
Rich’s “Redpants” 2007 V8 Vantage
It’s odd trying to describe my own car without sounding like I’m tooting my horn, but I really do think that my 2007 V8 Vantage is one of the most thoroughly modified V8 Vantages on the planet that still retains a “factory” body. It’s something of a Frankenstein’s car, using parts from a variety of Astons as well as a ton of aftermarket stuff. I originally set out to make it a lightweight and track-focused car, but decided to fold in the plans for my [former] red 2007 V8 Vantage when I sold that car… including supercharging it. More on that later.
This car is an ongoing project and as much as has already been done, I’ve still got some huge plans in store for it. This Build page covers the modifications I’ve done to my car. For a list of reliability-related issues, check out my Article about that topic. Although it might look like I’m showing a few different cars in the pictures on this page, they’re all of the same car! It has steadily evolved over time, along with a few times where the changes had revamped its look entirely.
The information below is roughly organized into a few sections which, to me, represent phases, or stages, or whatever you want to call them, wherein I made some signification changes that altered it in a substantial way. It’s roughly chronological but not exactly, especially within each section. I’ve also covered a lot of this in videos over the years, so you can get more information about my car on my YouTube channel.
Written by Richard Seidlitz
Jump to Section
The Basics
The Basics
2007 Aston Martin V8 Vantage
4.3L V8 engine
6-speed manual transmission
Mercury Silver paint
Phantom Grey leather with silver stitching
Over 97,000 miles (156k+ kms) and counting!
Current Modifications
BHP-built N24 engine (1 of 15)
Ported and Cerakote ceramic coated throttle body
Redpants oil catch can
Redpants air box deletes
Redpants intake filters
Redpants lightweight lug nuts
Powerflex control arm and sway bar bushings
BC Racing coilovers w/ Swift springs
BC Forged KL11 19” Widepants fitment wheels
Micheiln Pilot Sport 4S tires (265/305)
Wilwood 2-piece brake rotors
Hawk HPS 5.0 front and rear brake pads
Porterfield R4-S handbrake pads
Motul RBF 660 brake fluid
Motul Gear 300 75w90 gear oil
Motul X-Power 8100 10w60 engine oil
GMR carbon fiber slam panel
VelocityAP Engine tune
VelocityAP twin-plate clutch and lightweight flywheel
VelocityAP equal-length headers, Cerakote ceramic coated
VelocityAP high-flow cats
VelocityAP Touring muffler
Custom door sill and slam panel plaques
ECPS carbon fiber door sill scuff plates
ECPS carbon fiber door bars
ECPS carbon fiber gear shifter trim
ECPS V-weave carbon fiber front valance
ECPS V-weave carbon fiber ducktail spoiler
Orafol Oracal Luscious Lips red vinyl wrap
AeroCatch hood pins
Aston Martin Racing GT4 front bumper fascia
Aston Martin Racing GT4 lightweight front bumper beam and mesh grille with OMP tow strap
Aston Martin Racing GT4 carbon fiber side sills
Aston Martin carbon fiber fender vent strakes
Aston Martin V12 Vantage hood with carbon fiber and mesh inserts
Aston Martin black wings badges
Aston Martin black window surround trim
Aston Martin black Zircotech exhaust tips
Aston Martin clear tail lamps with black trim
Aston Martin ROW rear bumper
Aston Martin N420 carbon fiber rear diffuser
Aston Martin Alcantara shift knob
Aston Martin Alcantara steering wheel
Cobra Nogaro seats with OEM leather and OEM paint on shell
Aston Installations Infotainment Upgrade with HD Screen and front and rear cameras
LED map lights
Shorty antenna
Bosch Black-AGM battery
Hella Supertone horns
ETC card reader system
Previous Modifications
Aston Martin Power Pack
Redpants dry high-flow intake filters
Redpants lightweight battery kit
Braille B3121 AGM battery
RSC Tuning oiled intake filters
RSC Tuning high-flow cats (prototypes)
RSC Tuning muffler (prototype)
RSC Tuning brake ducts
RSC Tuning HD clutch disc
VCollection carbon fiber front valance (twice)
Porterfield R4-S front and rear brake pads
Porterfield R4 front and rear brake pads
Custom wheel spacers (used with OEM 7-spoke wheels)
H&R Sport lowering springs
BC Forged RT50 19” Redpants fitment wheels
BC Forged RZ05 19” Widepants fitment wheels
Hankook Ventus V12 Evo tires (235/275)
Michelin Pilot Super Sport tires (245/285)
ACR carbon fiber trunk lid spoiler
GMR supercharger kit
GMR carbon fiber supercharger cover
GMR high-flow cats
Aston Martin carbon fiber gearshift surround
Aston Installations screen mirroring system
The Big Picture
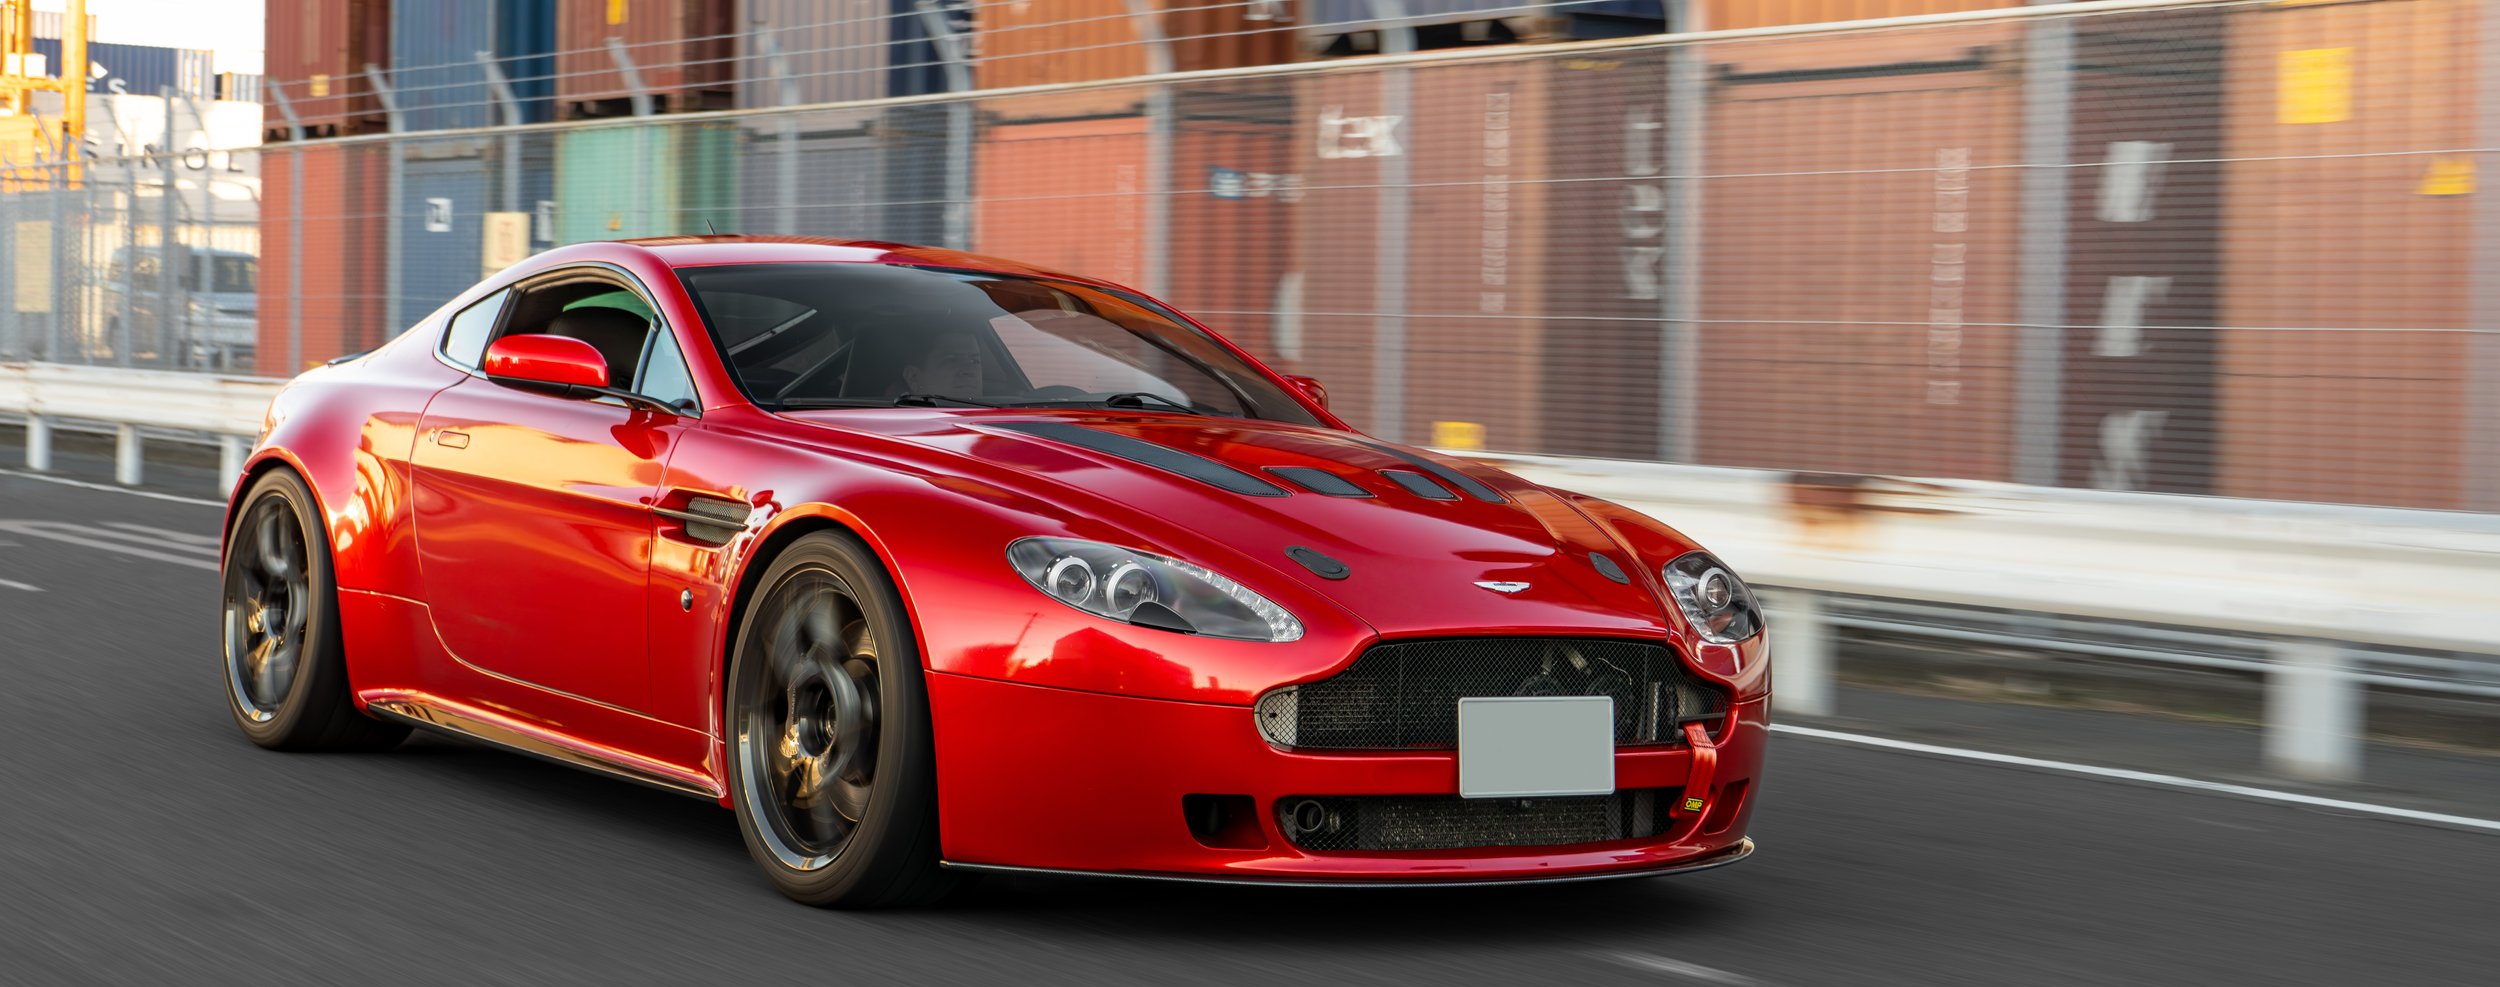
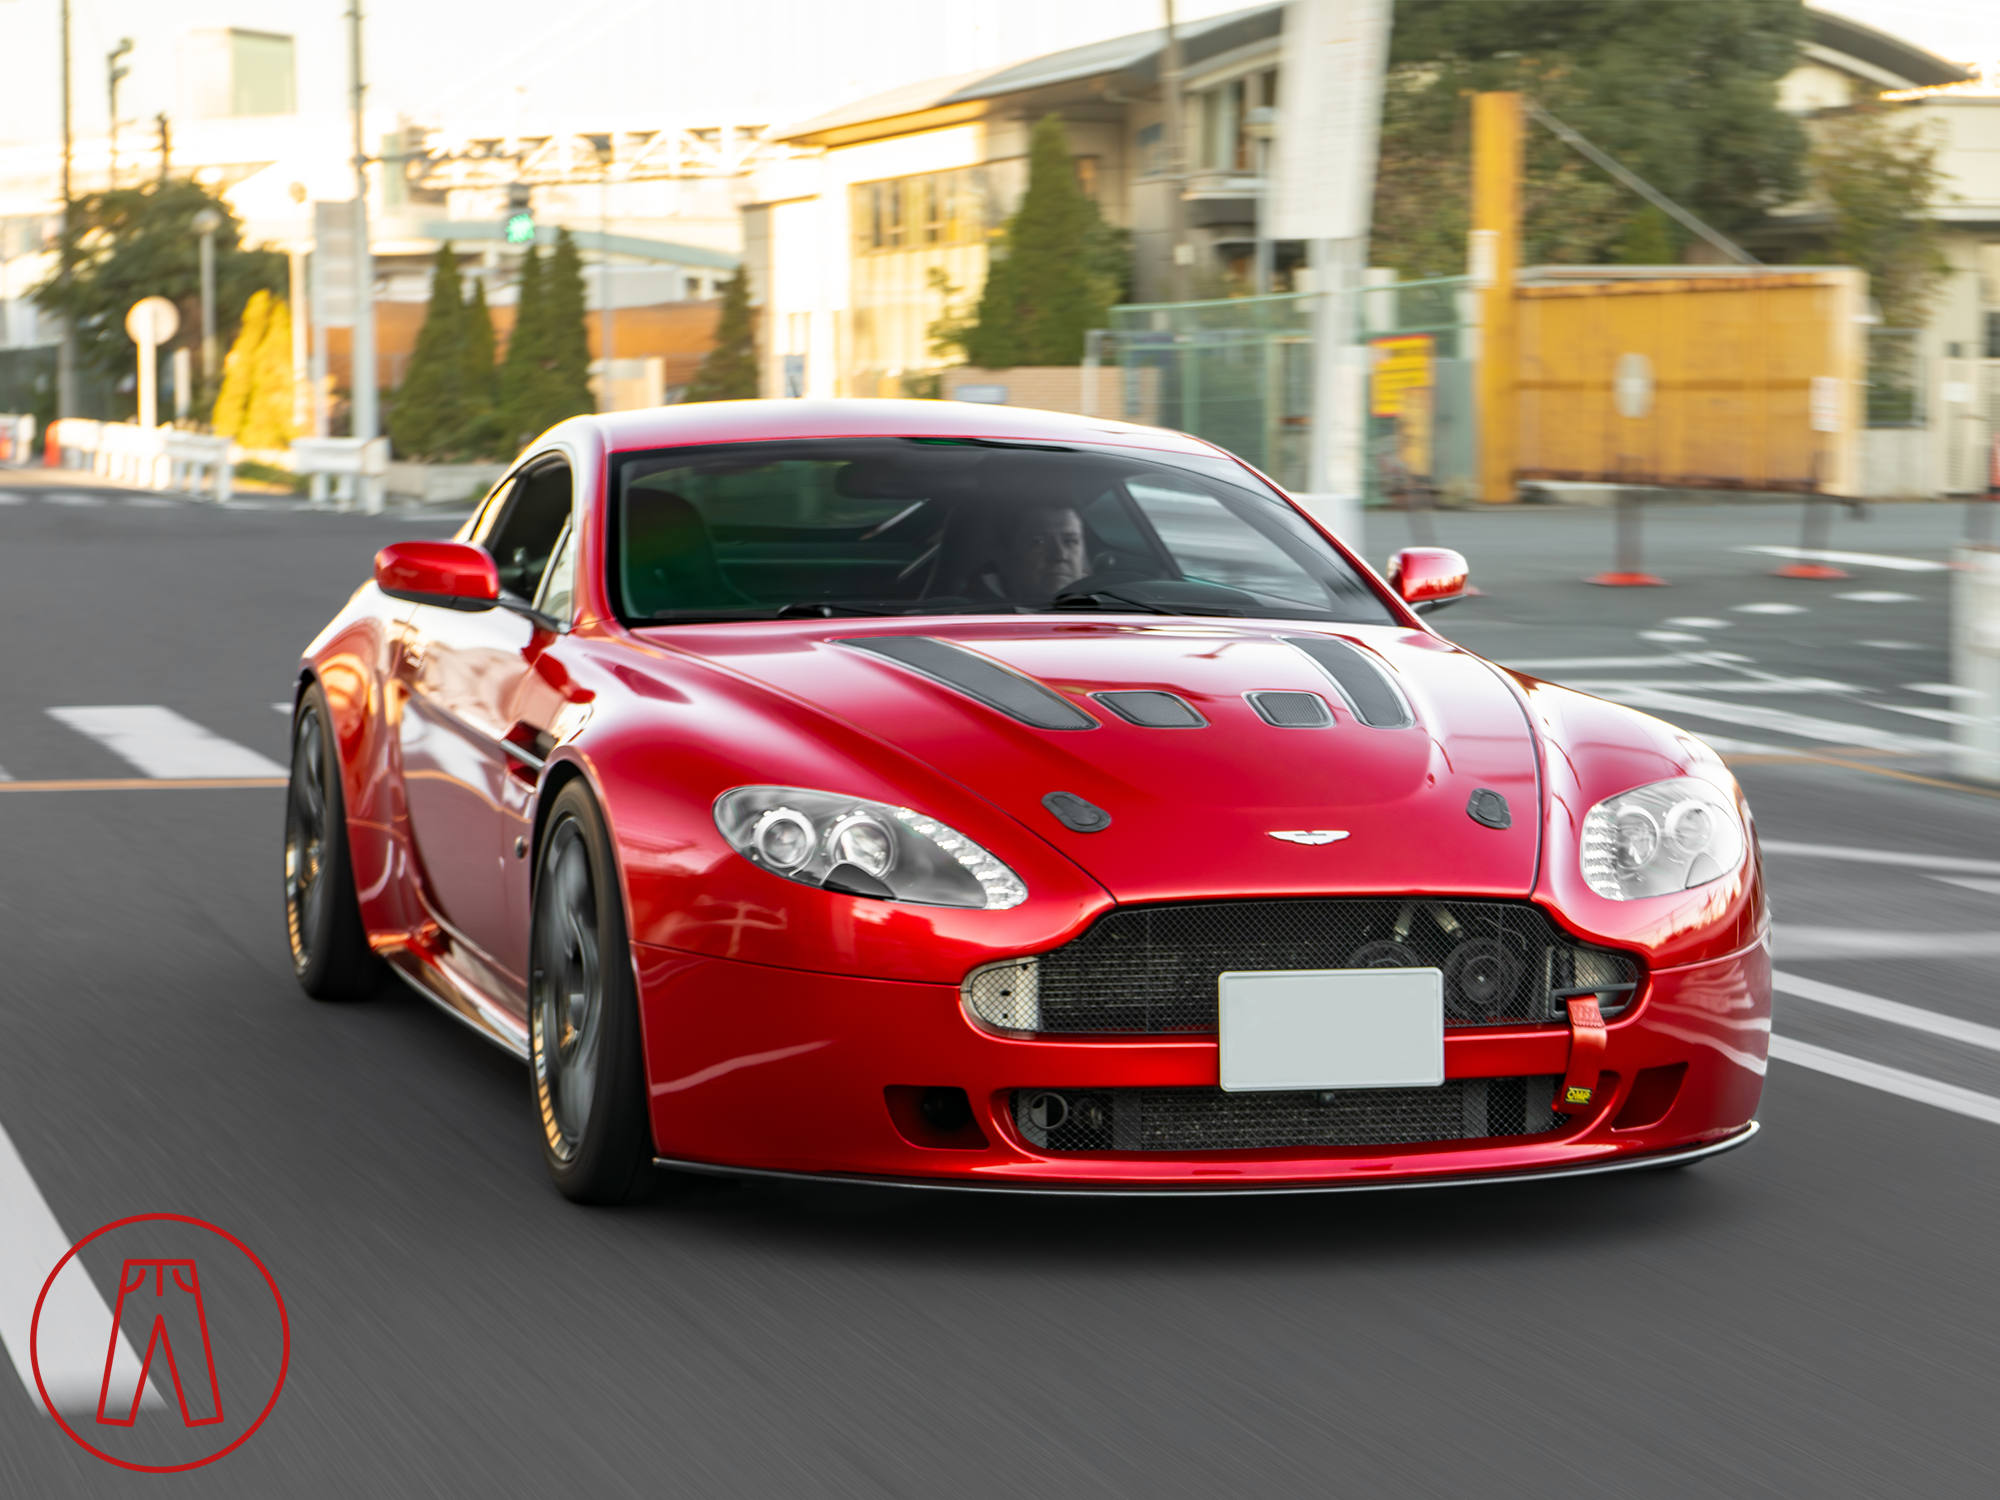
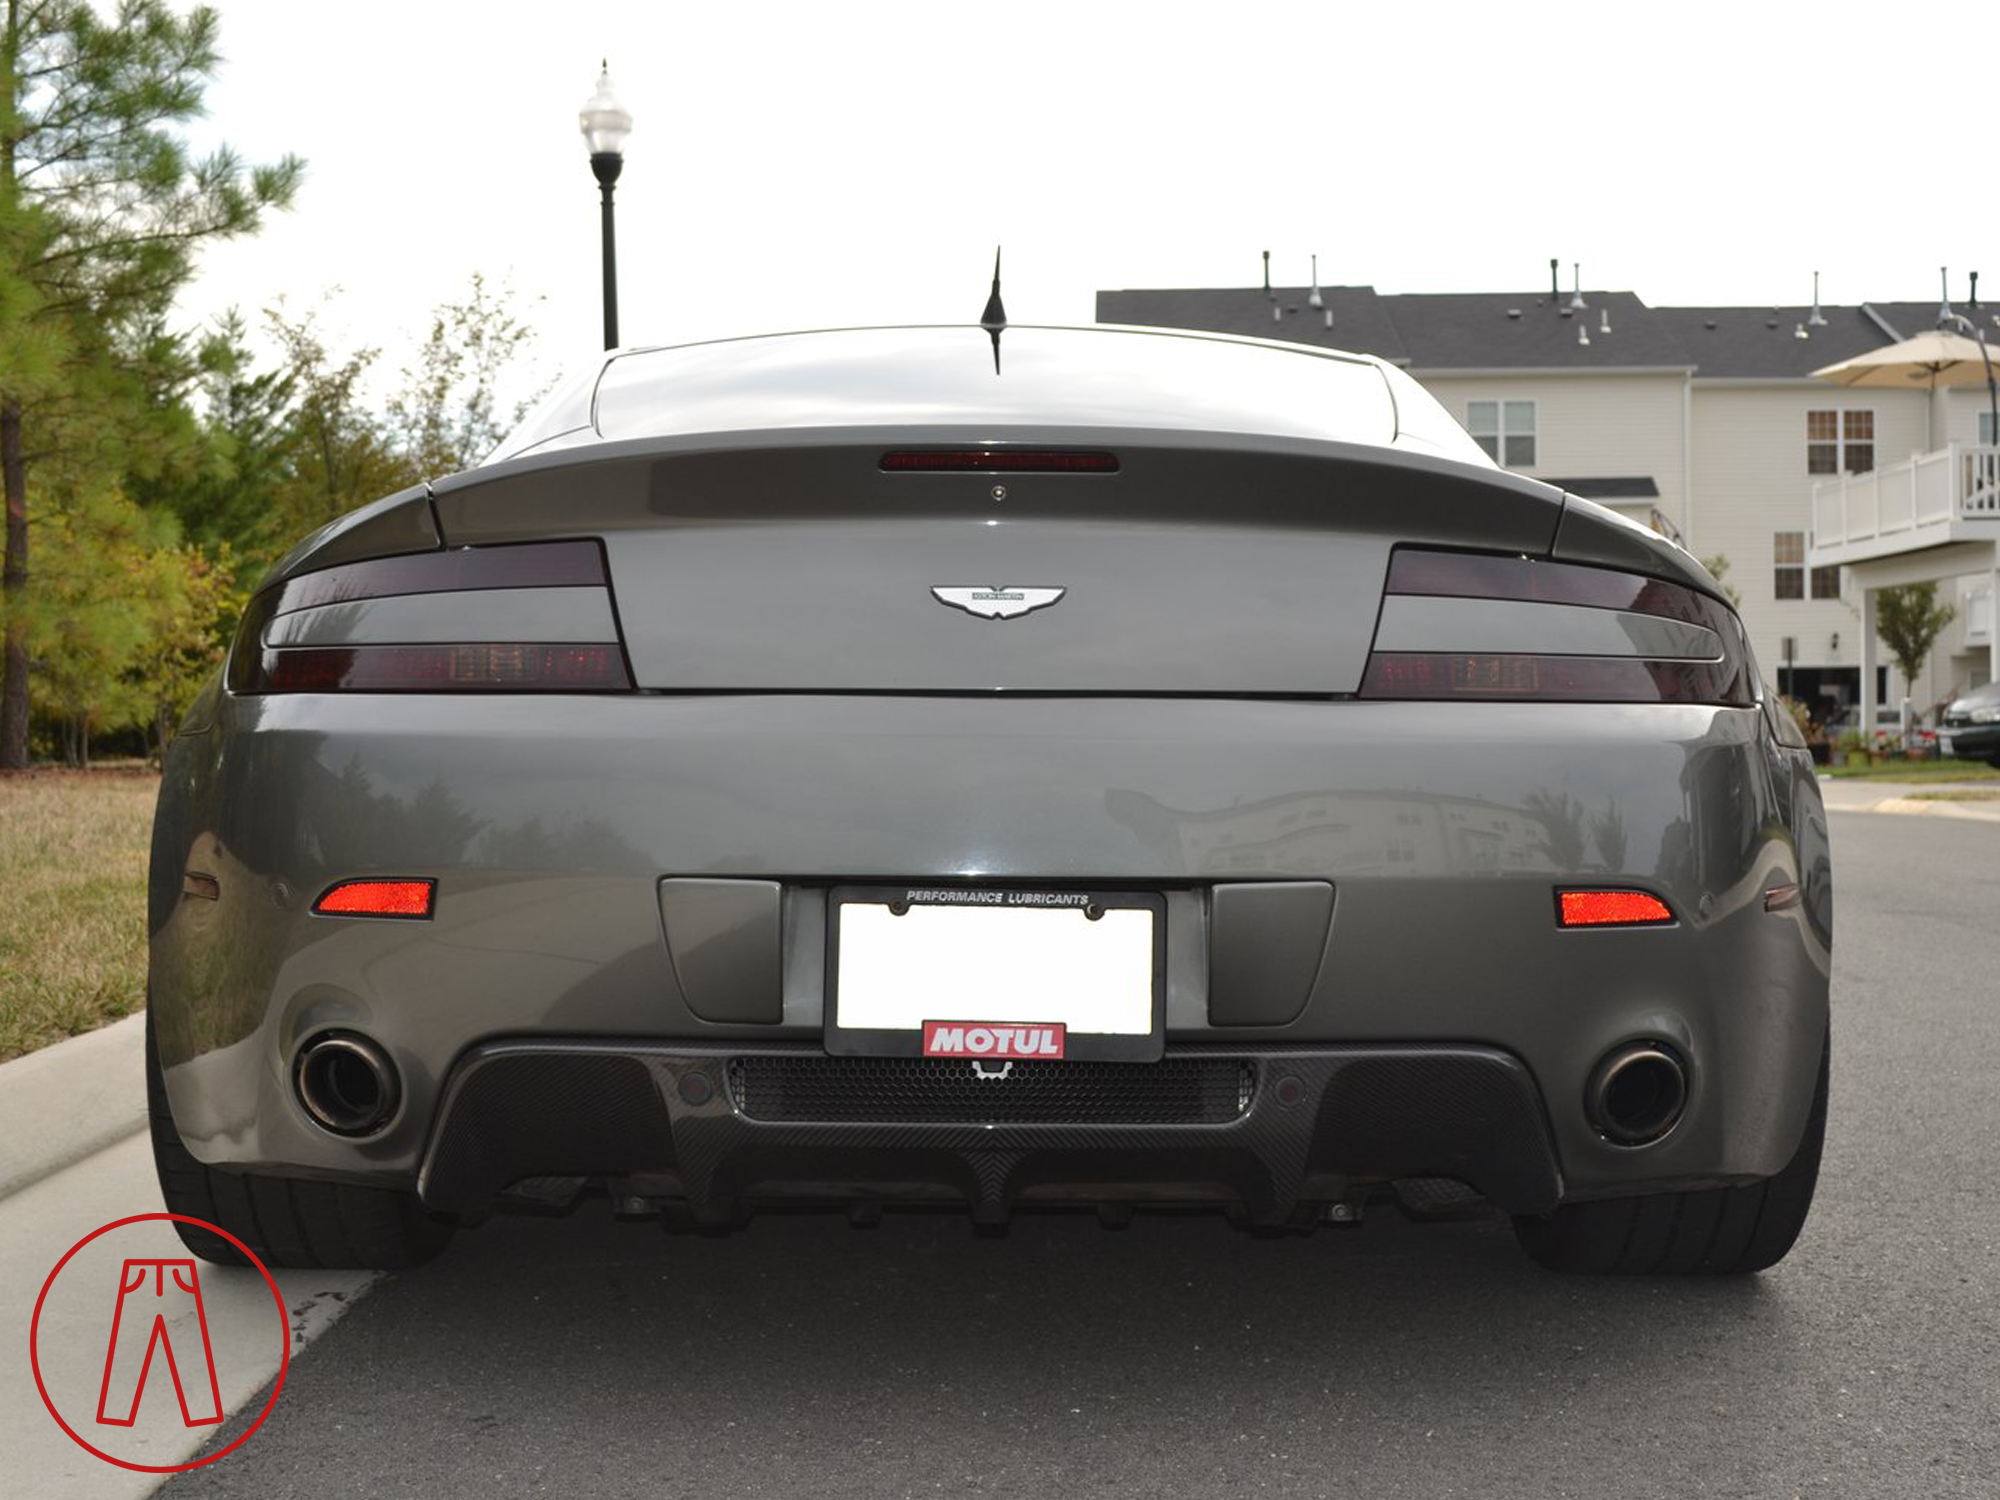
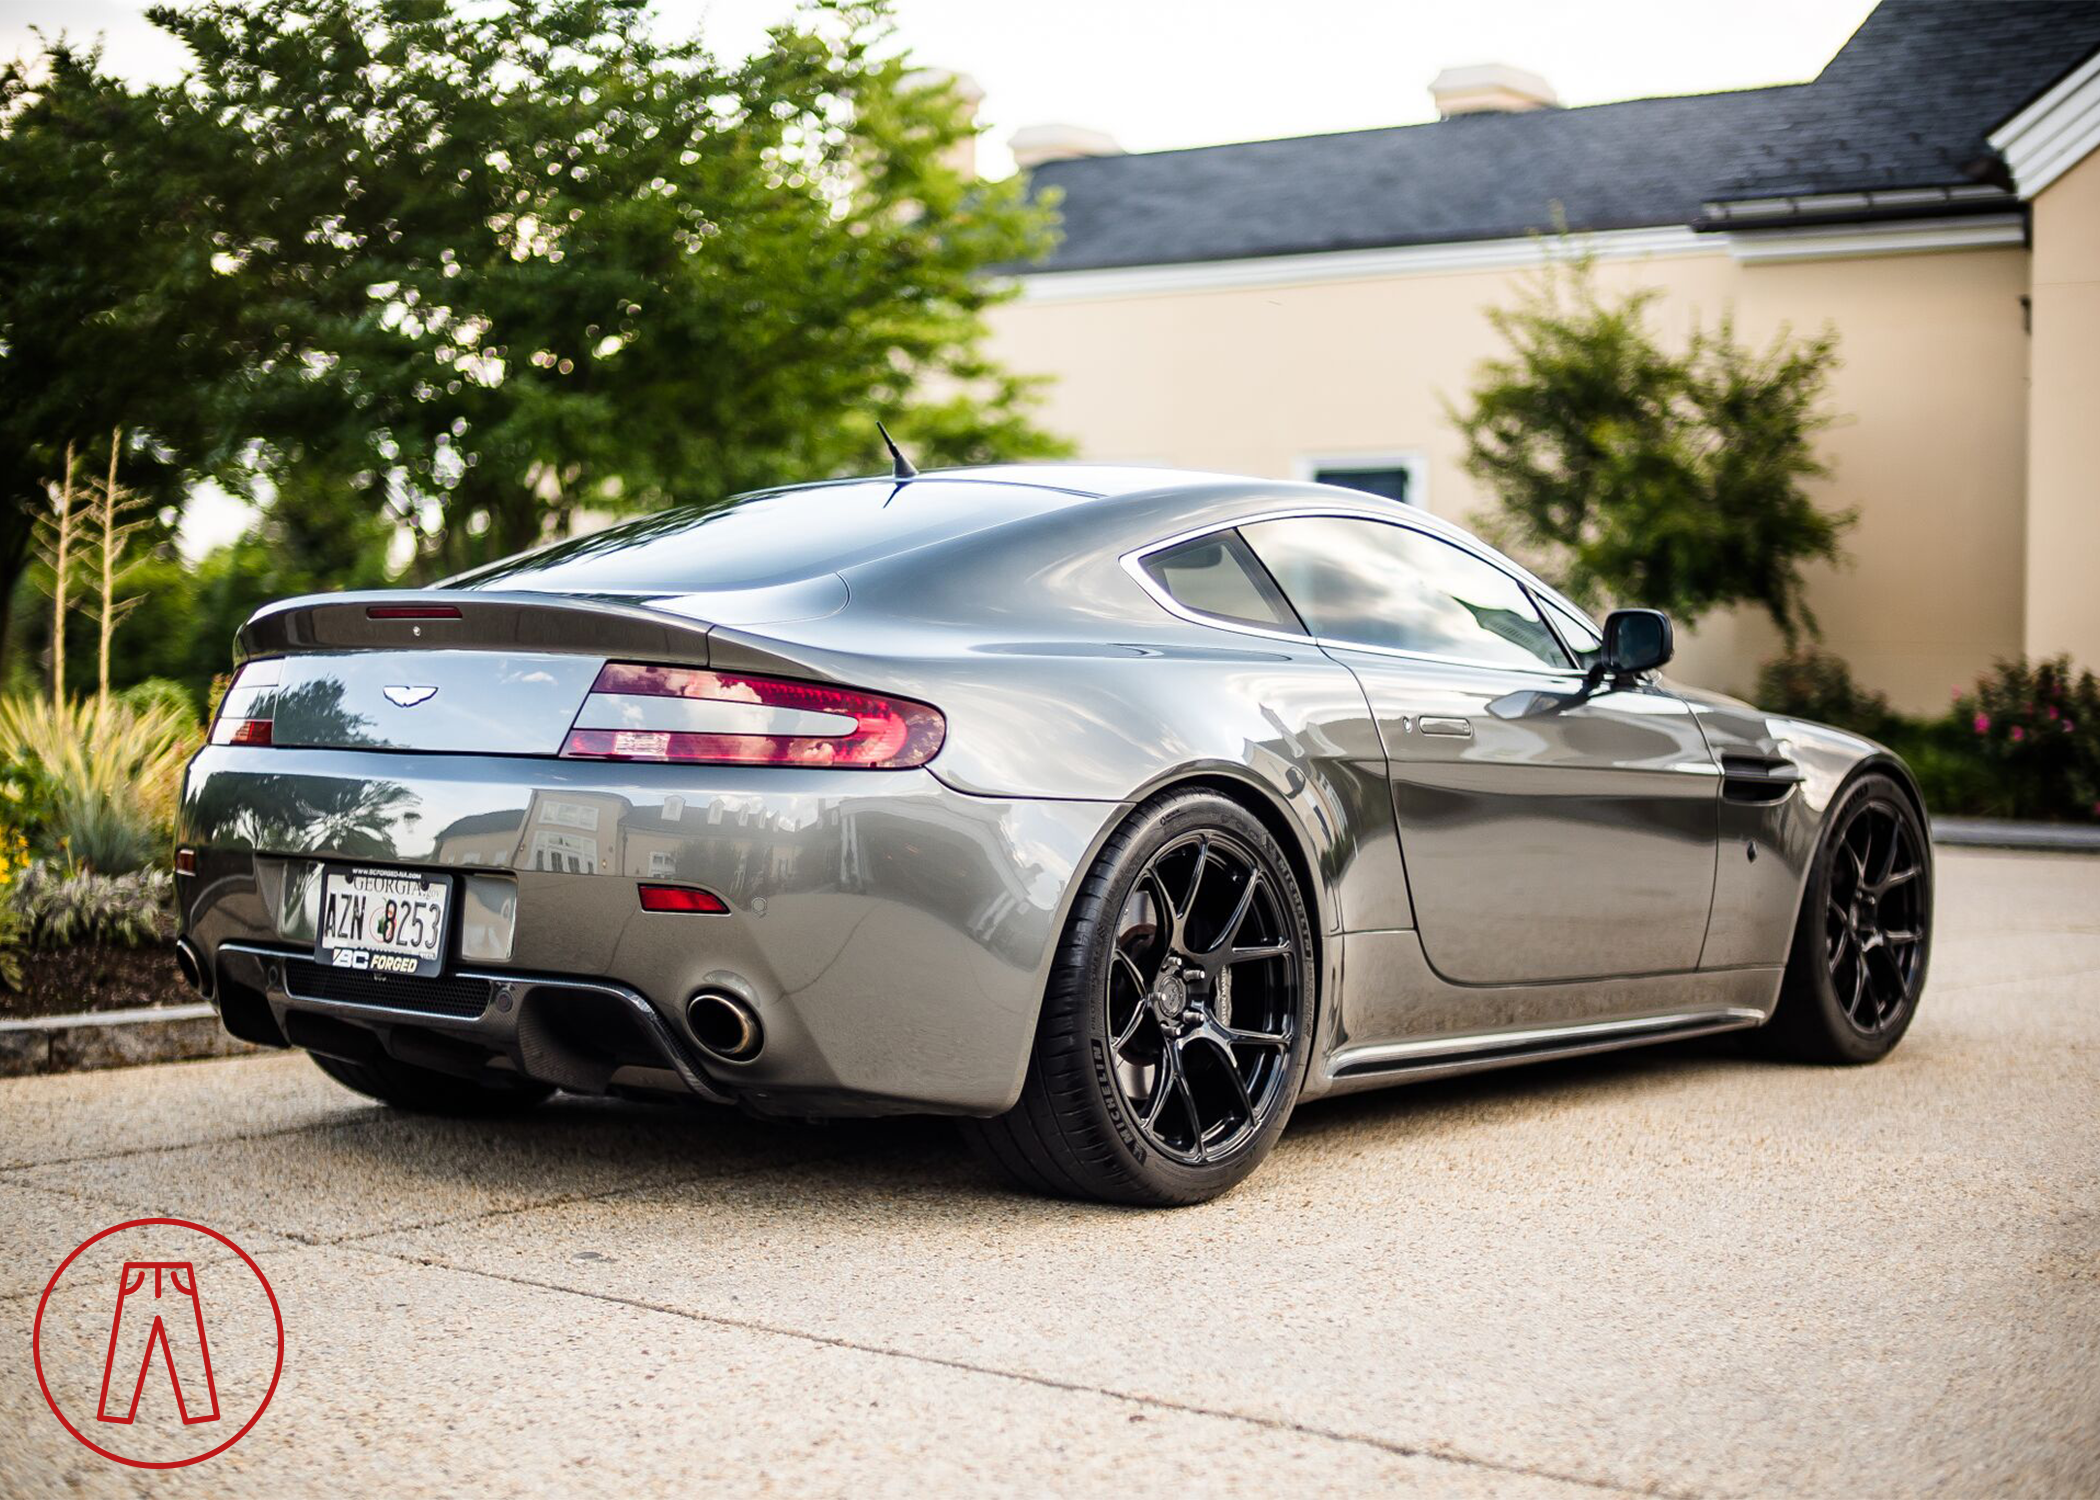
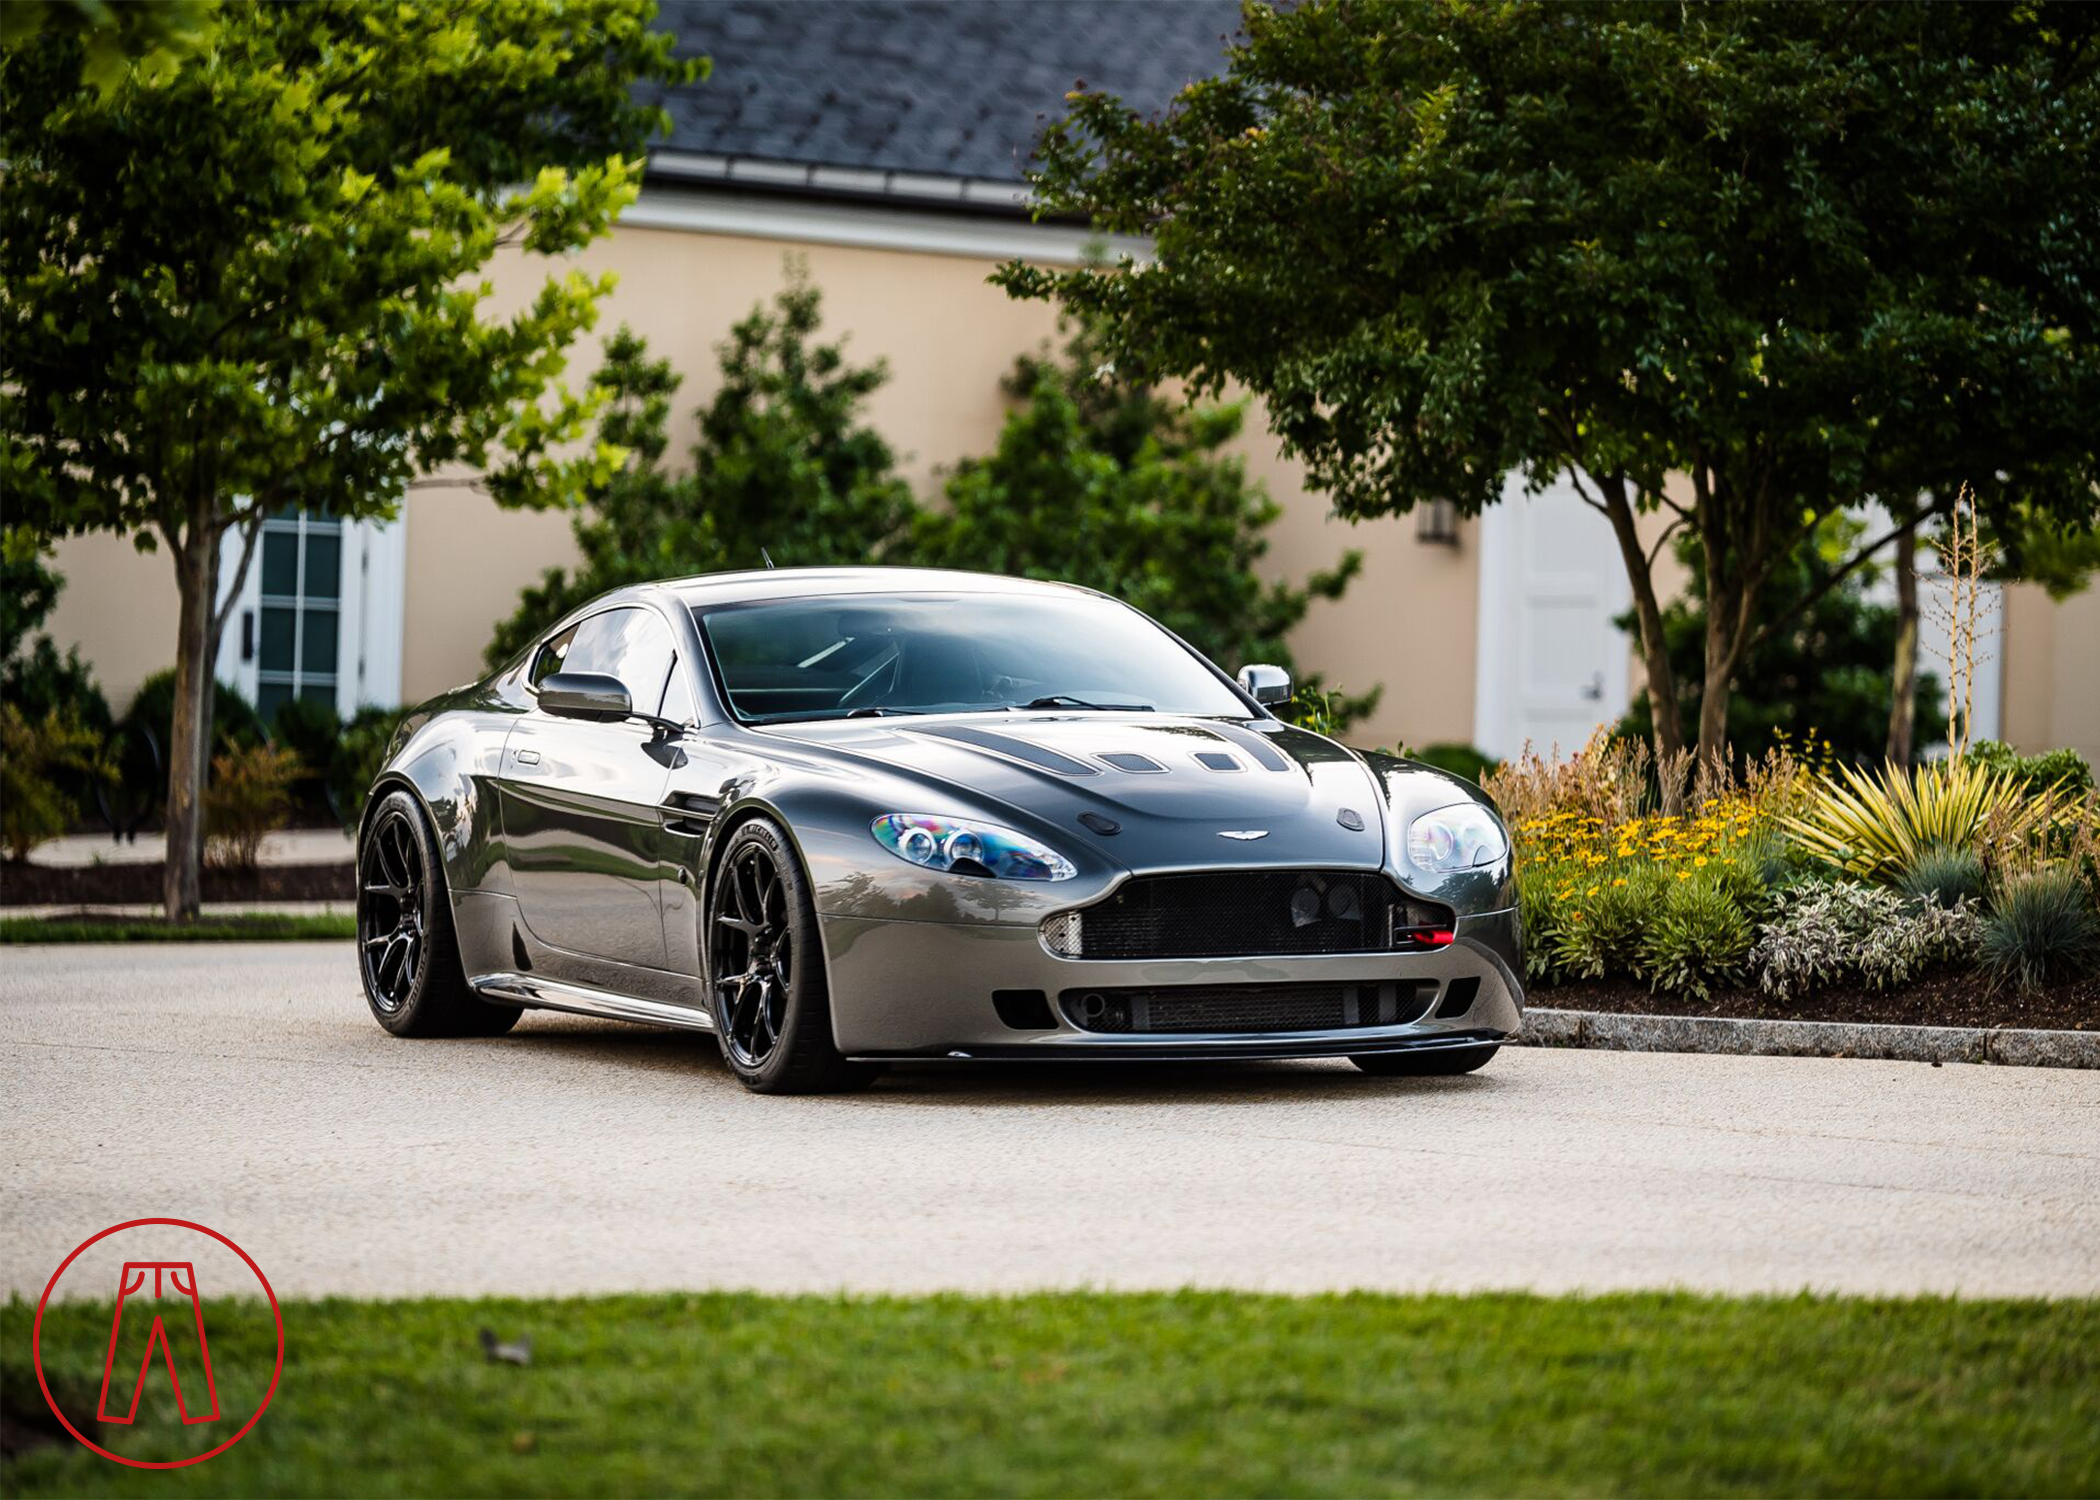
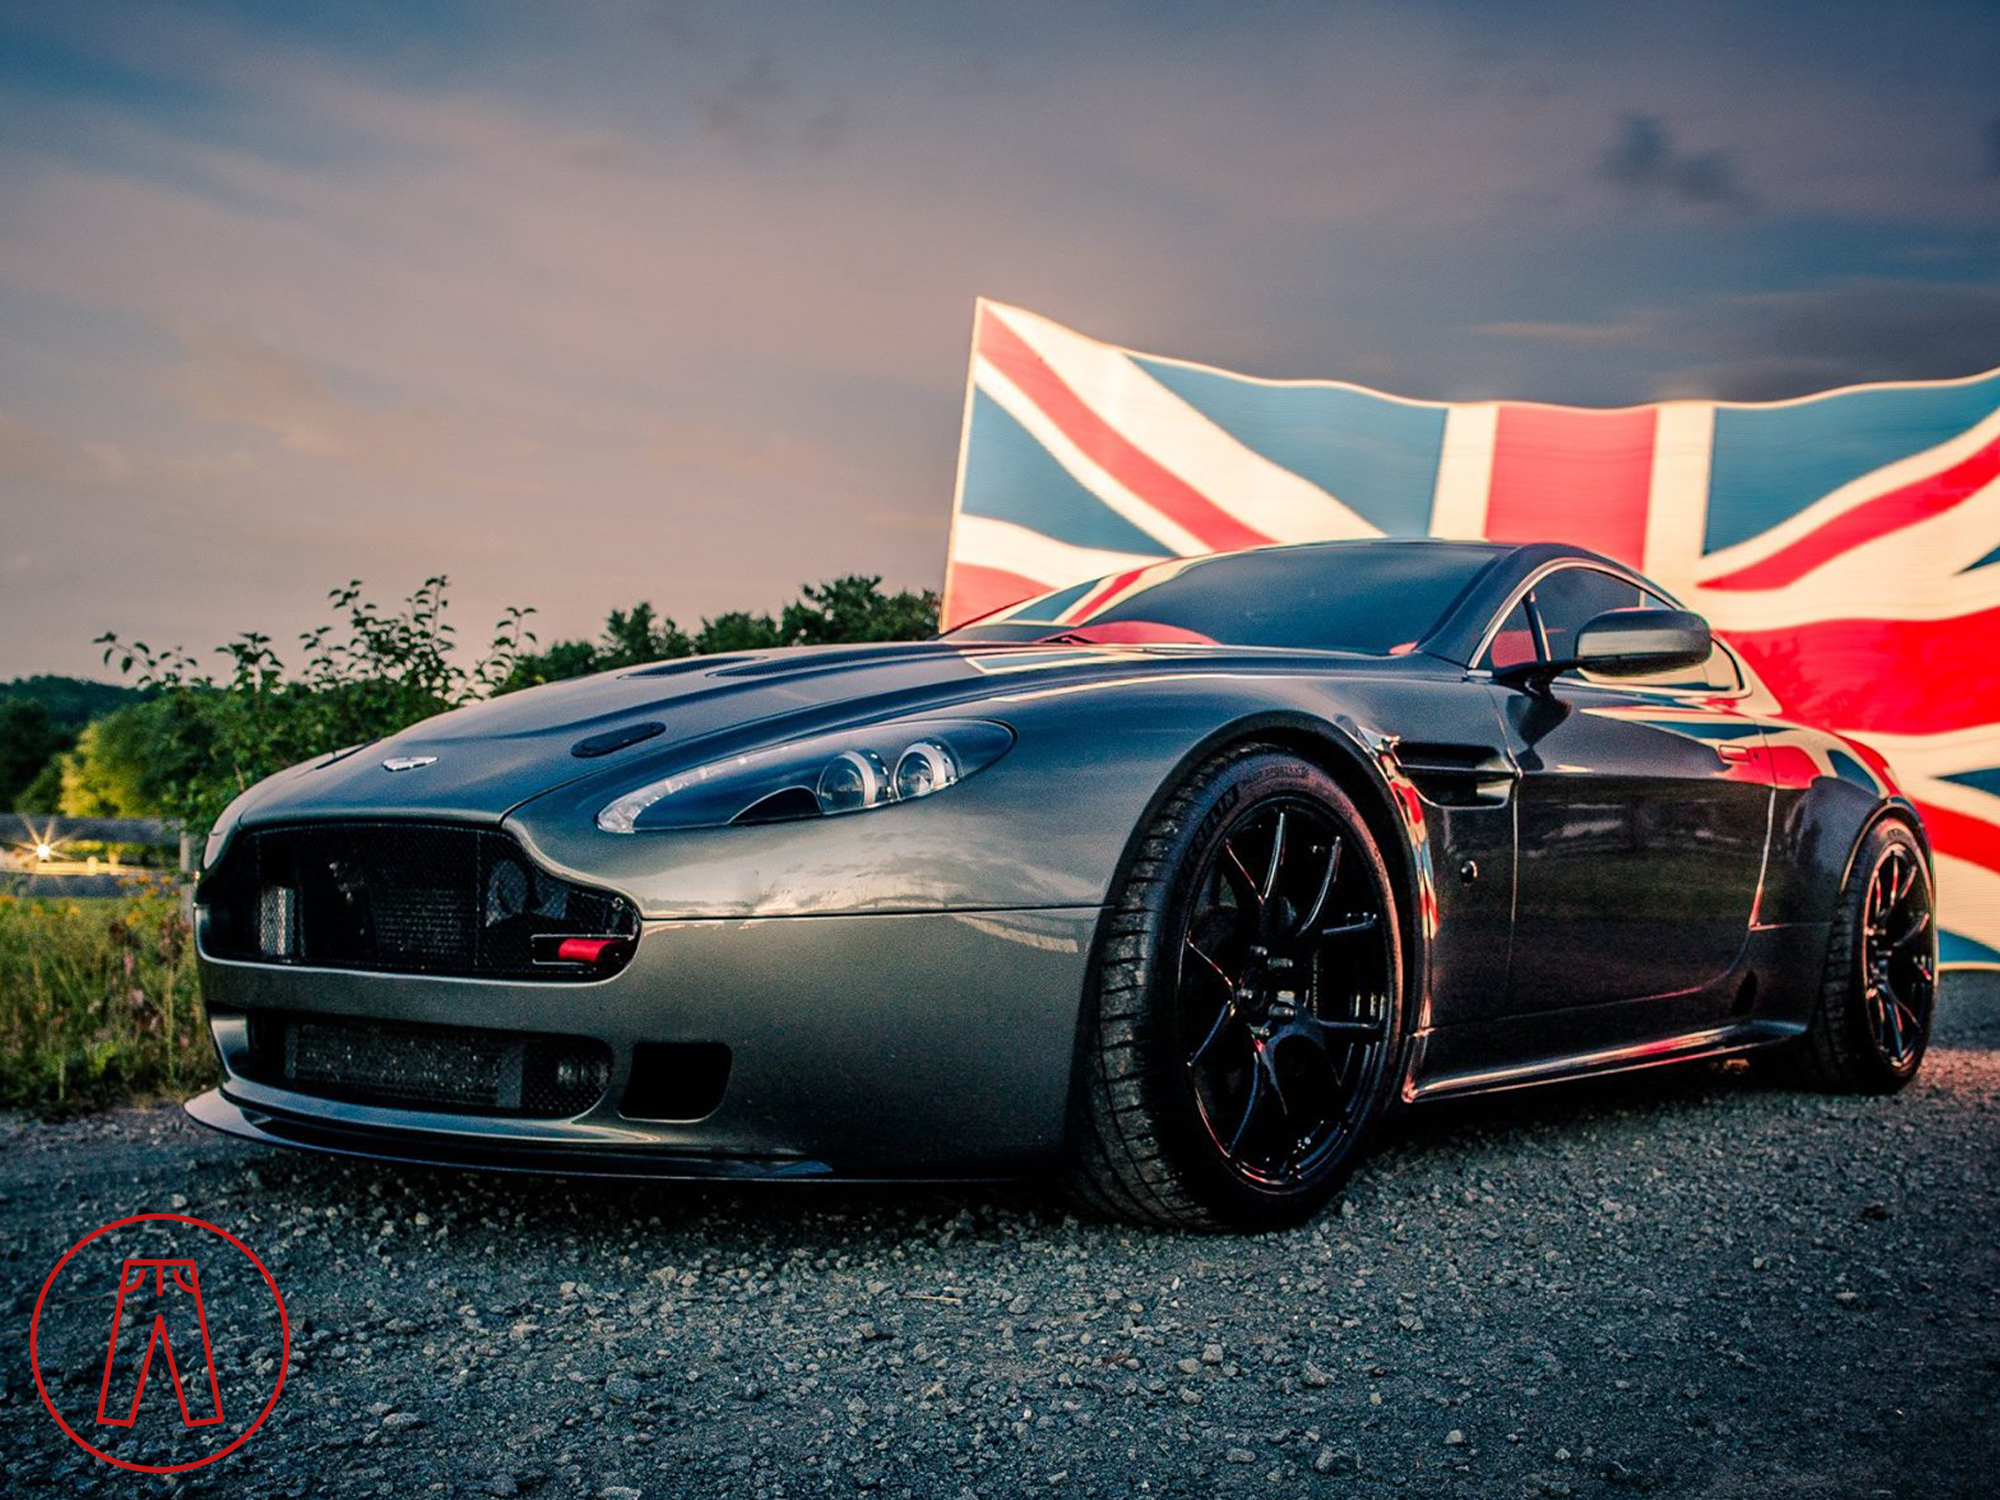
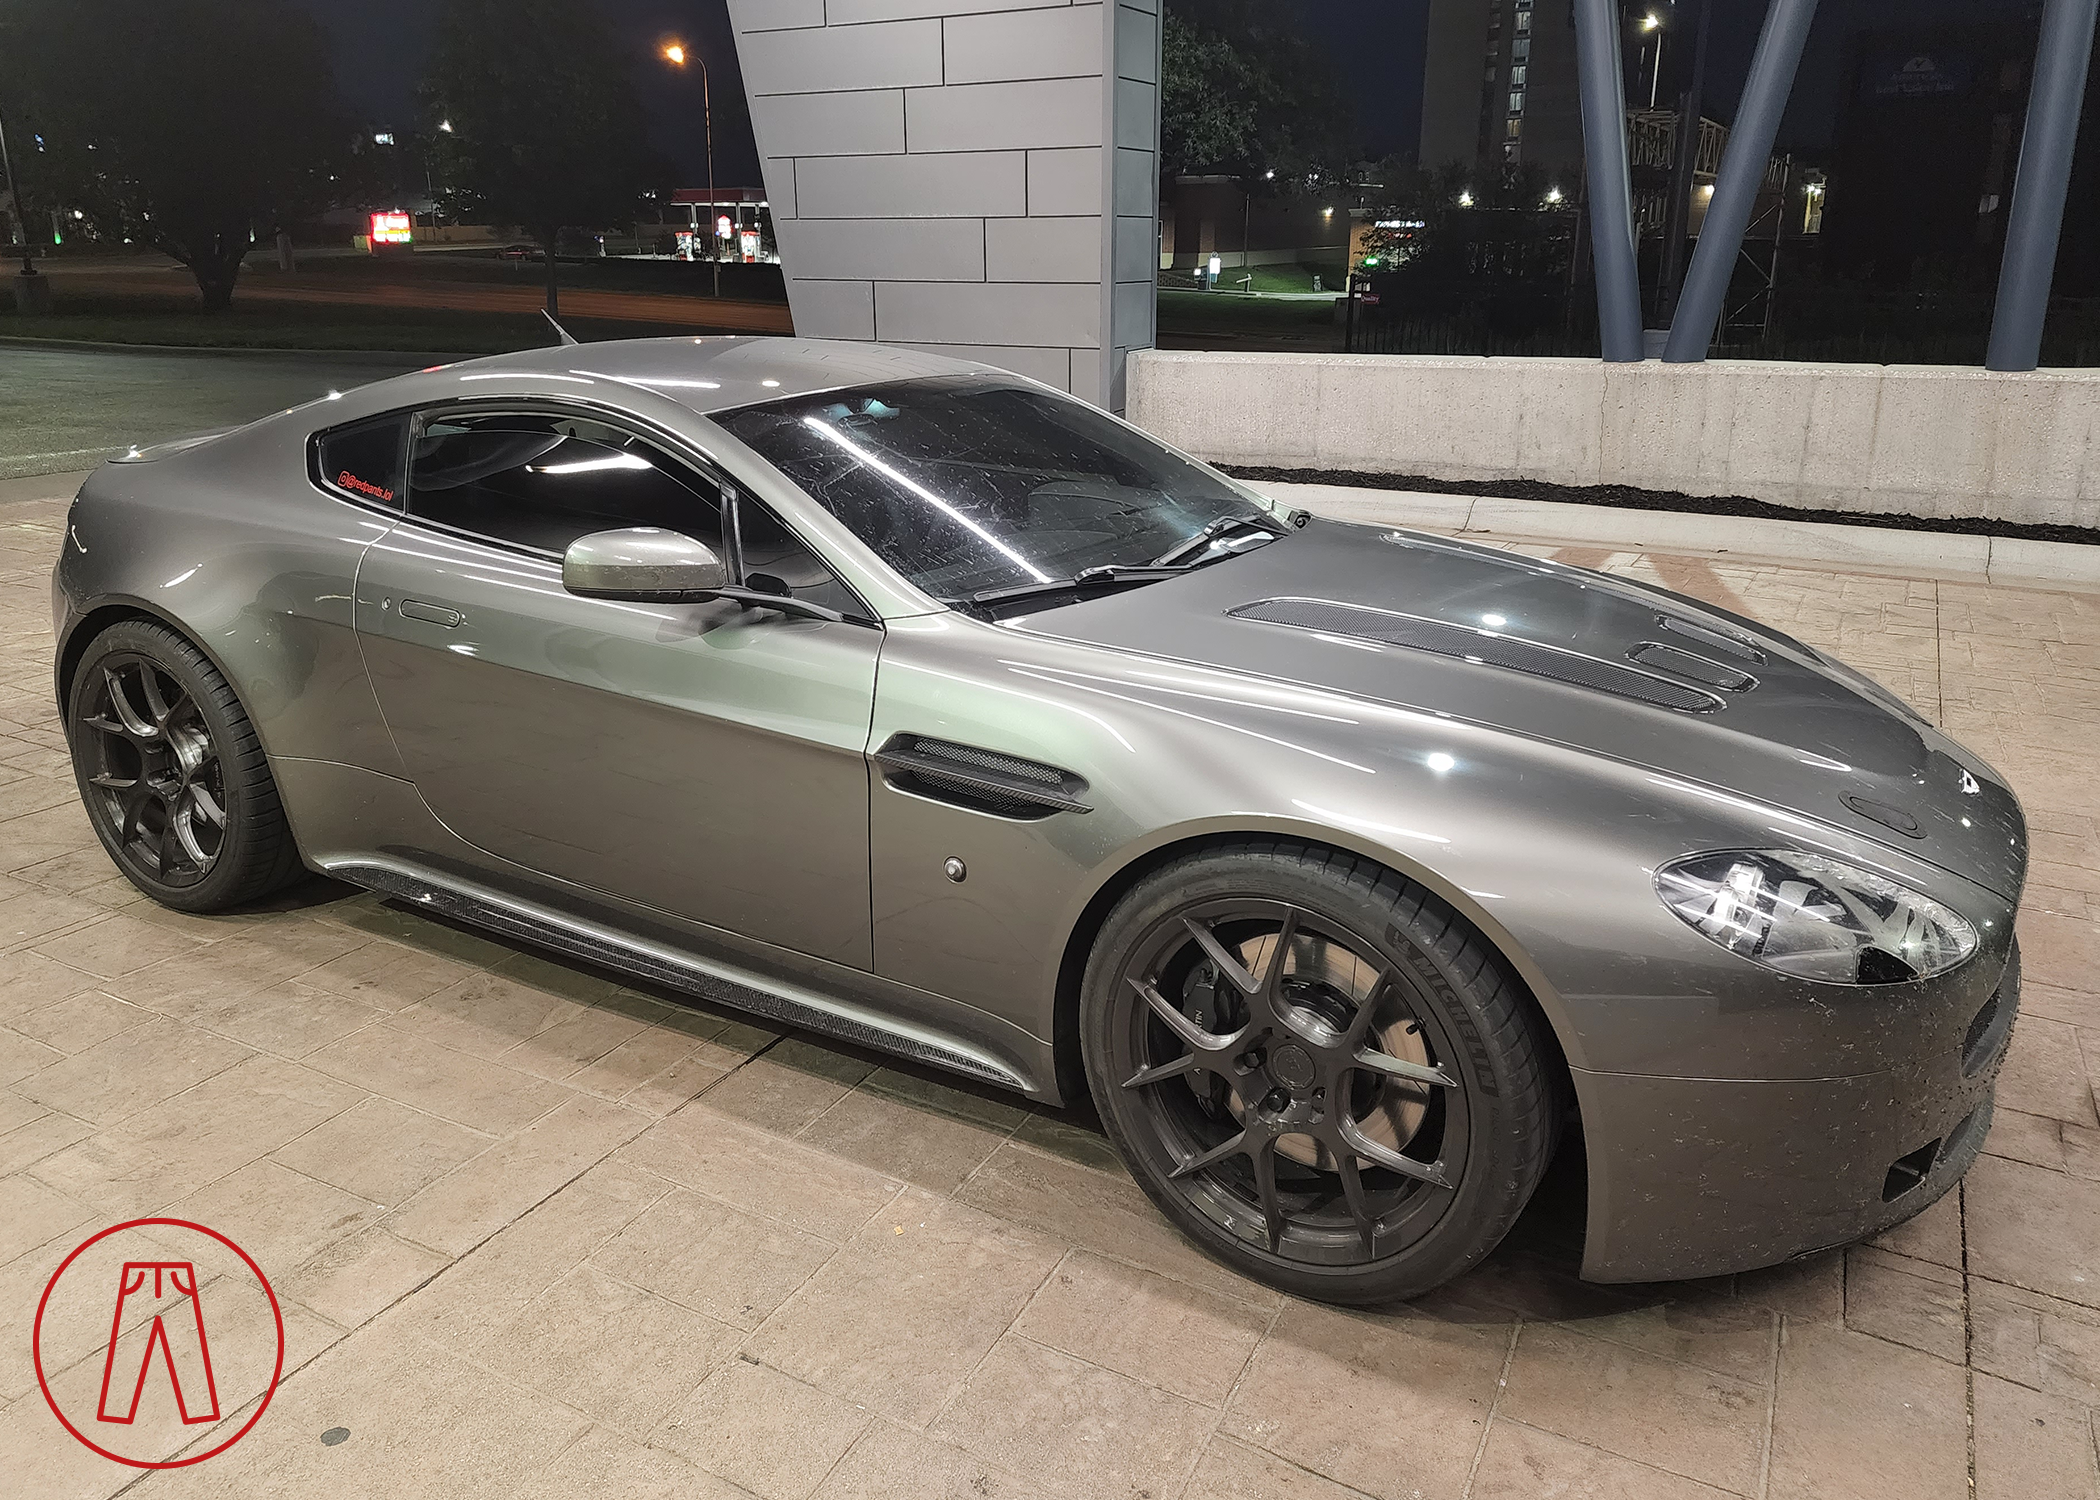
This car was my first foray into the world of Aston Martin ownership and I still have it to this day. It’s changed a lot over the years, starting off as a classy-yet-simple grey V8 Vantage and now far more aggressive and vividly red.
Here’s how it looks now.
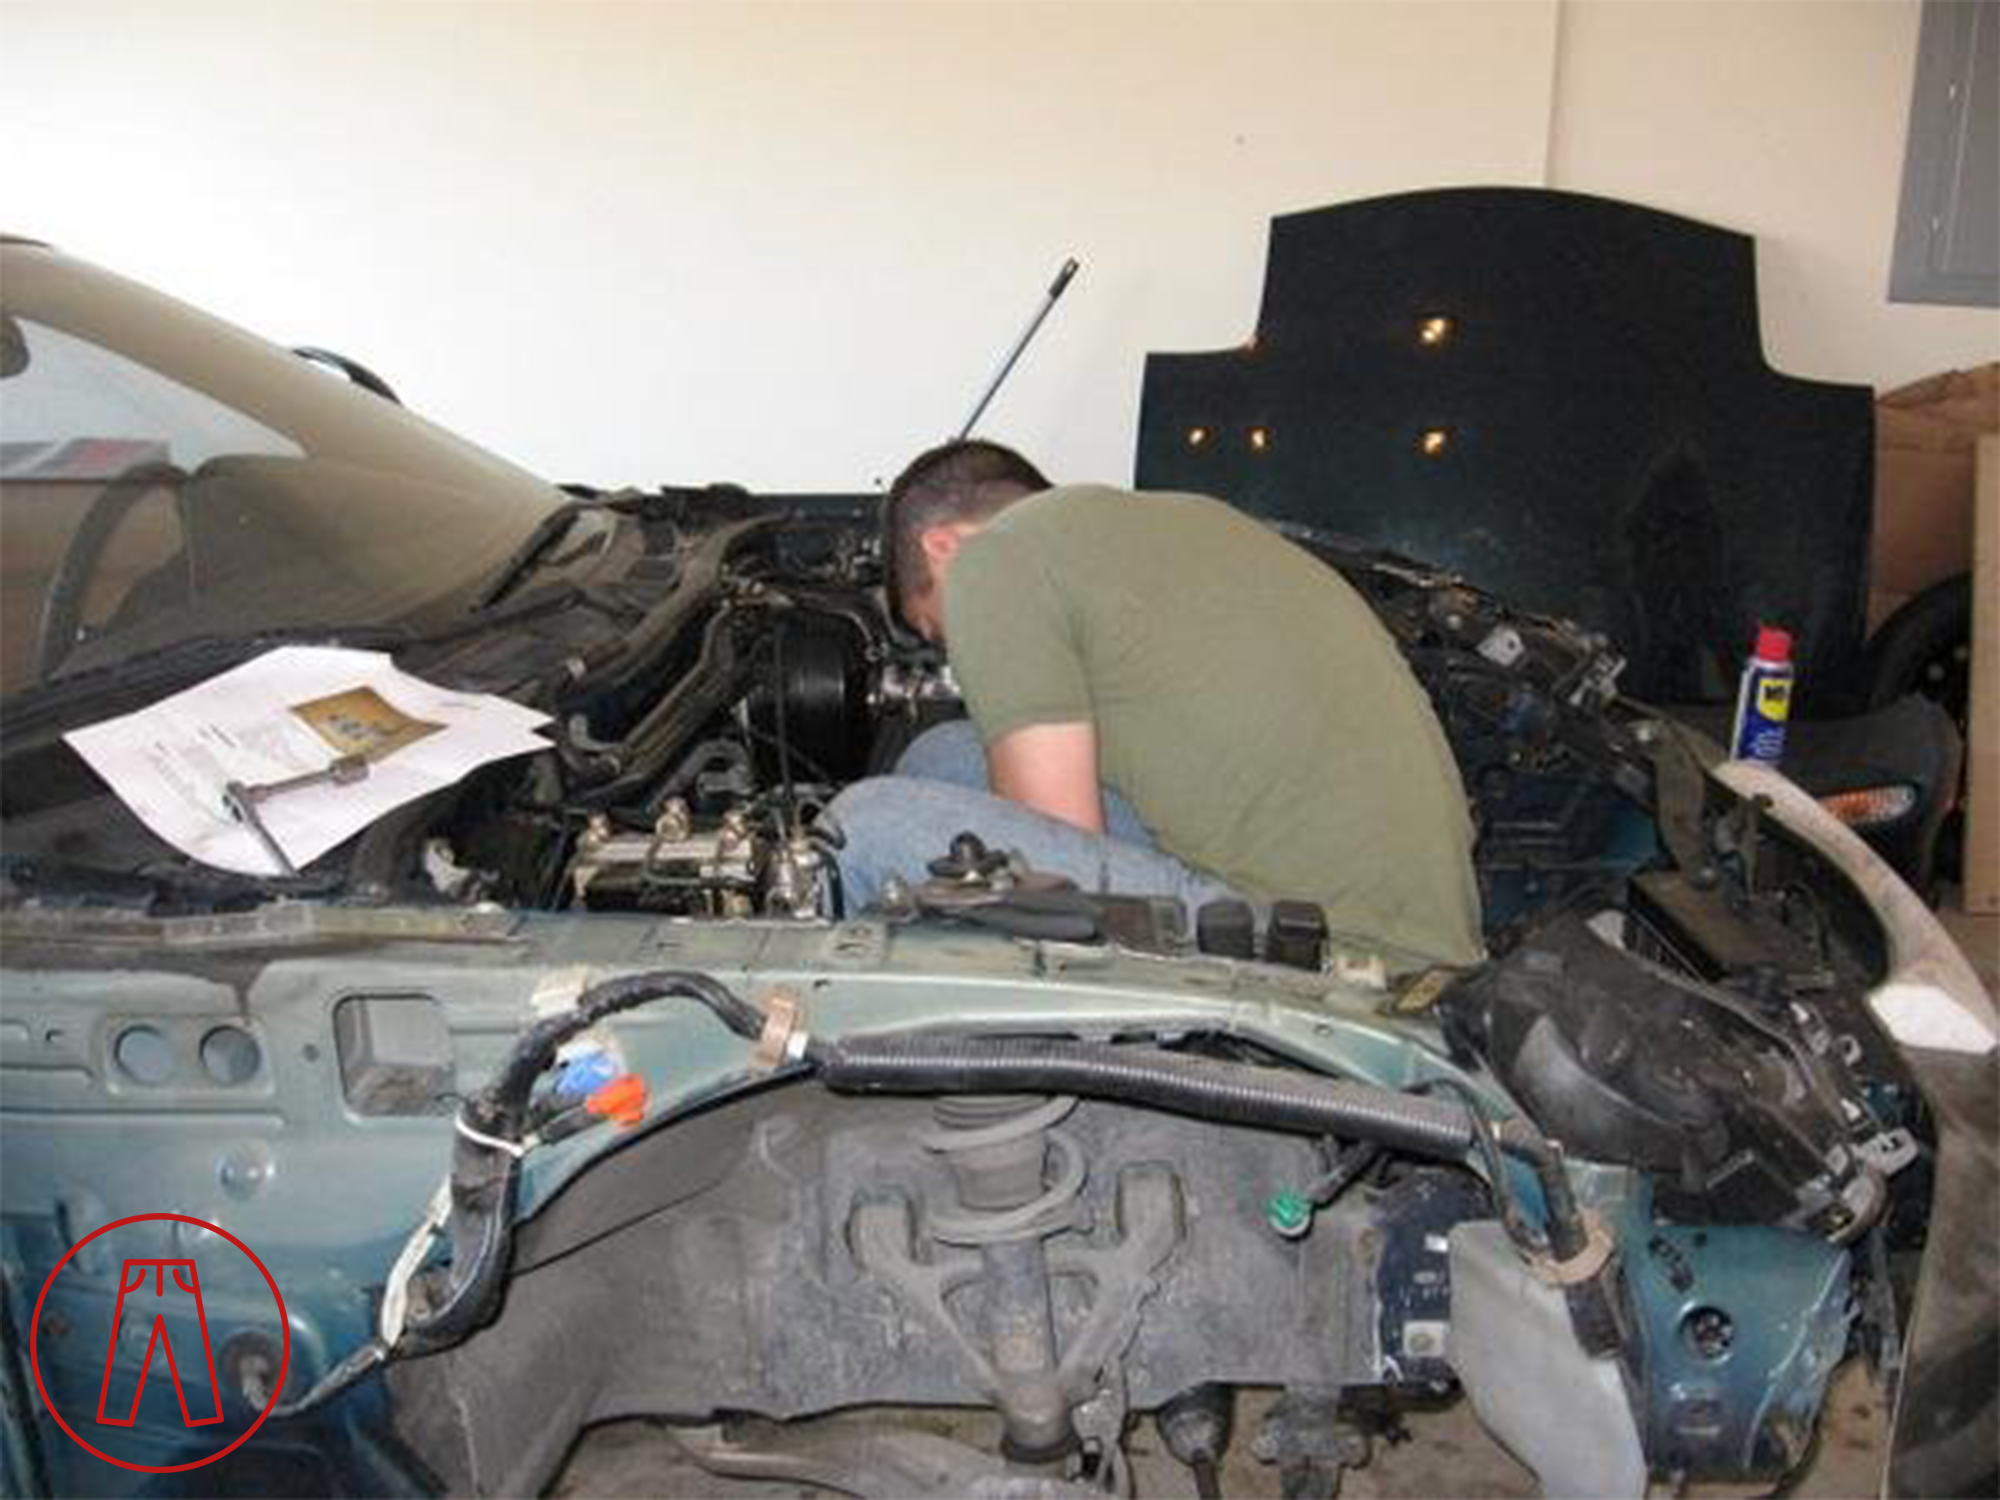
I didn’t have a build plan in mind when I first bought this car - quite the opposite, actually. Although it already had a few modifications when I bought it, I was originally planning to keep it as it was and take extremely good care of it. I told myself that I would only drive it on sunny Sundays and have it meticulously maintained by my most-local dealership (located a convenient two-hour drive away). But after owning the car for only five weeks, someone hit it in a parking lot and it was sent off for eight weeks of repairs.
Check out the work he did on my front end…
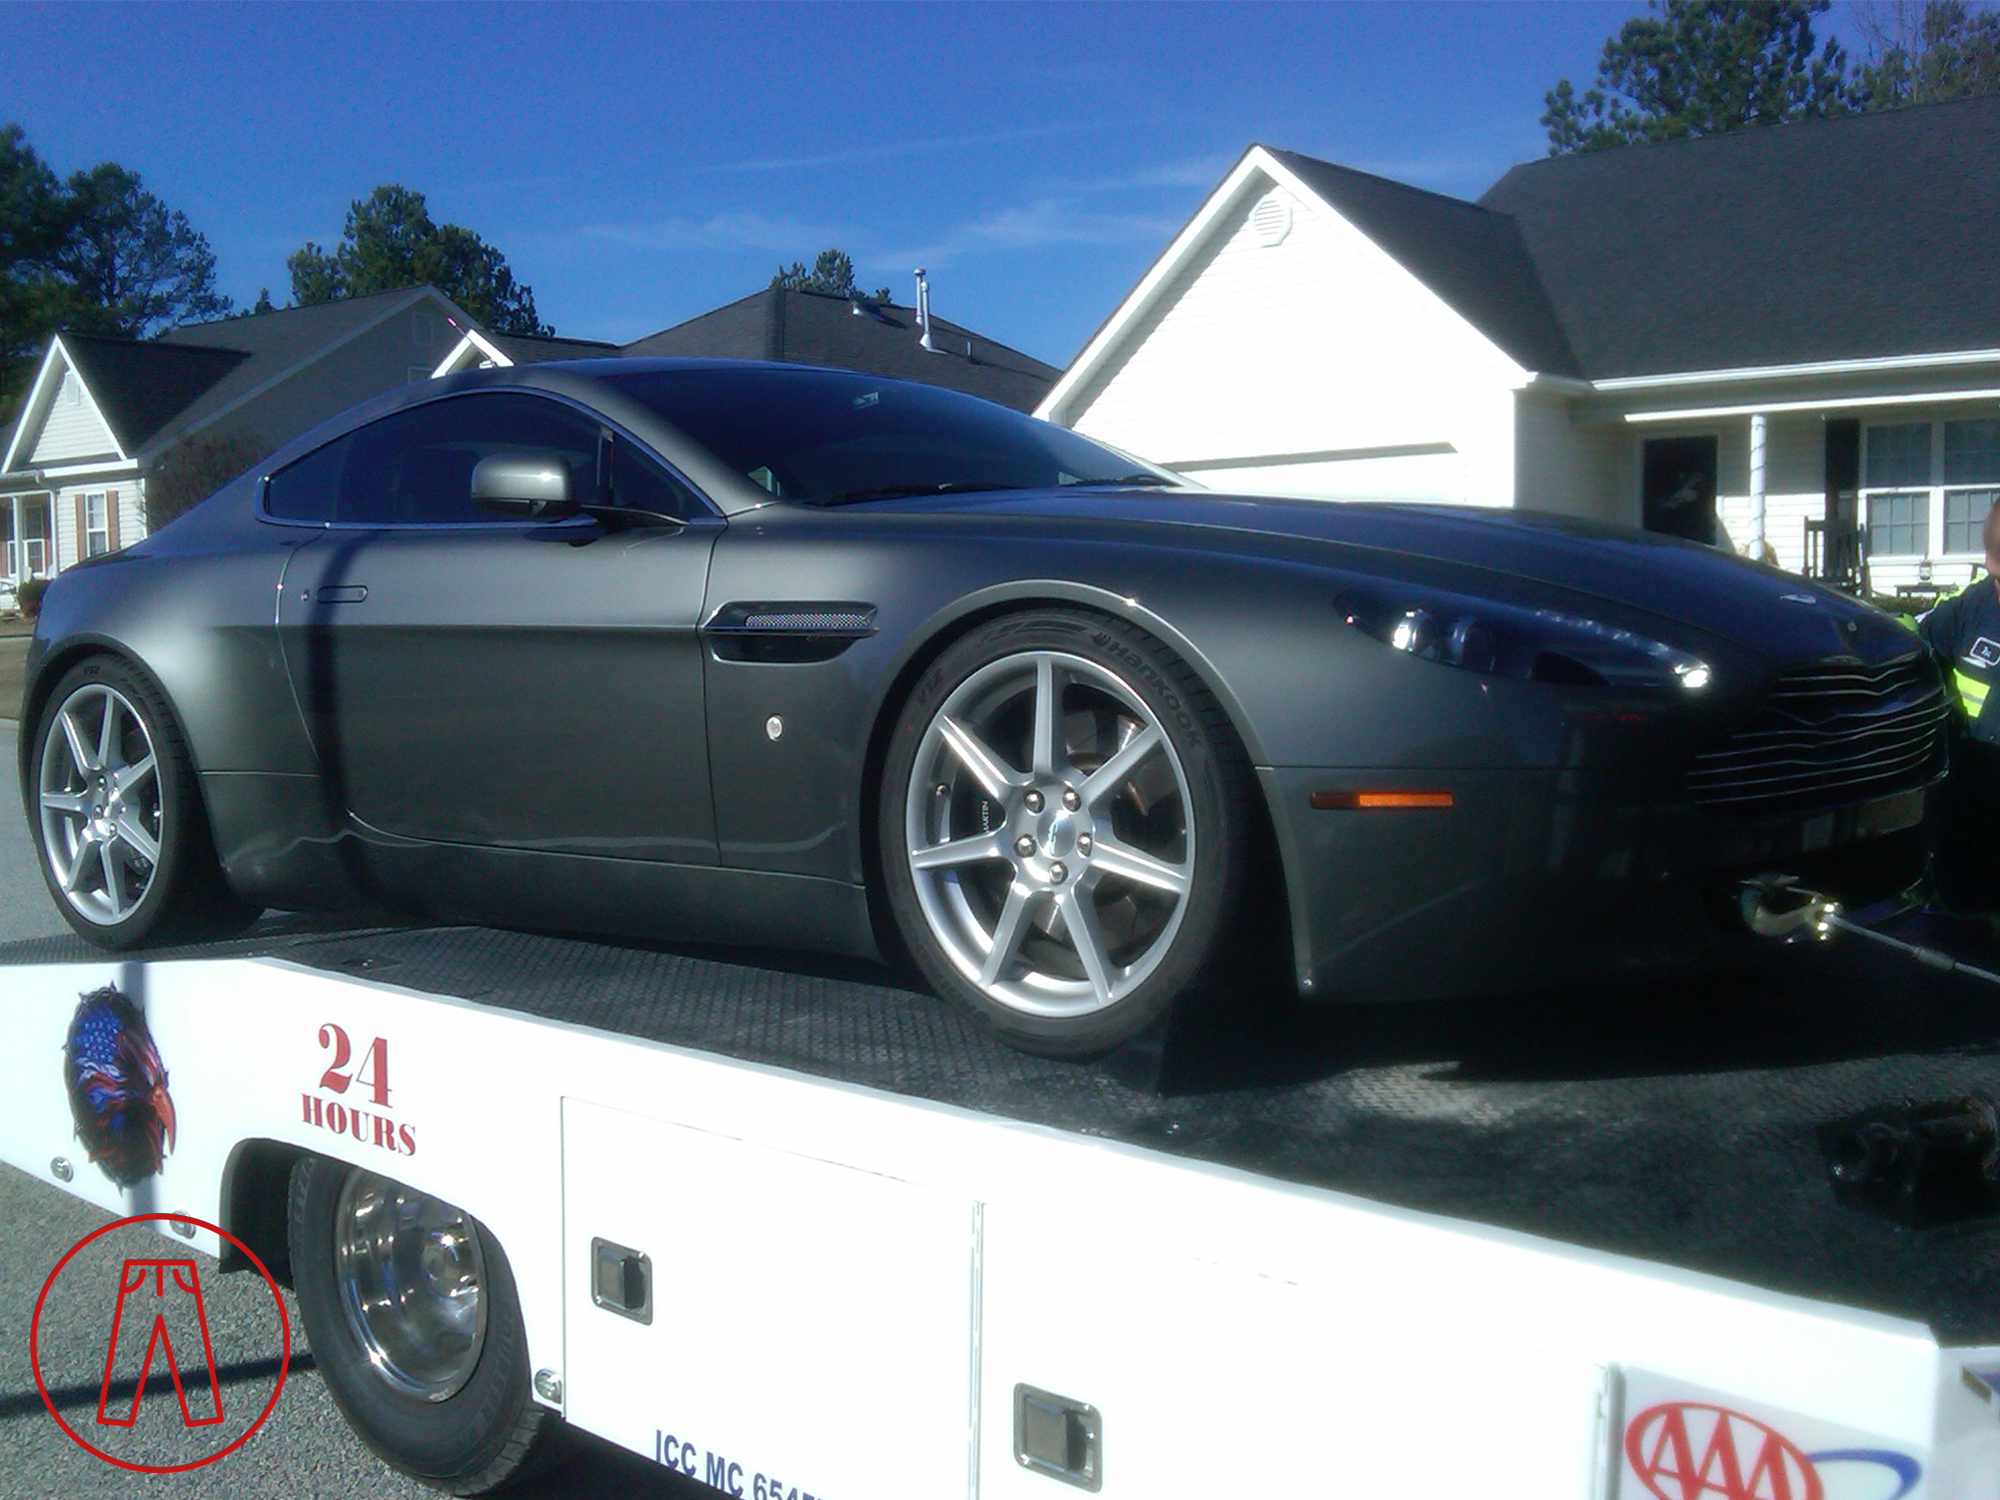
Don’t worry, there was just enough clearance under my car for this not-so-flatbed.
When I’d finally gotten it back, it had been in the body shop longer than in my garage since buying it. At that point, I could scrap the idea of keeping it pristine.
A few months later I was at my first-ever track day (aside from drag strips and autocross events I’d done in the thoughtfully-modified 2005 Subaru WRX STi that I also had at the time) and sure enough I was in my not-so-pristine V8 Vantage. Just to solidify the fact that it’d lost its unblemished status, a tractor trailer in front of me on the highway whilst headed to Road Atlanta kicked up a piece of metal that took a small chunk out of my windshield.
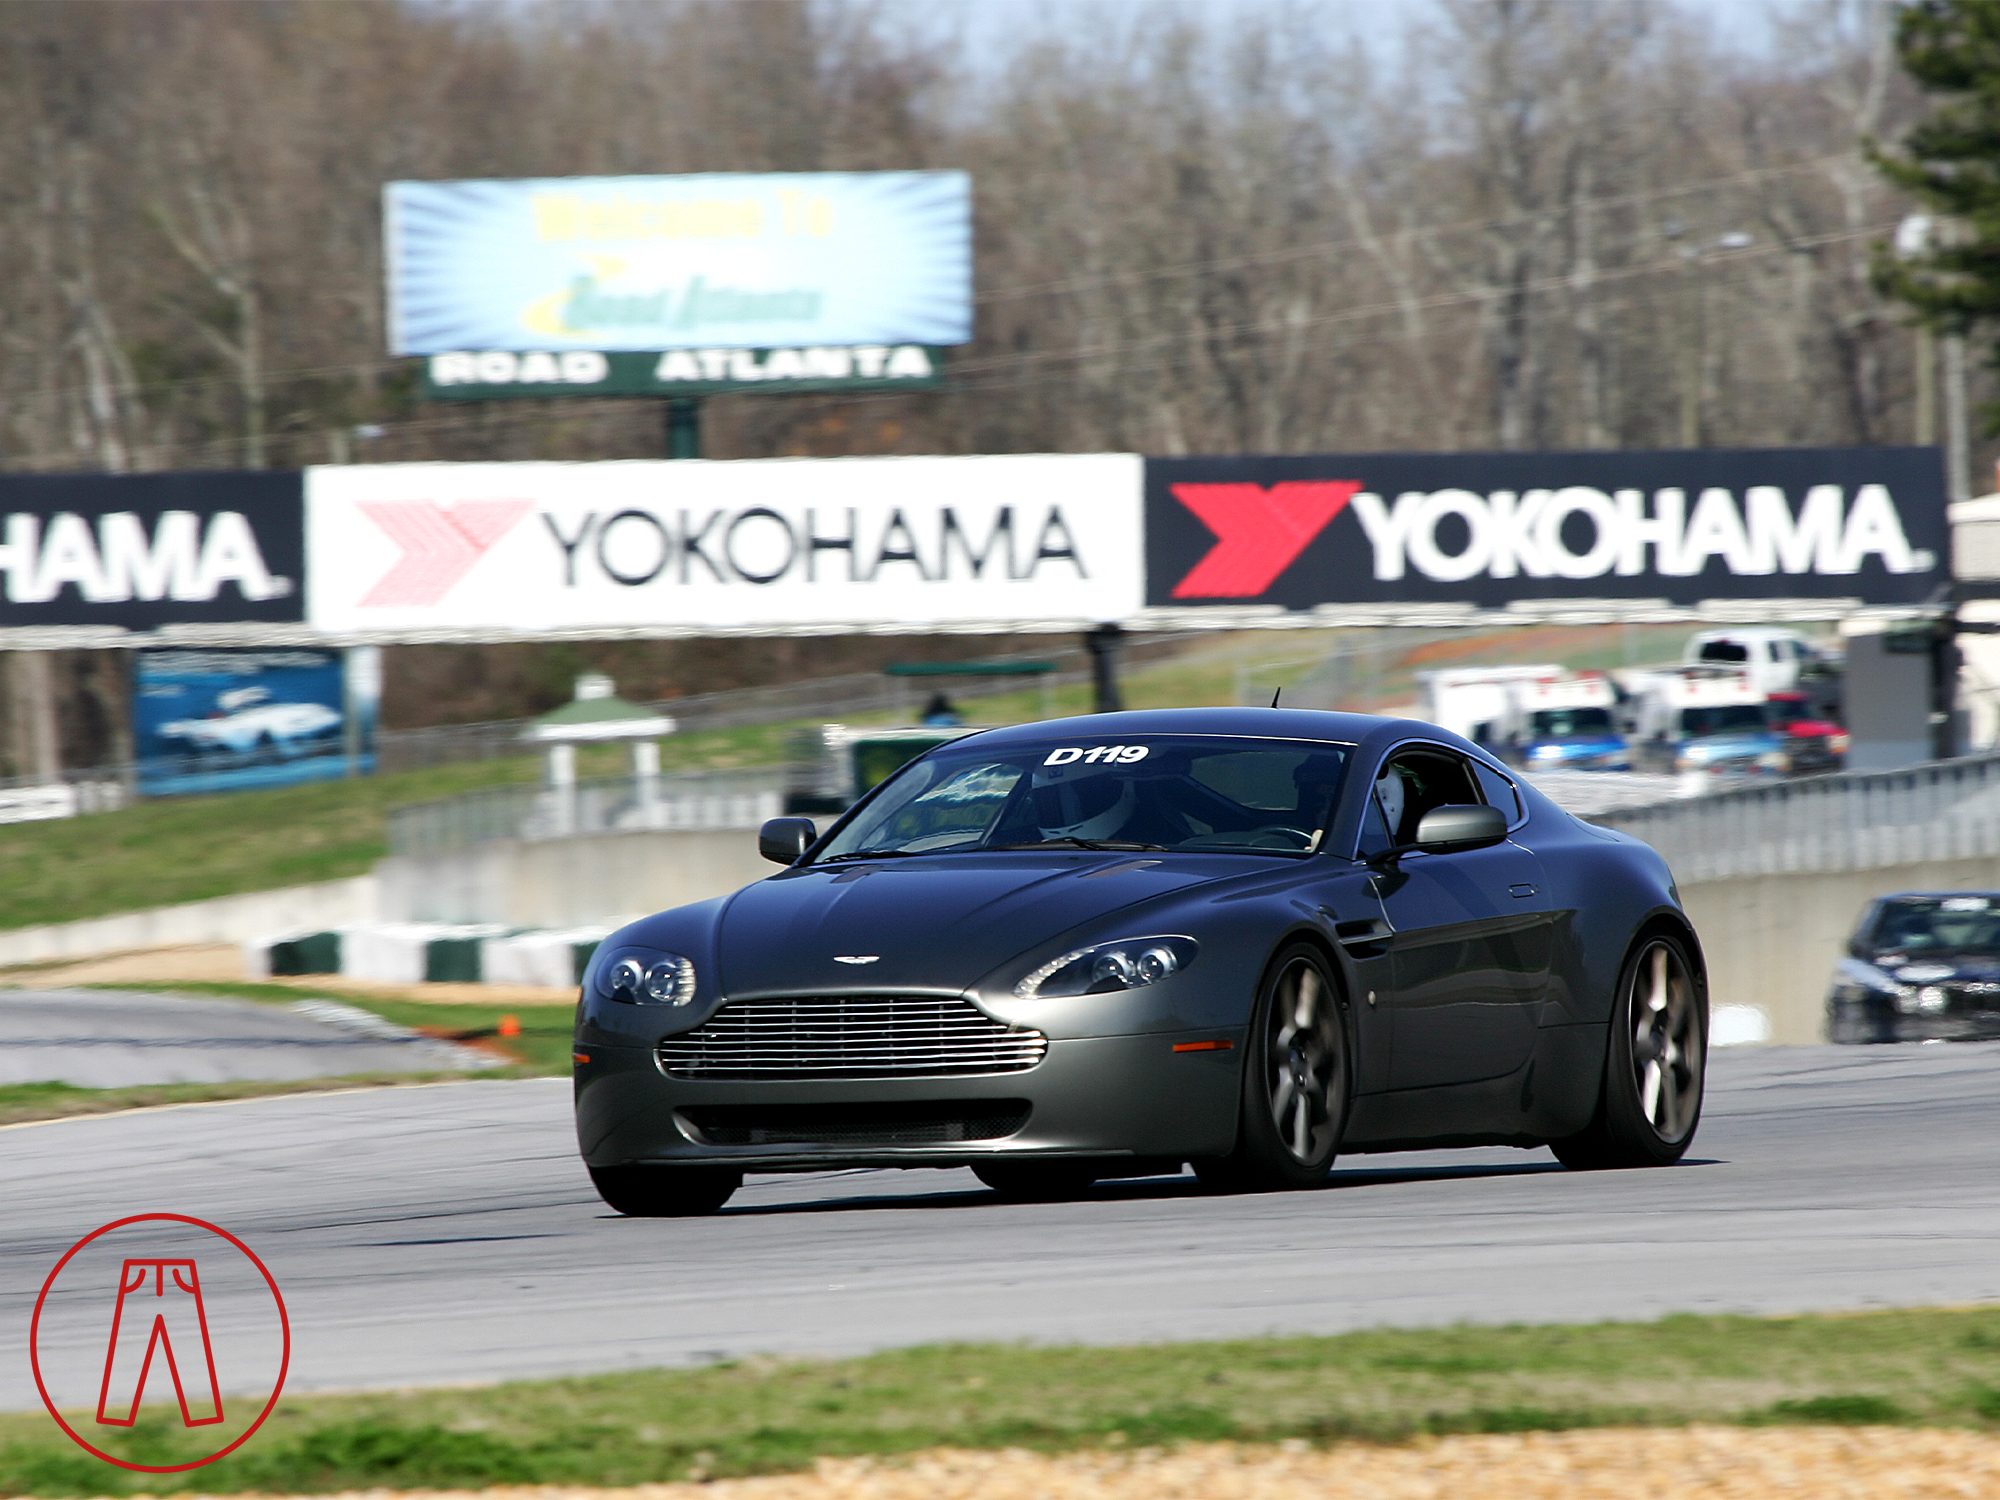
The track day was actually an HPDE - a High Performance Driver Education [track weekend] - which was hands-down the best way I could have been introduced to performance driving and is still something I highly recommend to anyone even if they don’t plan to do any open track days. I got to learn a ton about the car that was still somewhat new to me, like how restrictive the traction control can be on a track. It also exposed other aspects about the car that I knew I’d want to change, and that’s when I decided the car needed to be modified.
Like I mentioned before, it already had a few modifications done by the original owner. Funny enough, this car was used to test out prototype parts for RSC Tuning which was being run by Stuart Dickinson at the time - the very same man that now runs VelocityAP. Those modifications included wheel spacers, H&R springs, Hankook Ventus V12 Evo tires, drilled air boxes, RSC Tuning oiled intake filters, brake cooling ducts, heavy duty clutch plate, and prototype RSC Tuning high-flow cats and muffler. None of these remain, and I’ll address each below. I’ll also consider the Aston Martin Power Pack a modification here as well since it was retrofitted to the car, even if it’s OEM.
I didn’t necessarily have a goal in mind for how I would build this car when I first decided to start down that path. Rather, it was the subject of my usual modus operandi for life in general: one foot in front of the other and adapt as the situation changes. Sometime later I got a second Aston Martin - the red 2007 V8 Vantage I owned for a couple years - and I decided I needed to differentiate the two and build them in two different directions. I’d build my red car as a beefy GT cruiser - it’d have more comfortable suspension, upgraded amenities, and even a supercharger - and my grey one would be more focused on track use. I’d prioritize weight loss, handling, and responsiveness while also maintaining just enough comfort to drive it on the street without beating my kidneys to pulp.
When I sold my red car before I could do most of the things I’d wanted to do, I adapted once again and decided to fold many of the plans for that car into this one to combine the best of both concepts into one. So, everything is being dialed up to 11.
That being said, I’m still taking measured steps to make sure I don’t ruin my Aston Martin. A long time ago in my younger days, I did over-modify a car and ruined it.
No power steering, no air conditioning, and underdrive engine pulleys…. on a street-driven 1993 Mazda RX7…? Yeah, não foi bom.
In my defense, that particular car wasn’t in great condition when I bought it, and I got it specifically to learn how to work on rotary engines and to have fun tinkering with.
But it also taught me an important lesson about balancing performance-oriented modifications with real-world usage, and turning a would-be fantastic car into a chore to drive still sticks with me to this day.
With all that in mind, I’ve been carefully selecting the modifications for my 2007 V8 Vantage. It has parts from a variety of other Astons including road cars, special editions, and race cars. It’s got parts I’ve developed for Redpants, and aftermarket parts that bring out the best aspects of this car. And, as much as it’s got on it now, there’s still so much more yet to be done.
The First Stage
The first thing anyone sees of this car is the body, and there was one thing in particular that I absolutely hated from the very beginning, so let’s start there.
Alfalfa
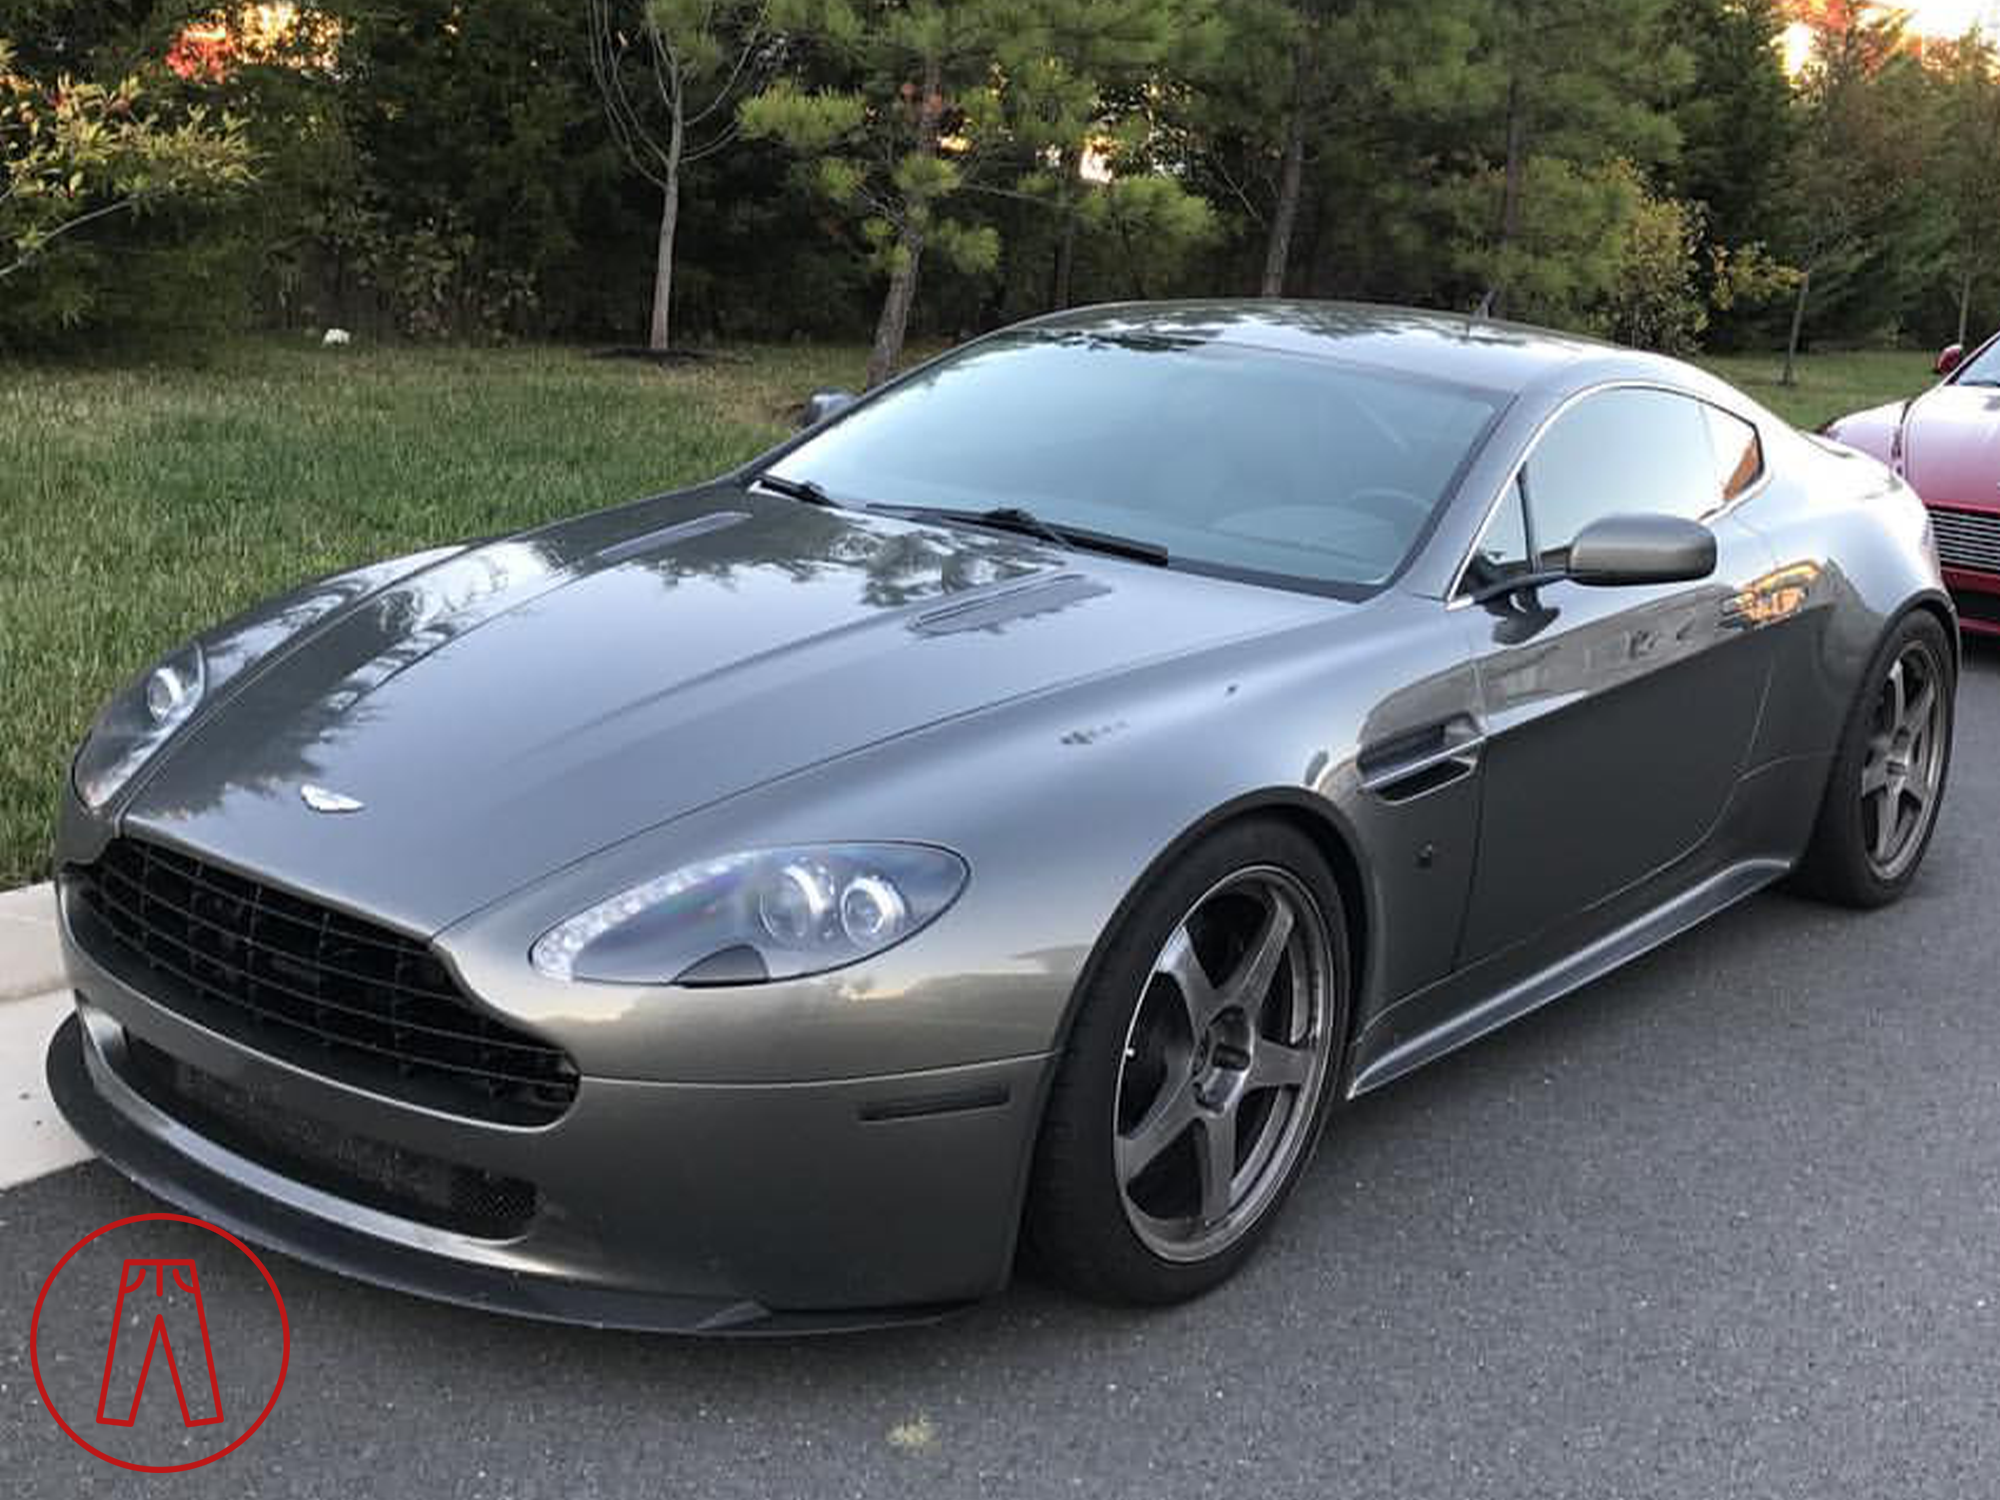
My car looked fairly standard for a while. It was lowered on H&R “Sport” lowering springs and had the factory 7-spoke wheels set nicely on spacers. It looked factory, but more aggressive in a way that many people couldn’t put a finger on simply because it looked right. It looked like it should have from the factory.
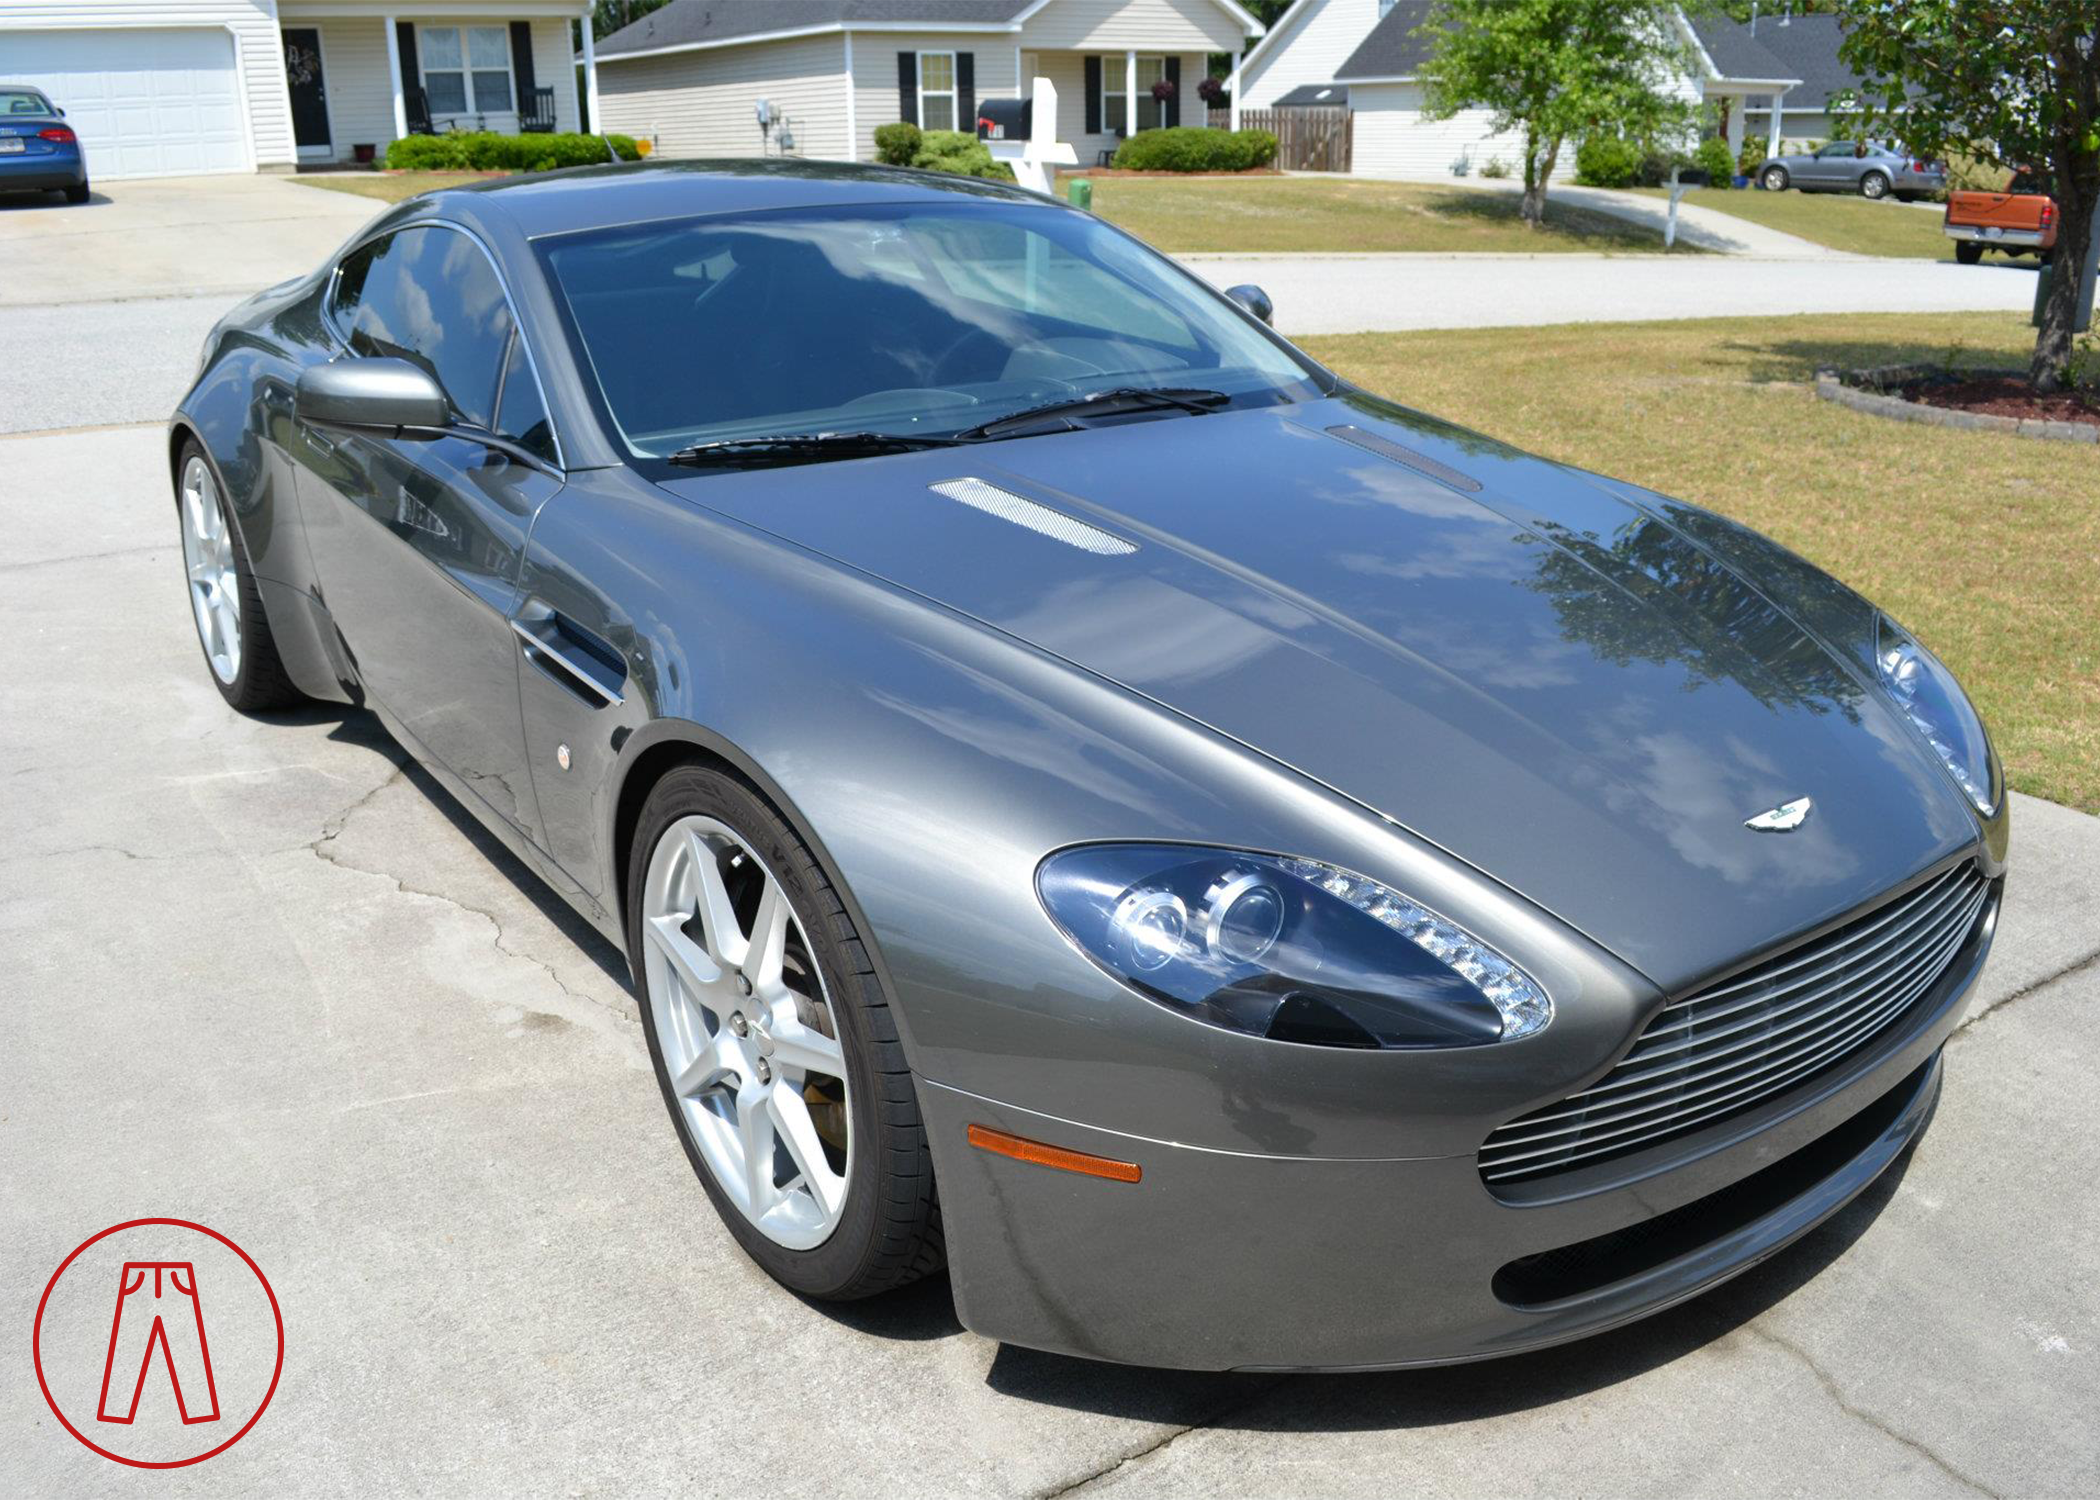
OMG it was so young and innocent back then! It’s like looking back at a childhood photo knowing what it’ll have gone through over the next 15 years of growth and development... like a rough puberty is on the way, and we’re just hoping it has a glow-up when it comes out the other side. Anyway, the car was fairly standard aesthetically but it did have a more aggressive stance than a standard V8 Vantage.
Again, when I first bought this car I had no intention of doing anything to it - it was an Aston Martin! I had an Aston Martin! I grew up poor and somehow had succeeded to the point of getting my dream car, so this was the pinnacle of everything and how dare I do anything to upset it. But… I couldn’t get over the Alfalfa-inspired antenna. No matter how high a pedestal I put this car on, and no matter how adamant I was or would have been about keeping the car untouched… this is something I just could not handle and had to address.
The Alfalfa reference will surely be missed by many, so here’s a picture I made to burn into your brain.

Of all of the exterior modifications on my car, ditching the OEM antenna for a Shorty Antenna has got to be one of the most subtle unless you’ve got this image in your head. I tried telling others how much the whip-style antenna bothered me and enough people shrugged it off that I made this picture of my car alongside Alfalfa showing just how absurd the antenna is.
Now that I’ve gotten that heavy chip off my shoulder, we can get on to the more interesting things you guys want to know about.
Wheels, Tires, and Brakes
The first visual change I made to the car after snipping the alfalfa sprout was getting a set of BC Forged RT50 wheels. I chose these because I wanted something similar to the 5-spoke Speedline wheels used on the original Vantage N24 race car. The RT50 was a very similar design but the spokes were a bit thinner, which I think was even better because it made them a bit more elegant rather than just looking like straight-up race wheels slapped onto a road car.
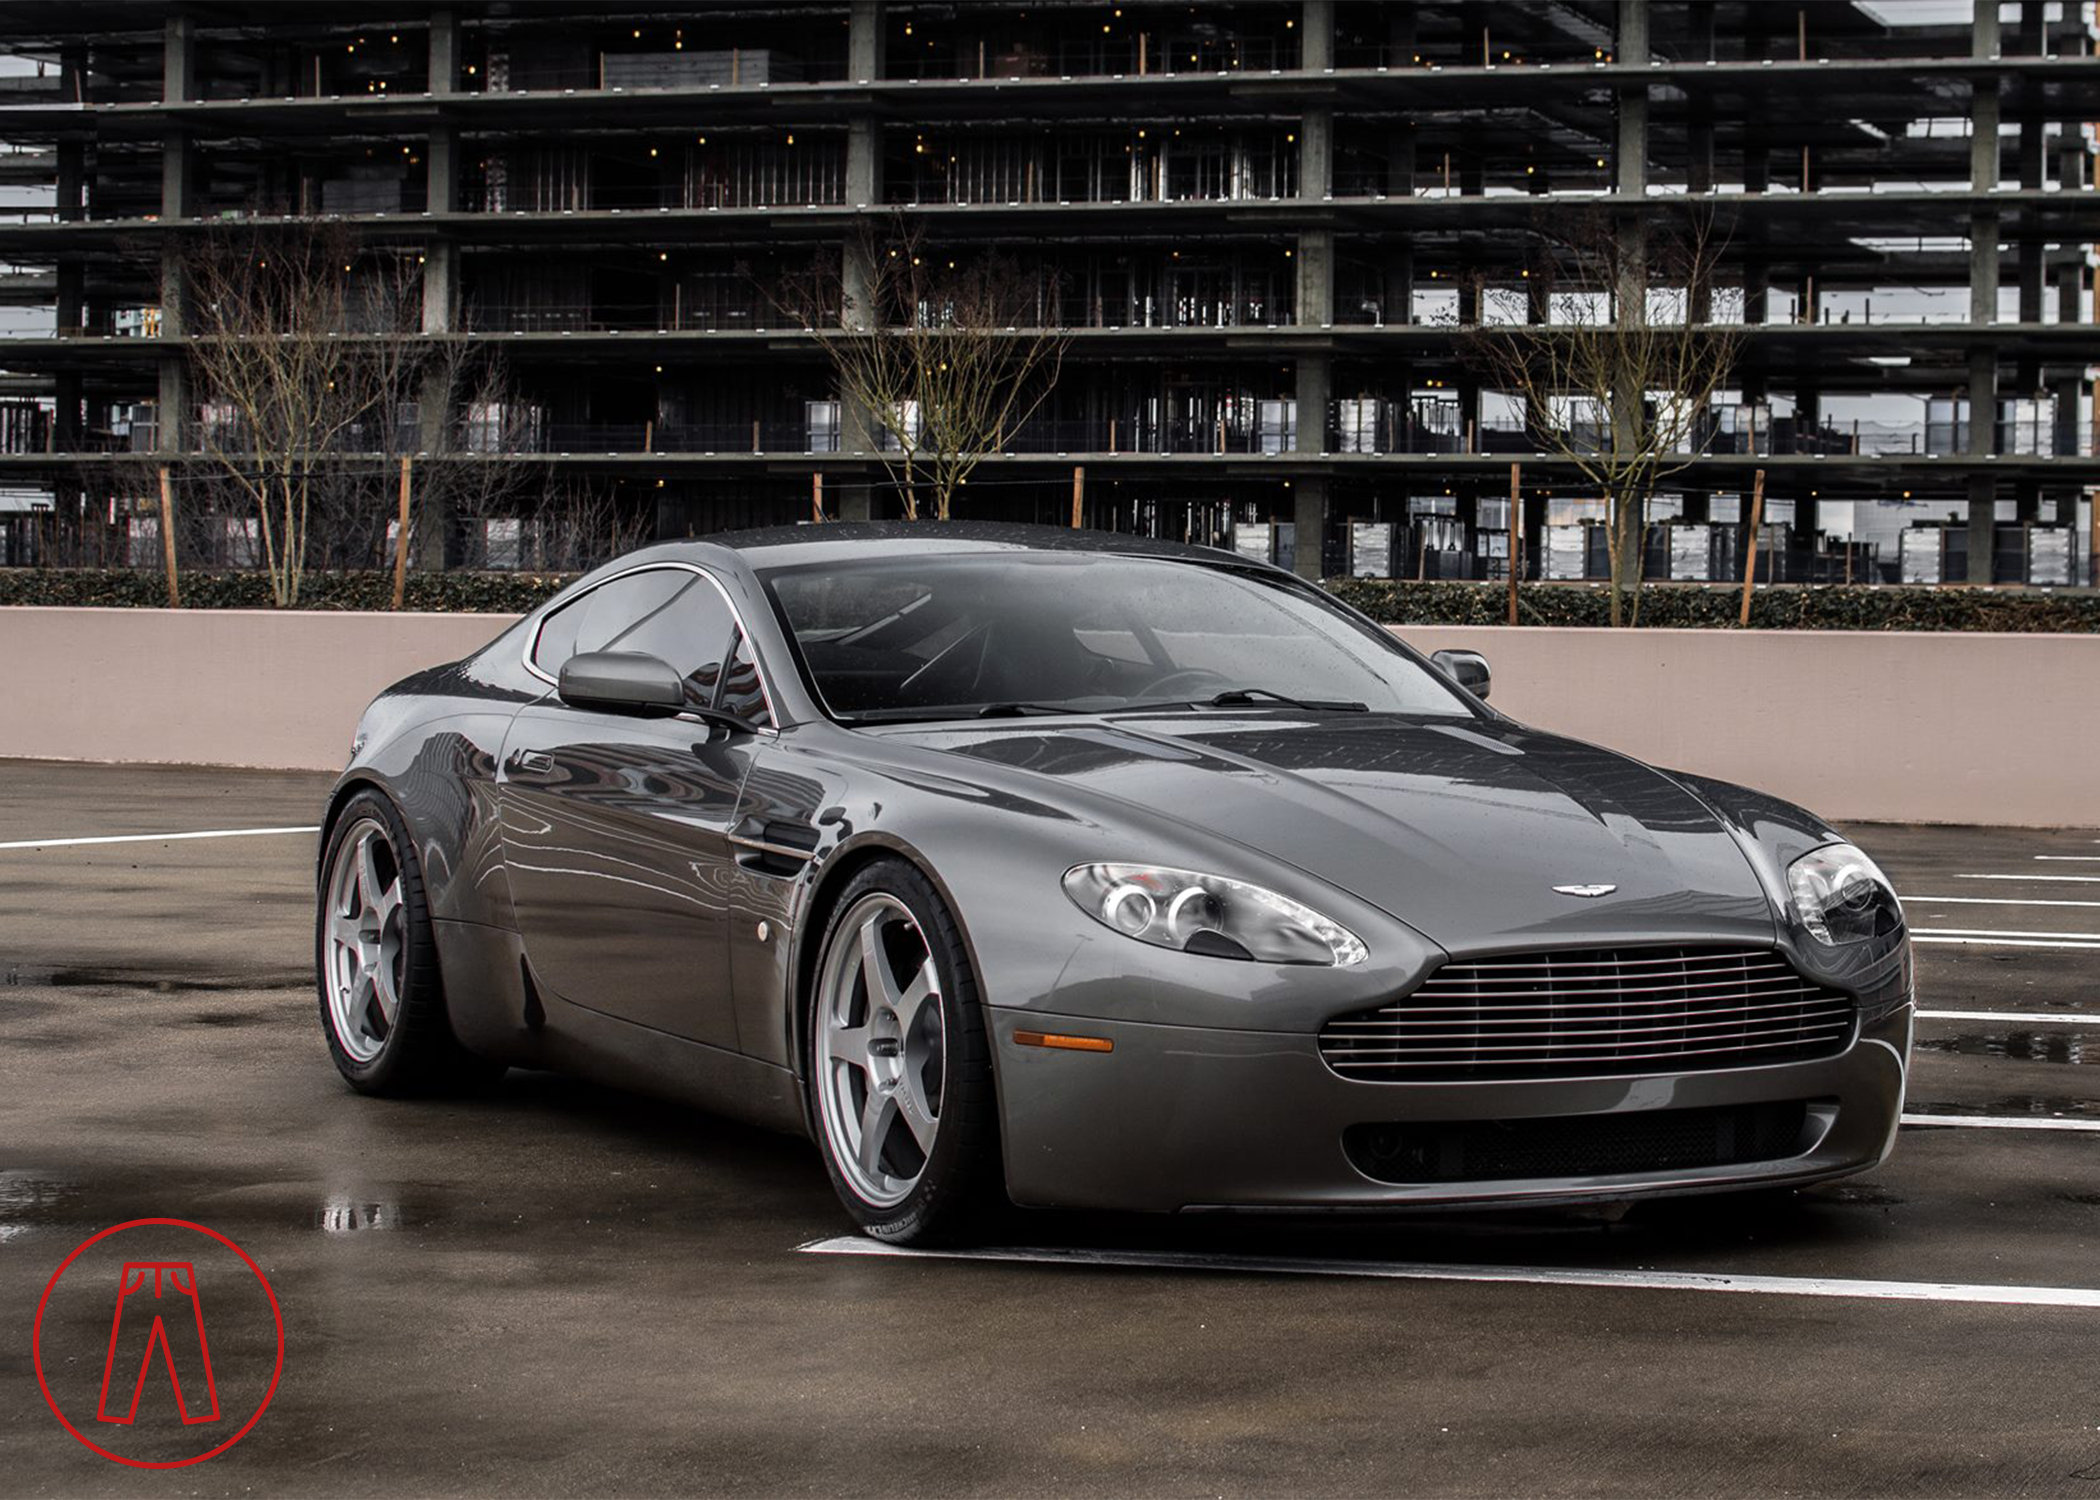
I went with flat-faced spokes on the wheels to get a racier look and also swapped out the factory-sized Hankook tires for a slightly larger set of Michelin Pilot Super Sports. I spec’d the BC Forged RT50 wheels to maintain the widths and diameter of the factory 7-spoke wheels, but with much better offsets. Not only did these weigh less than the OEM wheels, but they also eliminated the need for spacers.
The Hankook Ventus V12 Evo tires were cheap summer tires that were a lot of fun to drive on. They were the tires I used on my first track weekend at Road Atlanta and what I still remember from using them was how easy they were to throttle steer (something I still miss). They didn’t have nearly the grip thresholds of the Michelins, but that also made them a lot of fun without having to push the car so hard.
Michelin Pilot Super Sport tires were still en vogue at the time and were a huge step up from the Hankooks. Not only would I be getting more performance from a better tire, but I was also going to a larger size - up from the factory 235/275 setup to 245/285. They’re the same tire sizes as used on the V8 Vantage S and they fit factory-sized wheels beautifully.
By the way, those red pants in the background are the Redpants.
In addition to slightly larger tire contact patches, it also gave me slightly taller tires which meant less fender gap, more ground clearance, taller final drive ratio, and a tiny bit more comfortable ride. Each of these benefits is very small, but everything adds up.
You’ll also notice in that picture above that my tail lights aren’t exactly bright red like they should be. Around the same time I had also had the tail lights, rear reflectors, and rear corner markers all “smoked” - spray tinted to make them darker while still letting plenty enough light through.
Less obvious were my brake rotors. My original brake rotors were in need of replacement and I took the opportunity to upgrade to a set of 2-piece rotors from Wilwood. These were easy to spot by their unique, asymmetric slotting but were hidden behind the wheels so most people never noticed them.
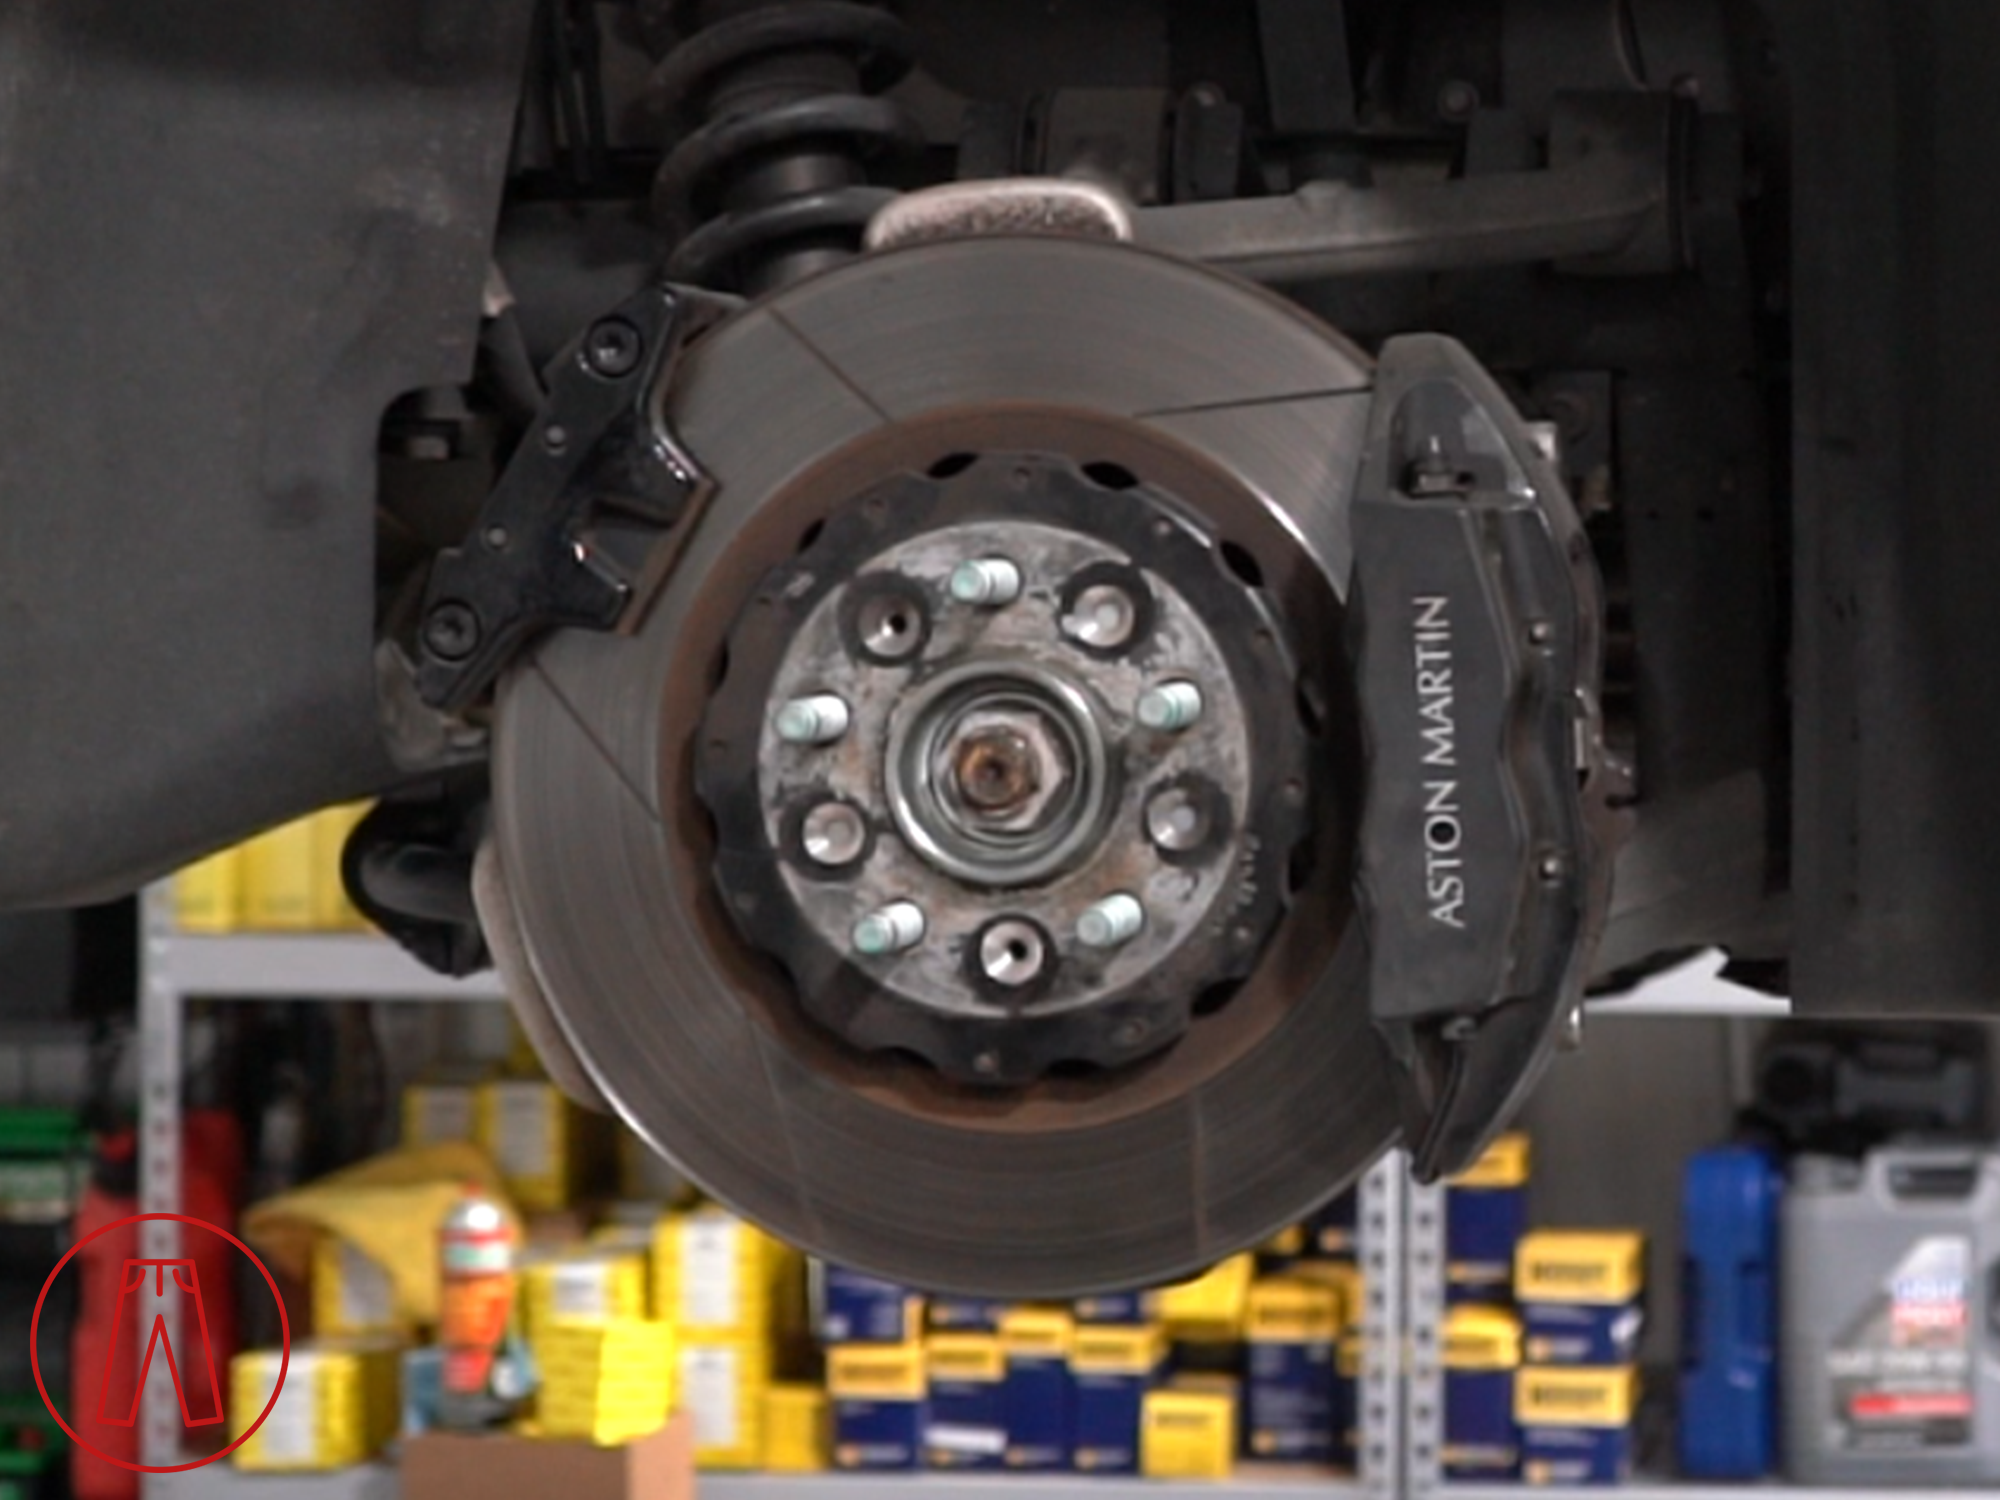
I think these were some of the most slept-on upgrades out there because they were incredibly resilient - mine lasted for a decade despite tens of thousands of miles of driving in all weather types, tons of spirited driving, and a whole bunch of track days. They were expensive, which is why I think most people didn’t consider them, but in the end they were well worth the price.
Unfortunately I’m saying all that in the past tense because Wilwood no longer offers them. I had wanted to rebuild these, which is one of the benefits of 2-piece brake rotors, but the parts are no longer available so I’ll have to move on to another brand.
Undoing Previous Modifications
The original owner of my car had worked with Stuart (then at RSC Tuning) to test out some parts that he had been developing while also doing a few modifications of his own. Related to the brakes were RSC Tuning’s cooling ducts. These used NACA duct inlets that were cut into and attached to the front undertray, with ducting to route air from under the car to the front wheel wells.
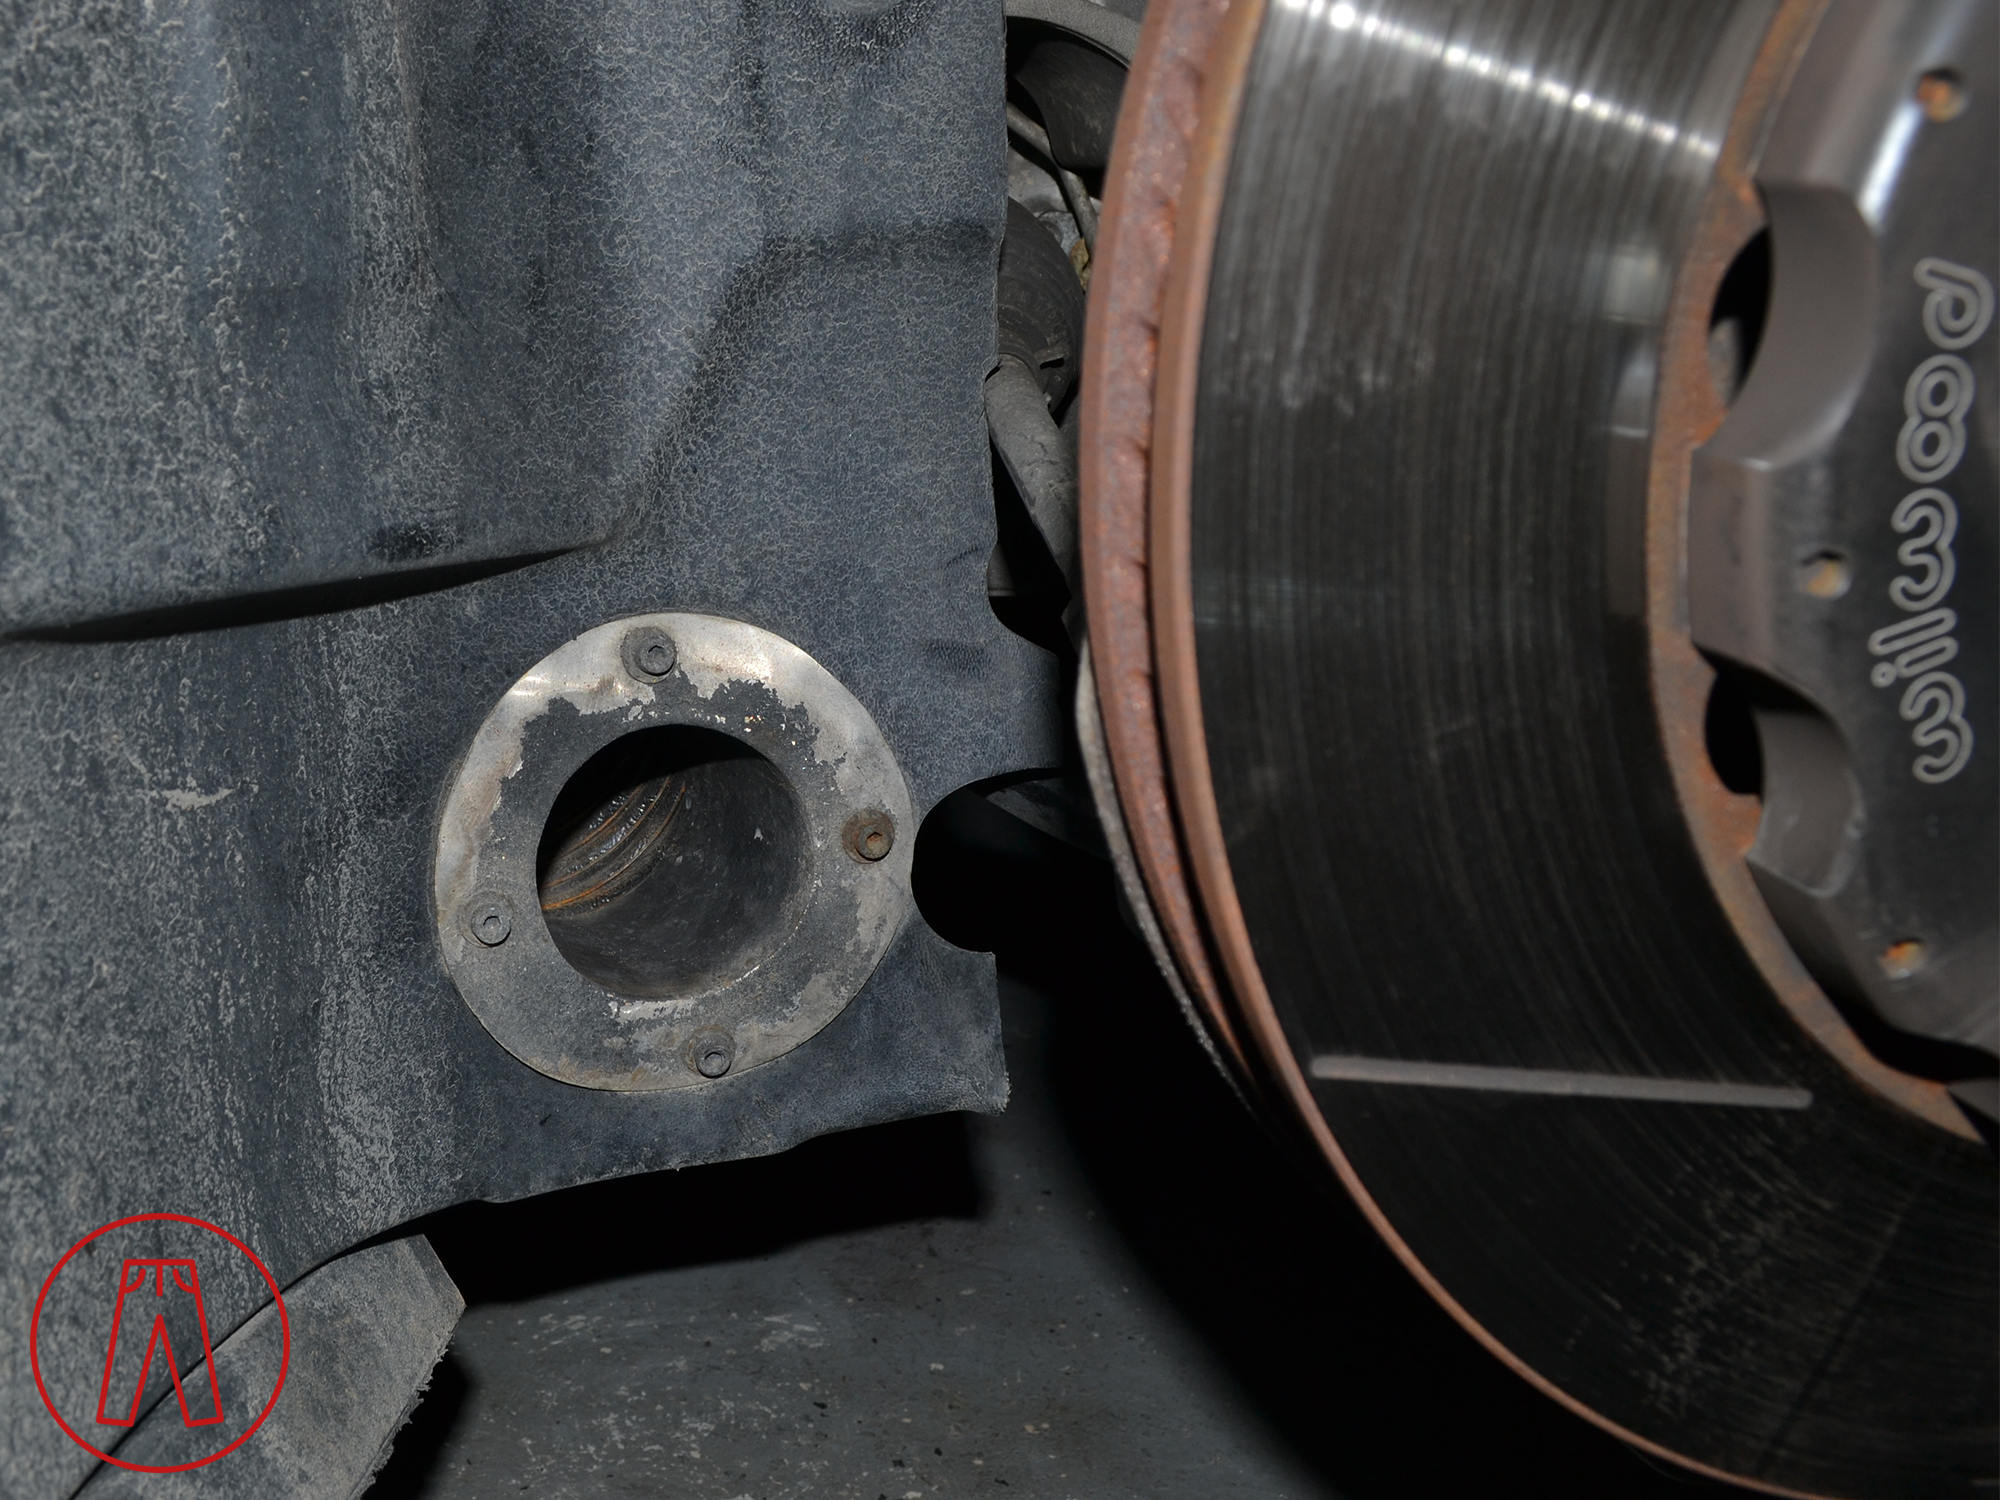
For those of you familiar with brake cooling systems, I’m sure the issue with this product will be immediately apparent… extra air may be getting pushed into the wheel well, but it isn’t being directed where it’s actually needed in order to cool the brakes! The cooling effect of the extra air in the wheel wells would have been negligible, if there was any effect at all.
The biggest effect these had was that it made working on my car that much more tedious - I’d have to deal with the ducting every time I took my undertray off and again when I reinstalled it. Since I wasn’t getting any benefit from this brake “cooling” system, I ditched the ducting and eventually replaced the undertray and fender liners with unmodified ones to eliminate the system altogether.
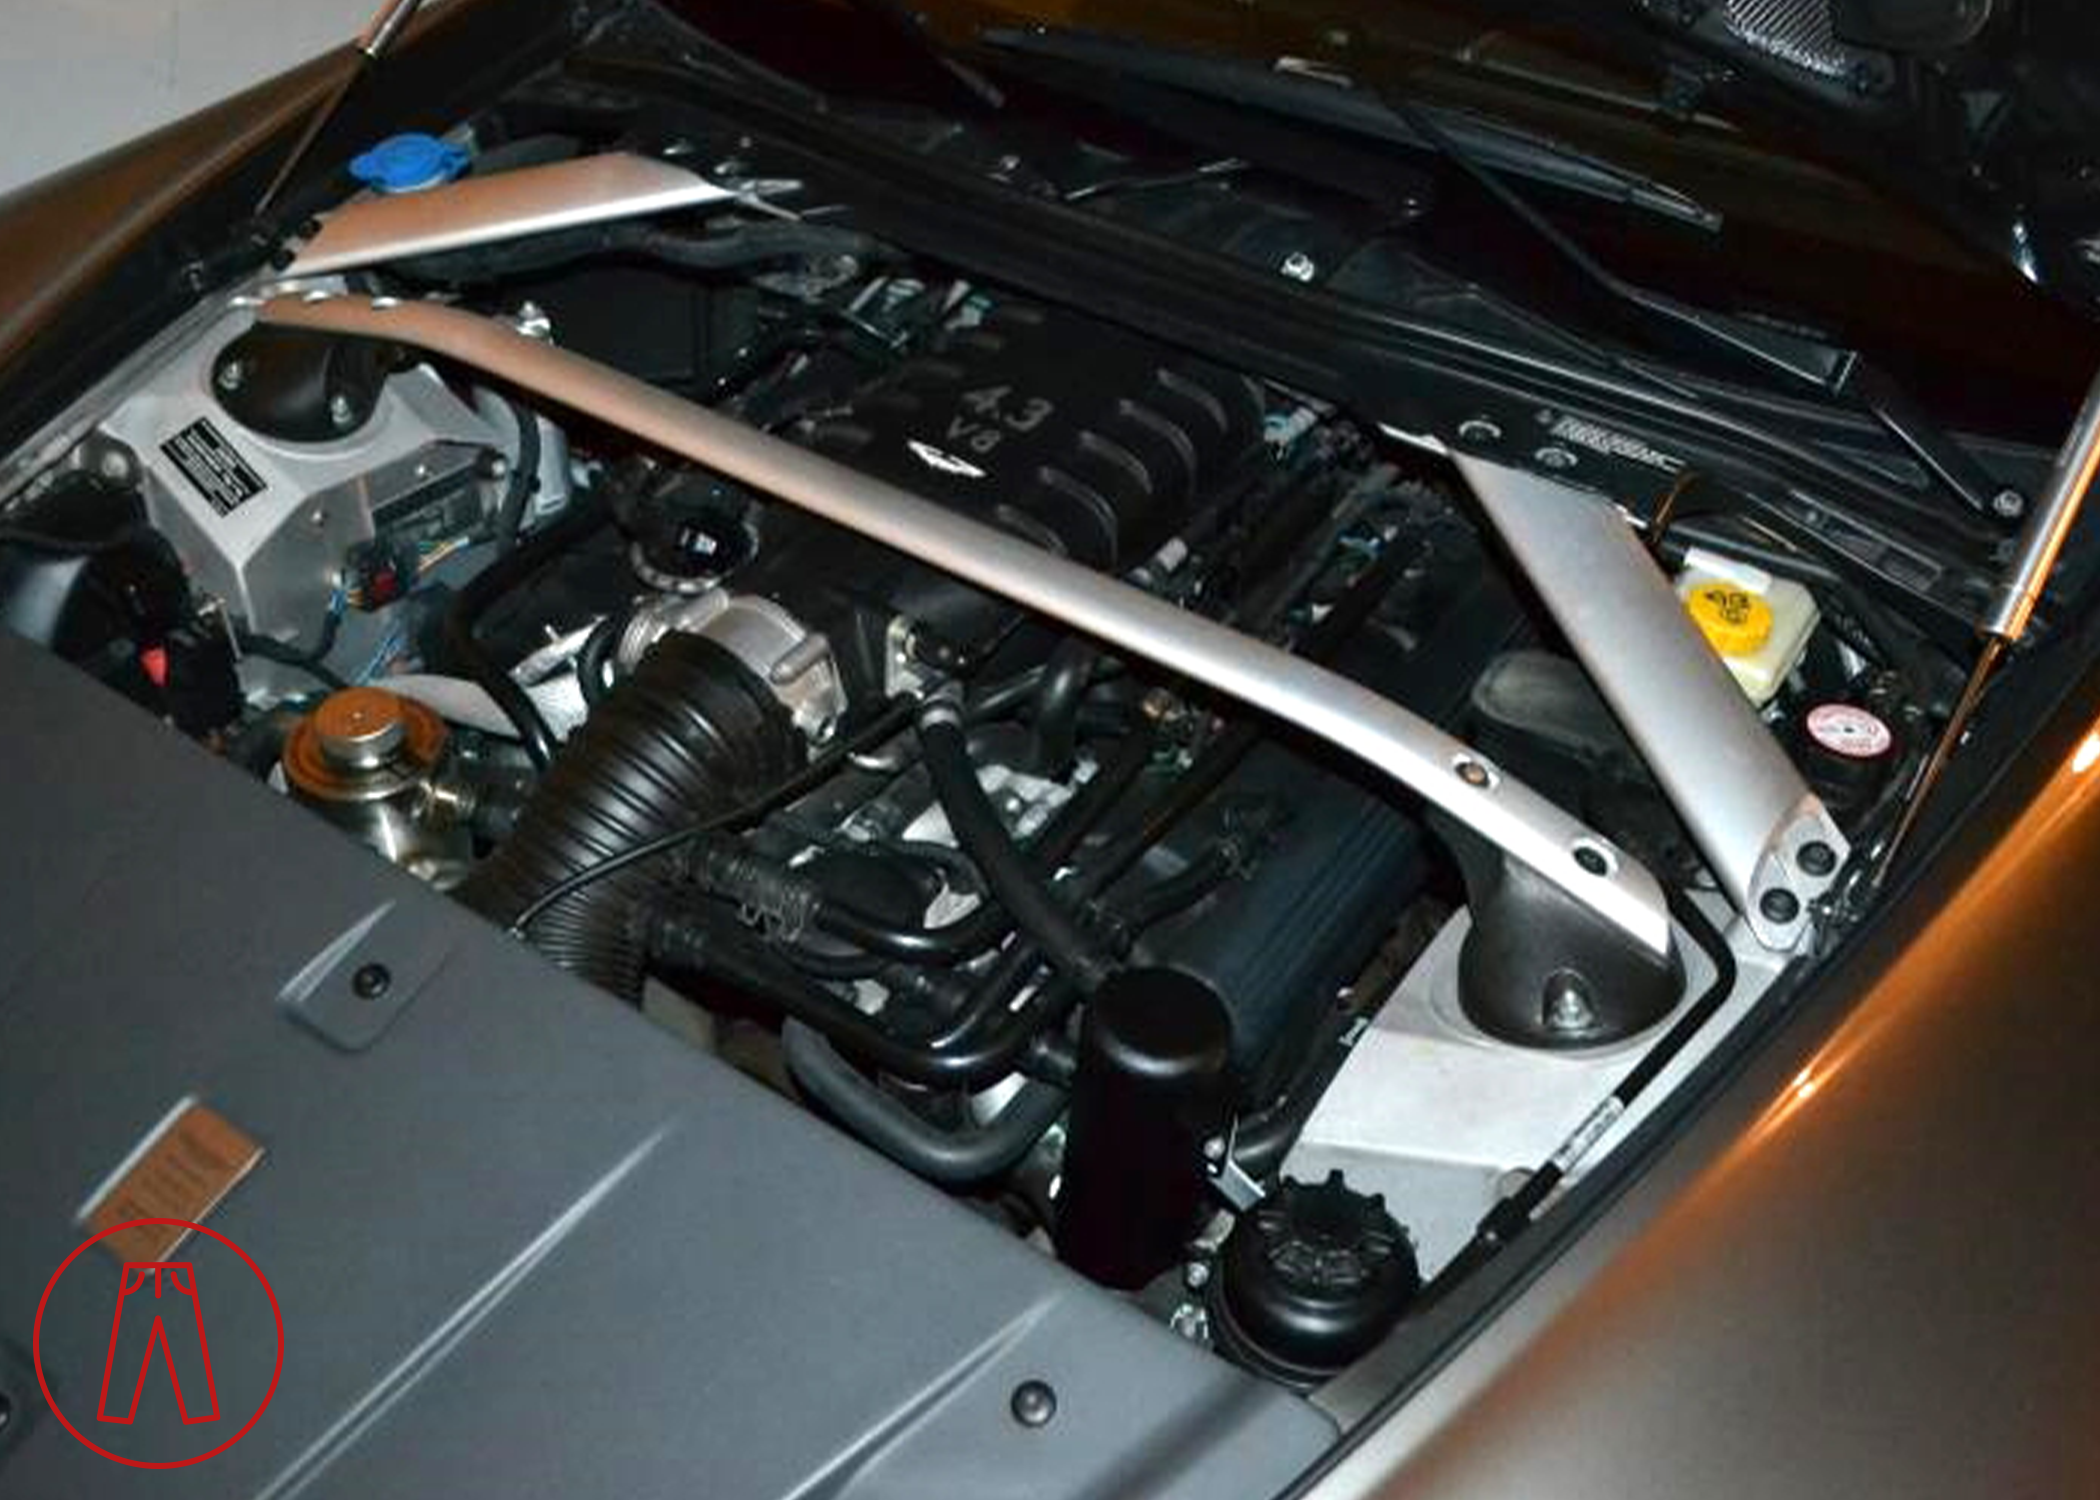
“Active” air boxes were introduced on the V8 Vantage N400 in 2007 and shortly thereafter offered as a retrofit called the Power Pack. When I bought the car, the original owner had the Power Pack retrofitted by his local dealership. But then, at some point, he decided he wanted even more air for the intake an drilled holes in a set of standard air boxes and swapped them in.
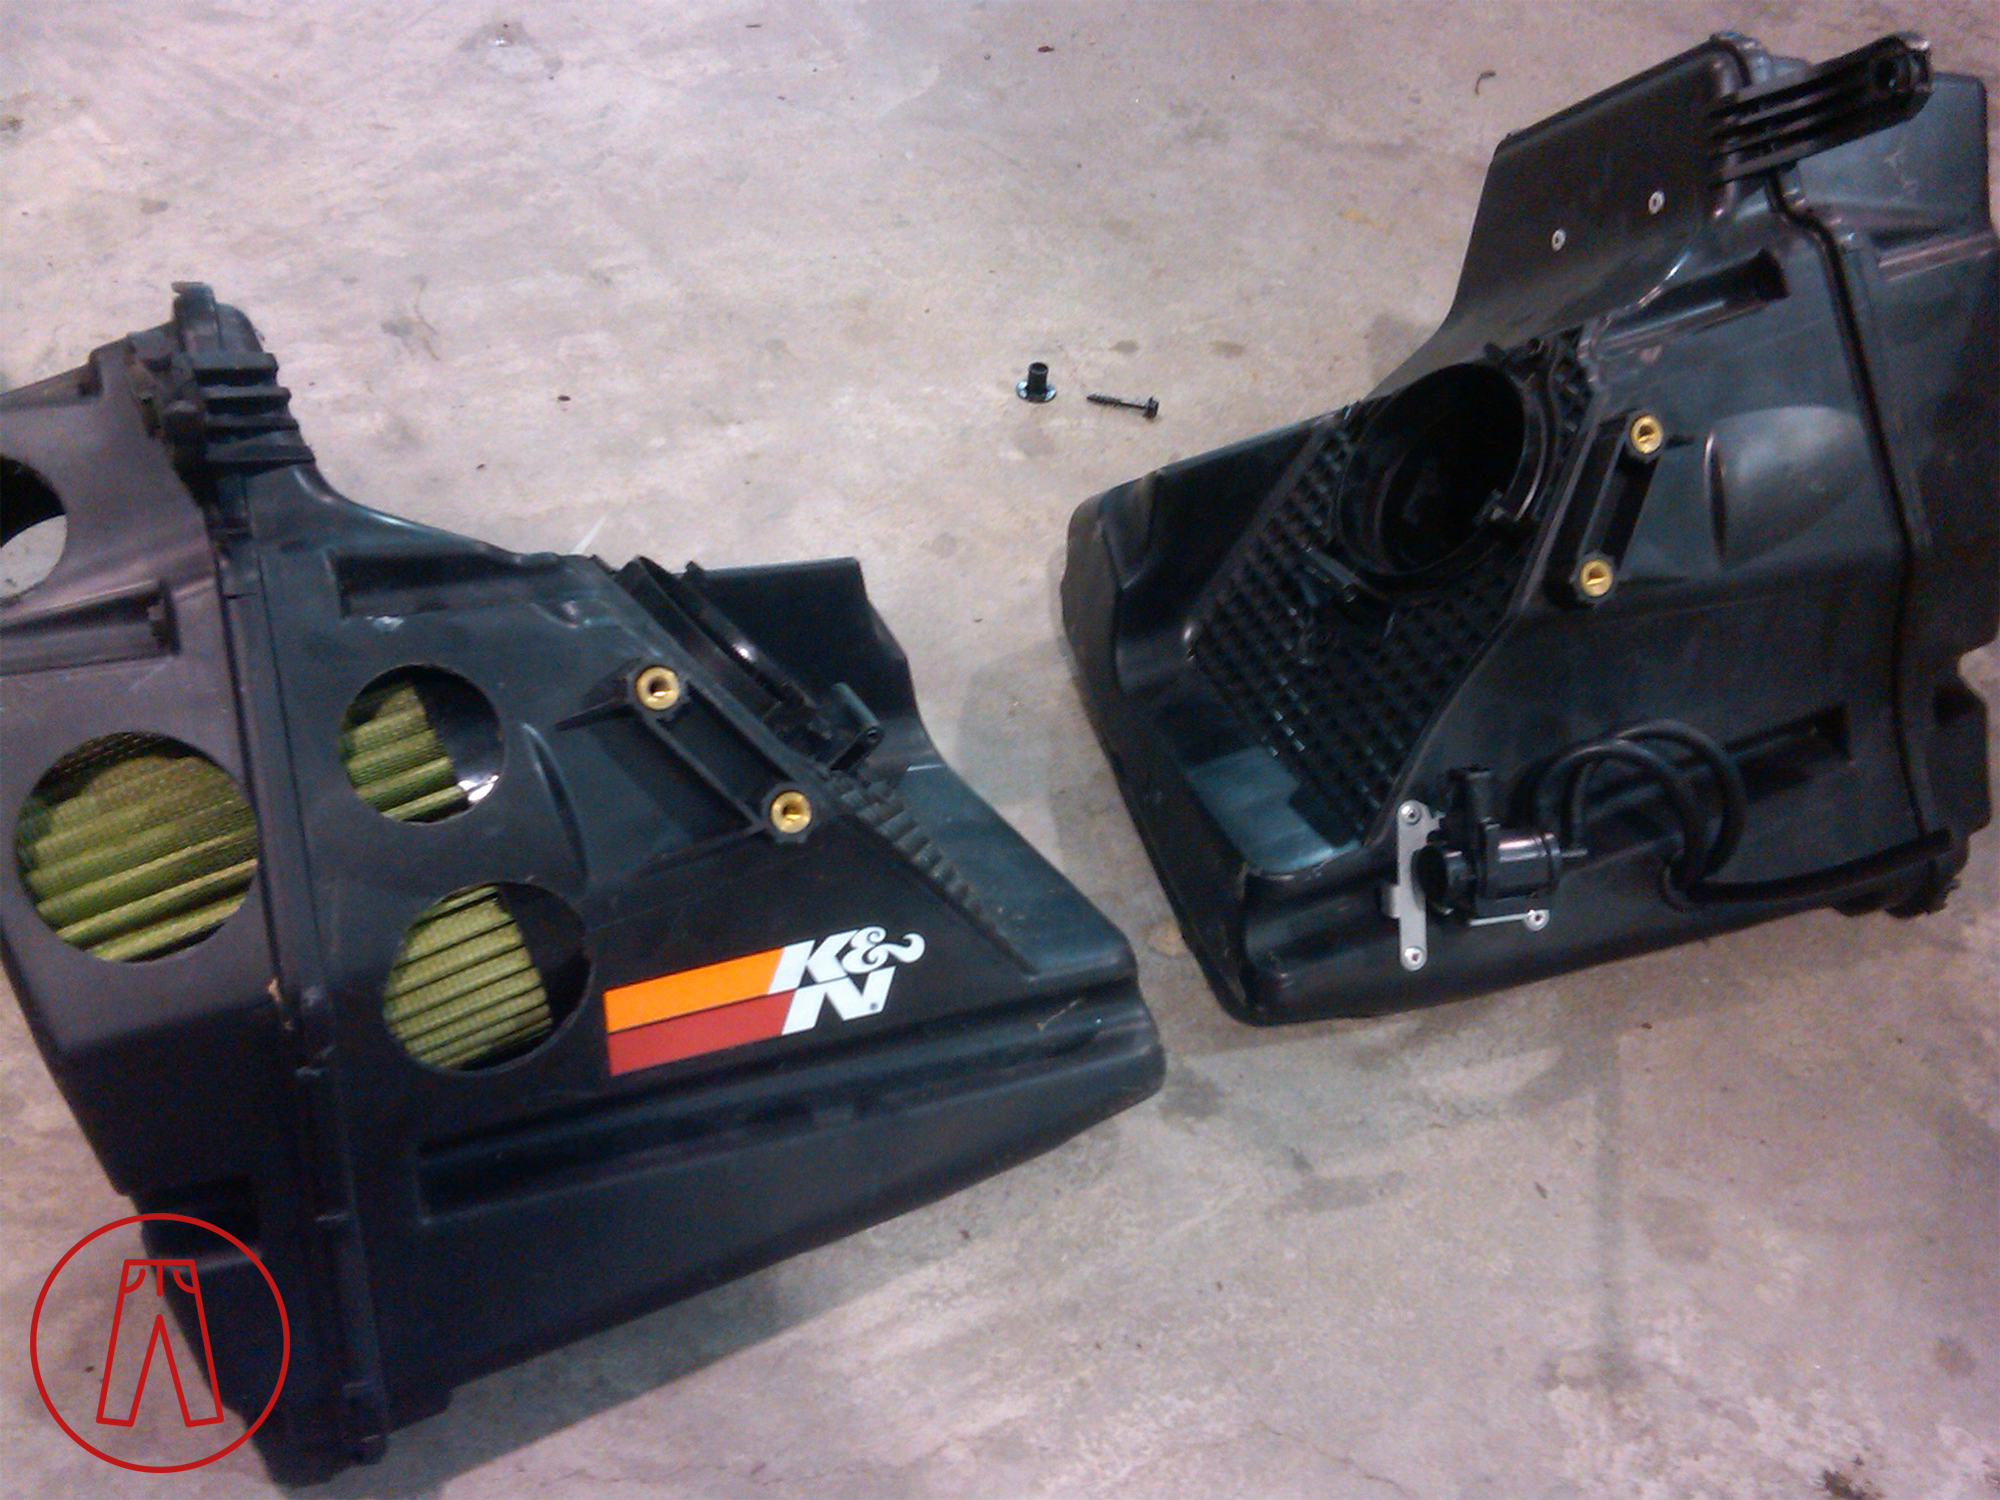
Standard air box with air holes drilled into it (left) vs Power Pack air box (right). The drilled air box has a K&N sticker on it from the original owner, who had used K&N filters prior to the RSC Tuning filters as seen in the picture.
Swiss cheese air boxes are nothing new - it’s an old-school way to allow more air to get to your intake filters at the cost of the air box’s original design intents (primarily to protect the intake filter and reduce intake noise). Reducing engine noise isn’t that big of a deal in a V8 Vantage given where the air boxes are located and how loud the exhaust is, but the intake filter protection aspect is an important one (more on that later).
The extra air can indeed make a difference. If one air box gets more air flow than the other (say, if there’s a crack in one air box), you can get a MAF Correlation Error. And, the race cars don’t use them at all - not only for the practical aspects of weight savings and simplicity, but supposedly there’s also a measurable increase in horsepower.
Within the air boxes were a set of oiled intake filters from RSC Tuning. Personally, I hate oiled intake filters. Yes, they do increase air flow into the engine and that gives you more power. But the downside is that the oil gets caked up with dust and grime (reducing air flow over time) and the oil can contaminate your MAF sensors (which is why I had to dig into my air boxes to begin with).
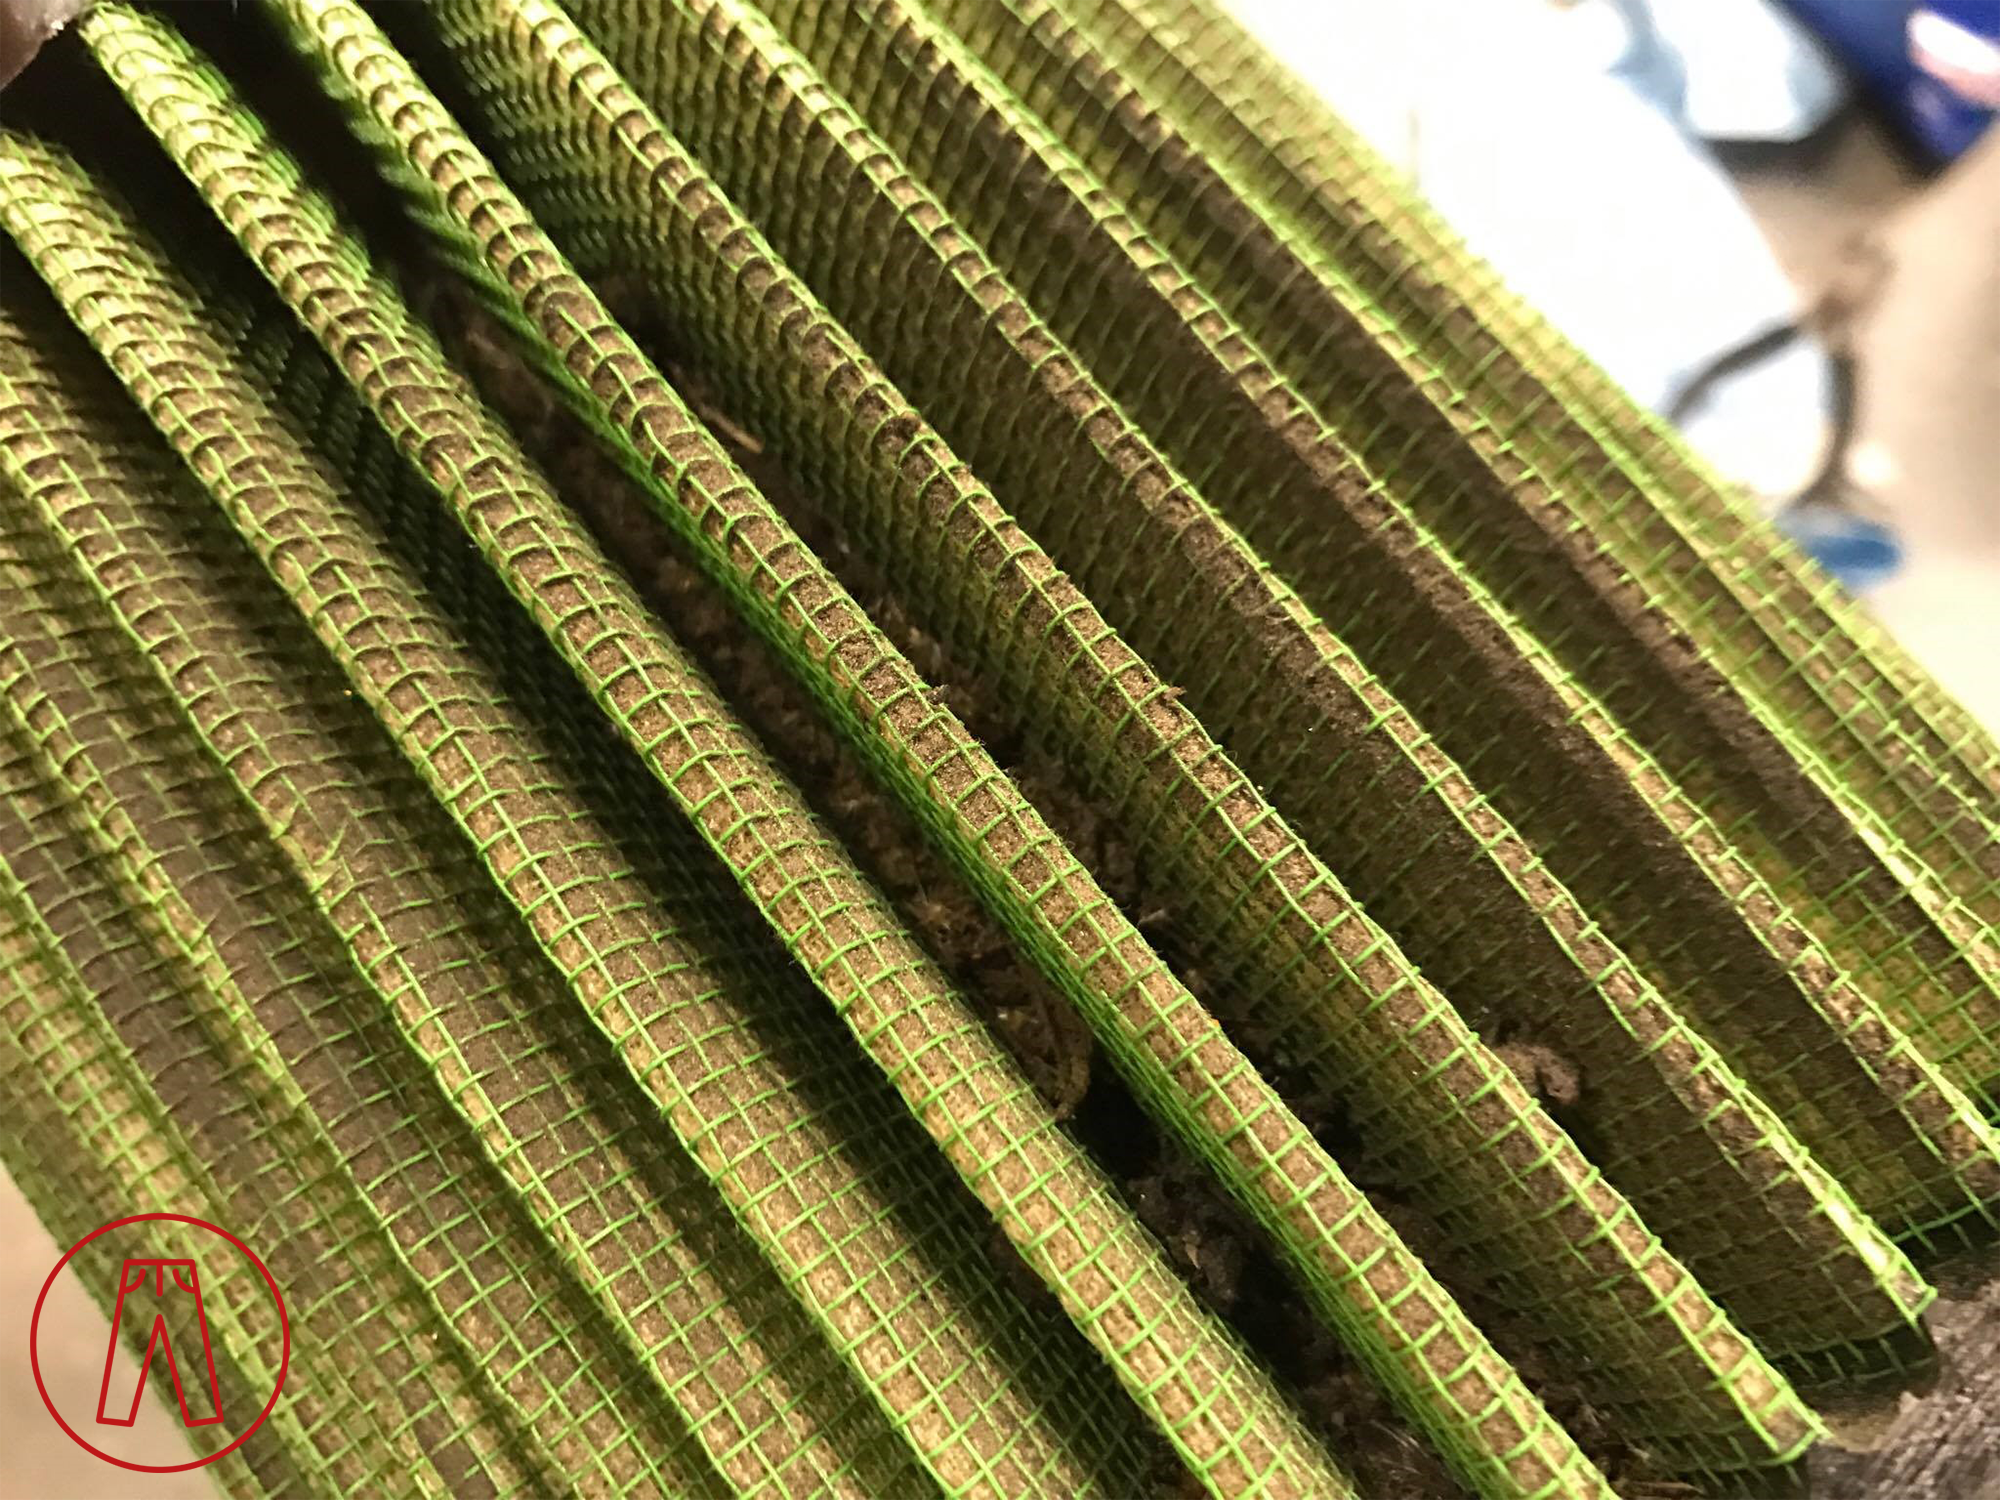
Buildup like this can easily happen on oiled intake filters - I’ve seen quite a few that looked just like this.
If you look at the top left corner of that picture, you can see that part of the filter is still pretty clean, and most of the filter looked the same as that. The area in with all the caked up is the area where air was coming into the air box and hitting the filter - basically, all the dirt and gunk and whatnot coming into the air box was hitting the filter and sticking to the oil in that one spot.
Buildup caused by the oil isn’t specific to this one intake filter - I’ve seen it on lots of others, including famous brands like K&N.
I decided to ditch the drilled air boxes and oiled intake filters, replaced my oil-fouled MAF sensors with fresh ones, and reinstalled the Power Pack air boxes.
The Beginning of Redpants
During this time I was tinkering more and more with my still-mysterious V8 Vantage and starting to notice things about it that could be improved. One of those things was that it seemed to be consuming quite a bit of oil that looked like it was being sent into the intake manifold via the PCV valve. That led me to create my first-ever product for the Aston Martin V8 Vantage: the famous Redpants Catch Can.
The first-ever production Redpants Catch Can is still on my V8 Vantage to this day!
The original oil catch can prototype was in place for testing and then swapped out once full production began. The one on my car has been there for twelve years years and for much of that I’ve been stress-testing it by having it held in place with just a single bolt - and yes, it’s survived… a couple… accidents without issue.
Not long after introducing my oil catch cans, I discovered how heavy the batteries are that Aston Martin uses. The rationale is sound: most people that have an Aston Martin seldom drive it so the car needs enough power reserve to sit unused for weeks at a time. But some of us drive our Astons often enough that the extra reserve may not be necessary, and going to a smaller battery would be a quick and easy way to drop some weight out of the car.
As small as it is, the V8 Vantage is actually fairly heavy. Sure, modern cars have bloated and the baby Aston now looks like a featherweight by comparison, but back in the mid-2000s, things were different. A direct competitor for the V8 Vantage was the Porsche 911 C2S. While the V8 Vantage had an extra 30 bhp over the 911, it also carried an additional 150 kg (330 lbs)! Dropping weight is one of the best things that can be done to improve a car’s performance, and I wasn’t worried about battery reserve since I was daily-driving my V8 Vantage, so I came up with my second product: the Redpants Lightweight Battery Kit.
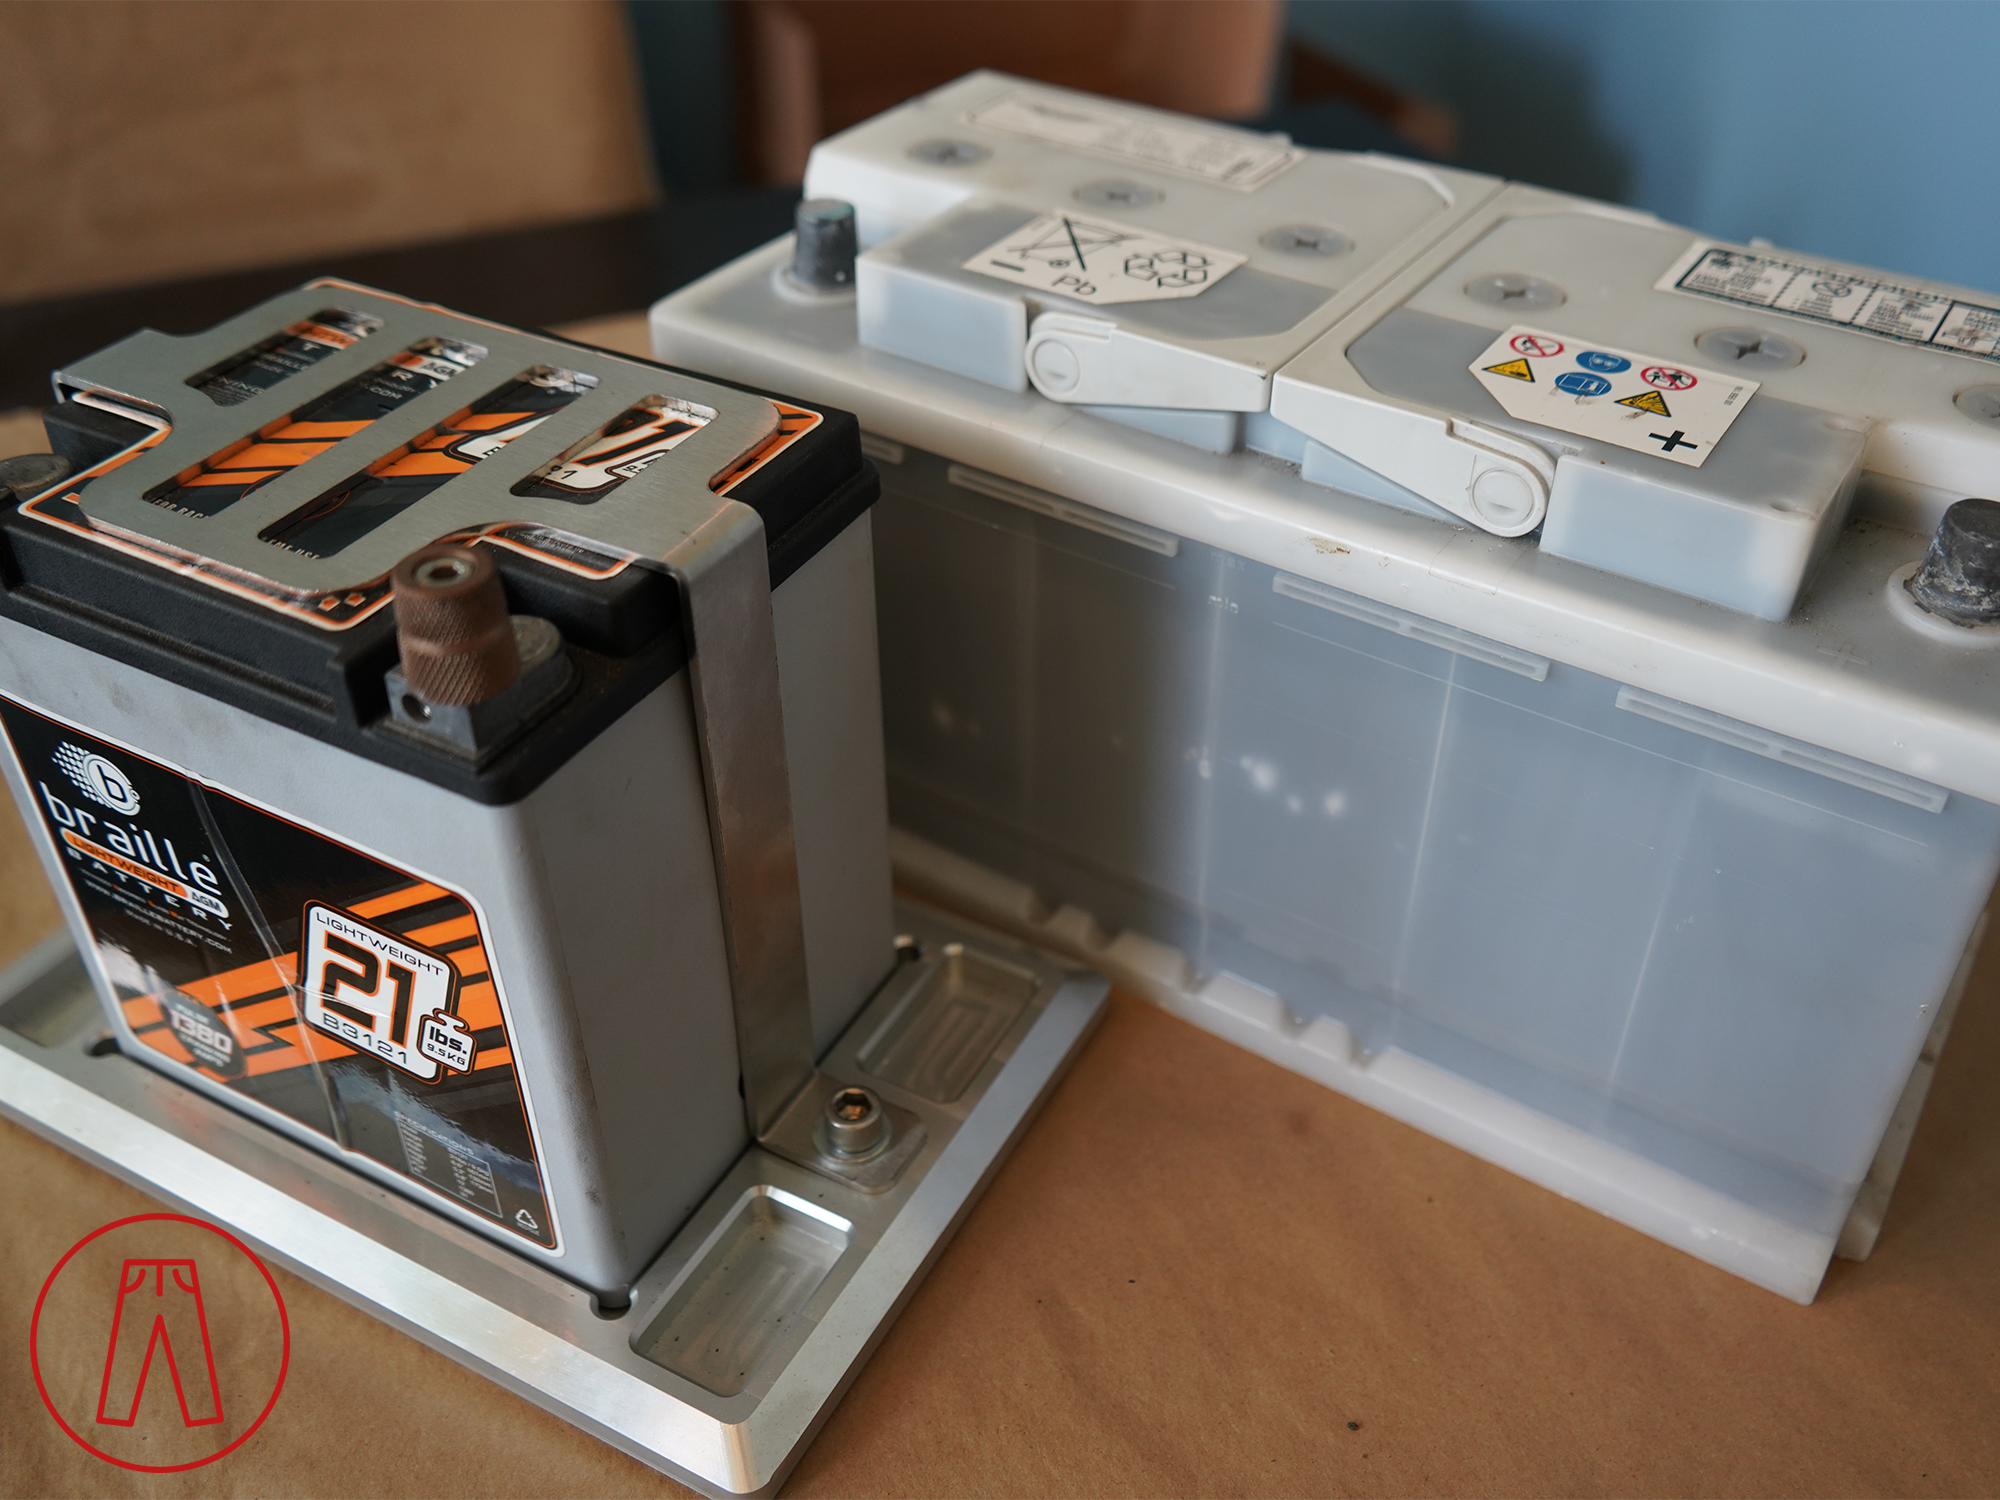
The original Redpants Lightweight Battery Kit vs the OEM Varta battery.
My lightweight battery kit dropped a substantial 13 kg (nearly 30 lbs) from my car while also making it drastically more easy to remove the battery. The kit used a Braille B3121 AGM battery - an improvement over the original battery’s standard lead-acid composition so the much-smaller size wasn’t much of an issue so long as I drove my car somewhat regularly. I think the longest it ever sat was when I was out of town and my car sat in the airport’s parking garage for a couple weeks. Even then, it started up just fine when I returned.
Between the Redpants Oil Catch Can and Lightweight Battery Kit, plus enough people asking where to buy normal maintenance items so they could do the jobs themselves using the growing number of DIY Guides I was posting on forums back then, it warranted starting up a small side business. That’s when I decided to create Redpants.
Cosmetics
I loved how understated the early V8 Vantage looked. There was nothing loud about the design. There were no garish features or accents. There was nothing that stood out on its own. Rather, the design was perfectly in harmony and it was absolutely stunning as it was.
Unfortunately, I can never leave well enough alone. The wheels were the first cosmetic change I’d made (aside from chopping down the silly roof antenna) and they altered the car in a way that forced me to continue making changes. Seriously, I was the victim here, and all I could do was keep down the path on which I’d already started. Woe is me or something.
My BC Forged RT50 wheels were simply too racy for the rest of the car’s elegant slant. To compensate for that, I decided to make some changes to spice things up a bit without going overboard. I knew I wanted to use carbon fiber but I’m a stickler for cohesive design and having just one thing (like a carbon fiber front lip) wouldn’t look right to me without there being more to tie everything together. So, I came up with a plan to add carbon fiber in tasteful ways that would be visible from every angle of the car.
Leading the way would be a carbon fiber front valance from VCollection. This one was much, much more aggressive than the flimsy plastic trim piece that Aston Martin originally put on the car - not only was the carbon fiber better looking than the dull plastic, but its protrusion from the front bumper demanded attention.
Also up front was a simple DIY job I decided to do, which was to convert my original 8-bar grille to 4 bars. While it was pretty controversial at the time, I stood by it (and still do), since I wasn’t the first to do it - Aston Martin Racing was. The original Vantage N24 race cars had 4-bar grilles, which was a quick [and free] way to drop nearly a kilo of weight off the car.
Along the sides were a set of carbon fiber side sills from Aston Martin Racing. These were first used on the Vantage N24 and then Vantage GT4 race cars, and much later were used on the road cars starting mid-2017 as part of the AMR Aero Pack. A fun factoid about them is that even though only the "rib” along the side is left as exposed carbon fiber, the entire side sill itself is fully carbon fiber. Despite being carbon fiber, they’re actually heavier than the original side sills - the construction is incredibly solid (more on that later…) while the original plastic ones are rather flimsy.
The V12 Vantage would later adapt the design, simplify it by removing the contour around the exposed rib, and save a ton of money by not using carbon fiber. A lot of people think the Aston Martin Racing side sills are based on the V12 Vantage ones, but it’s actually the other way around - the racing parts came first. I don’t think I was the first person to put these on a street car as I do remember seeing another car with them before I did mine, but that might have actually been a Vantage GT4.
As much as I love these side sills (and, I really do love them), they’re actually a bit of a pain to live with because they make lifting the car much more difficult. If it isn’t done just right, the lift can crack the side sills because the rigid carbon fiber doesn’t flex like the usual plastic ones. It’s a non-issue for race cars because they have built-in air jacks, and I’m honestly not sure how the AMR Aero Pack handles it (maybe they use a variation of these rather than the actual racing parts?). I have my tricks for dealing with it but it can still be annoying and sometimes a bit scary to lift the car.
The front valance and rear diffuser of the Vantage N420 were made of carbon fiber and can be bought as a package together. Since I was already planning to use one from VCollection, I sold the very subtle front lip to a buddy of mine and installed the rear diffuser on my car to round out the look.
Addressing the Achilles Heel
I’ve long said that the Achilles’ heel of the V8 Vantage is its transmission. The Sportshift is okay - that is, it isn’t as bad as a lot of people make it out to be (they’re usually treating it like an automatic transmission instead of the manual transmission that it is). The manual is great in most situations, but both it and the Sportshift share the same fatal flaw: the original single-plate clutch. The result of bean counters cutting costs, the original clutch for the V8 Vantage was a single-plate unit that was too fragile and too expensive. With reverse gear being unnecessarily tall (it’s closer to 2nd gear than it is to 1st gear), reversing uphill is basically a death sentence for the clutch. I had an upgraded, heavier-duty clutch disc from RSC Tuning but, sure enough, mine did eventually die.
The no hesitation recommendation I make to anyone asking about clutch replacements is to upgrade to a twin-plate clutch when your original one kicks the bucket, and that’s exactly what I did myself. When my original clutch needed to be replaced, I got the VelocityAP Clutch Package for its drastically improved durability and resilience, the improved throttle response provided by the more centralized mass of the twin-plate clutch and lighter weight of the flywheel, and because I’d been signed up as a VelocityAP dealer and wanted to show off their products. Hey, why would I sell something I wouldn’t use myself?
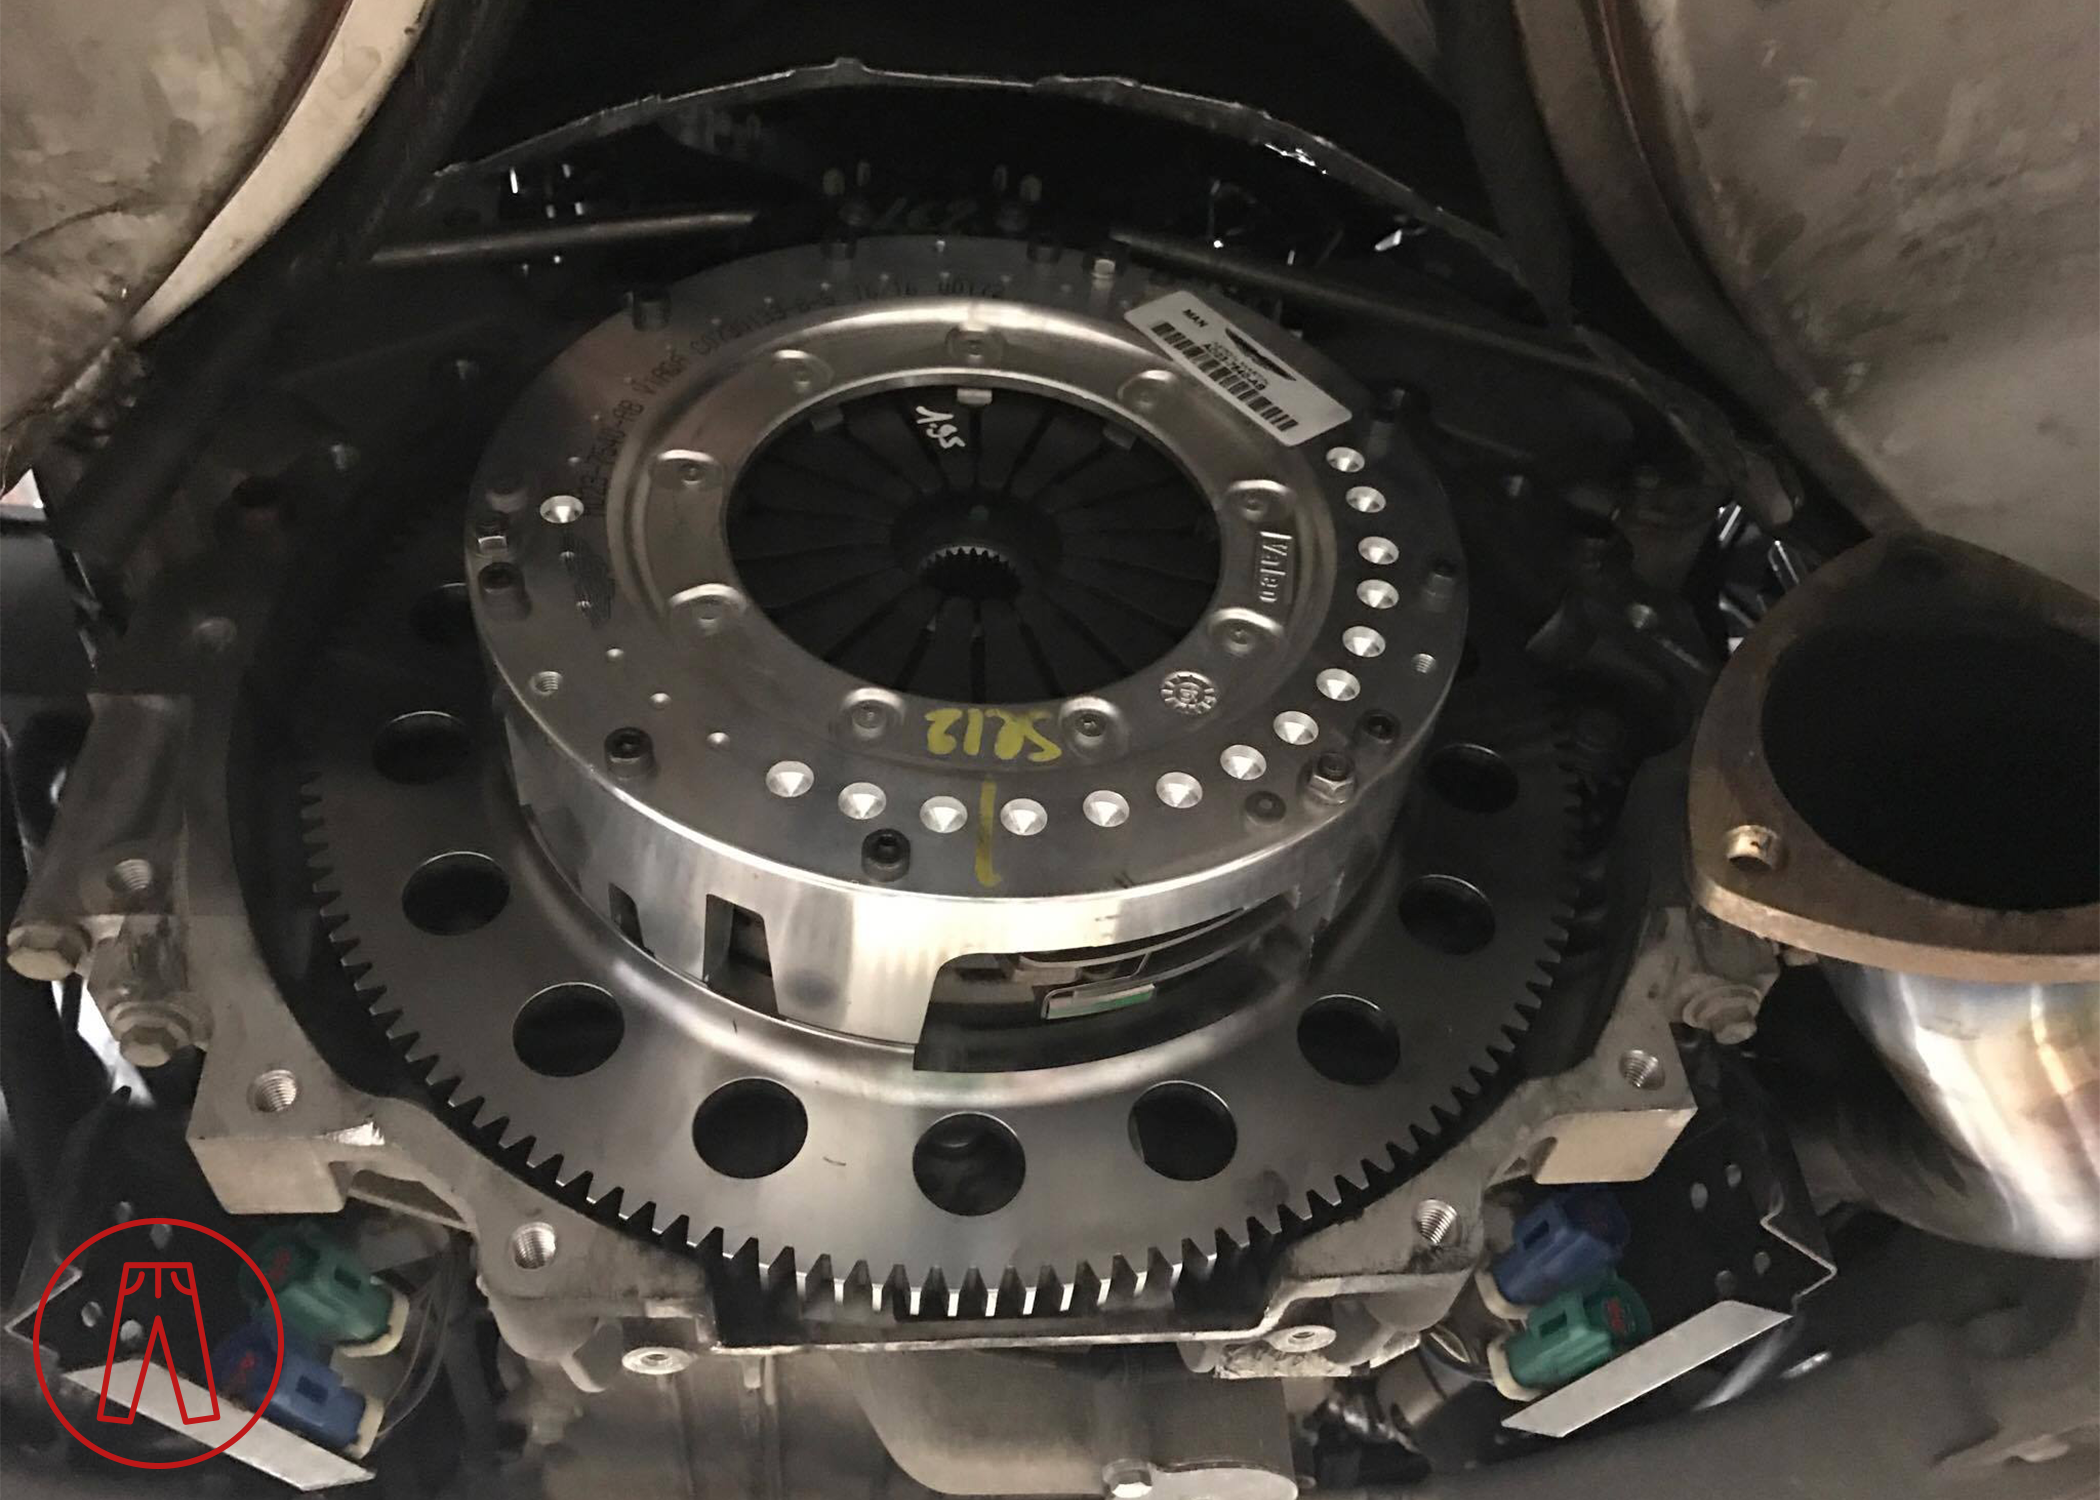
The funny thing is, I’d actually thought something was wrong when I first test-drove my car after the clutch was installed. I actually asked my mechanic if the clutch line needed to be flushed because the clutch pedal felt so light. Turns out, no, it’s supposed to be that way. I honestly had to get used to it because it felt too light and I was so used to how stiff the pedal had been with the original clutch. (Sometime later I bought a second V8 Vantage and would often drive them back-to-back, and it was shocking how much the red one felt like an industrial tractor with its original clutch compared to this car!)
It’s also a lifesaver to have the light clutch pedal if you have leg or knee issues. I’ve got a busted knee from my time in the Marines and have to be extremely careful not to make the injuries flare up. I’d be in excruciating pain after long drives with the original clutch, but that’s not an issue at all anymore. Hell, for that alone I’d say the clutch upgrade is worth it!
More Than Just Looks
I can appreciate a pretty car, but mine was starting to look too fast for how sluggish it really was. A standard V8 Vantage is no slouch, but it isn’t exactly quick, either. It already had some go-fast bits on it, like the high-flow cats, muffler, and intake mods, but there was still plenty more to do. Uh, kinda.
Aston Martin doesn’t have much in the way of aftermarket upgrades due to how small the market is for parts, and there were far fewer back then than there are now. There just aren’t enough customers for big companies to invest in developing products for these cars, which is why there are just a few specialists that focus on them and little else out there. When I wanted to get more power, I already had half of what was available already on my car: the Aston Martin Power Pack, a set of high-flow cats, and a freer-flowing (and much lighter) muffler. With the twin-plate clutch and lightweight flywheel freeing up some power by reducing drivetrain loss, there were only a couple things left: an engine tune and a set of headers.
VelocityAP’s engine tune was easy to do via their handheld module, and it increased power across the rev range while also improving throttle response. Supposedly it also improves fuel efficiency, but… le shrug. I care more about how well the engine revs up now, especially in conjunction with the clutch and flywheel.
I’d done a couple track days at this point and there were a couple spots were I’d be a whole lot happier with just a tiny bit more RPMs available to me, so I asked them to increase redline to a cool 7700 RPM. I’m sure a few of you will say that’s too dangerous, and maybe it is - but redline only matters if you actually get to it. I could set the redline at 25,000 RPM and it wouldn’t matter whatsoever if the engine never revved above 4,000.
Lastly for this “stage” was the set of equal-length headers from VelocityAP. Better flow, a smoother and more exotic exhaust note, and much lighter than the factory exhaust manifolds all made these worthwhile, despite the tough installation.
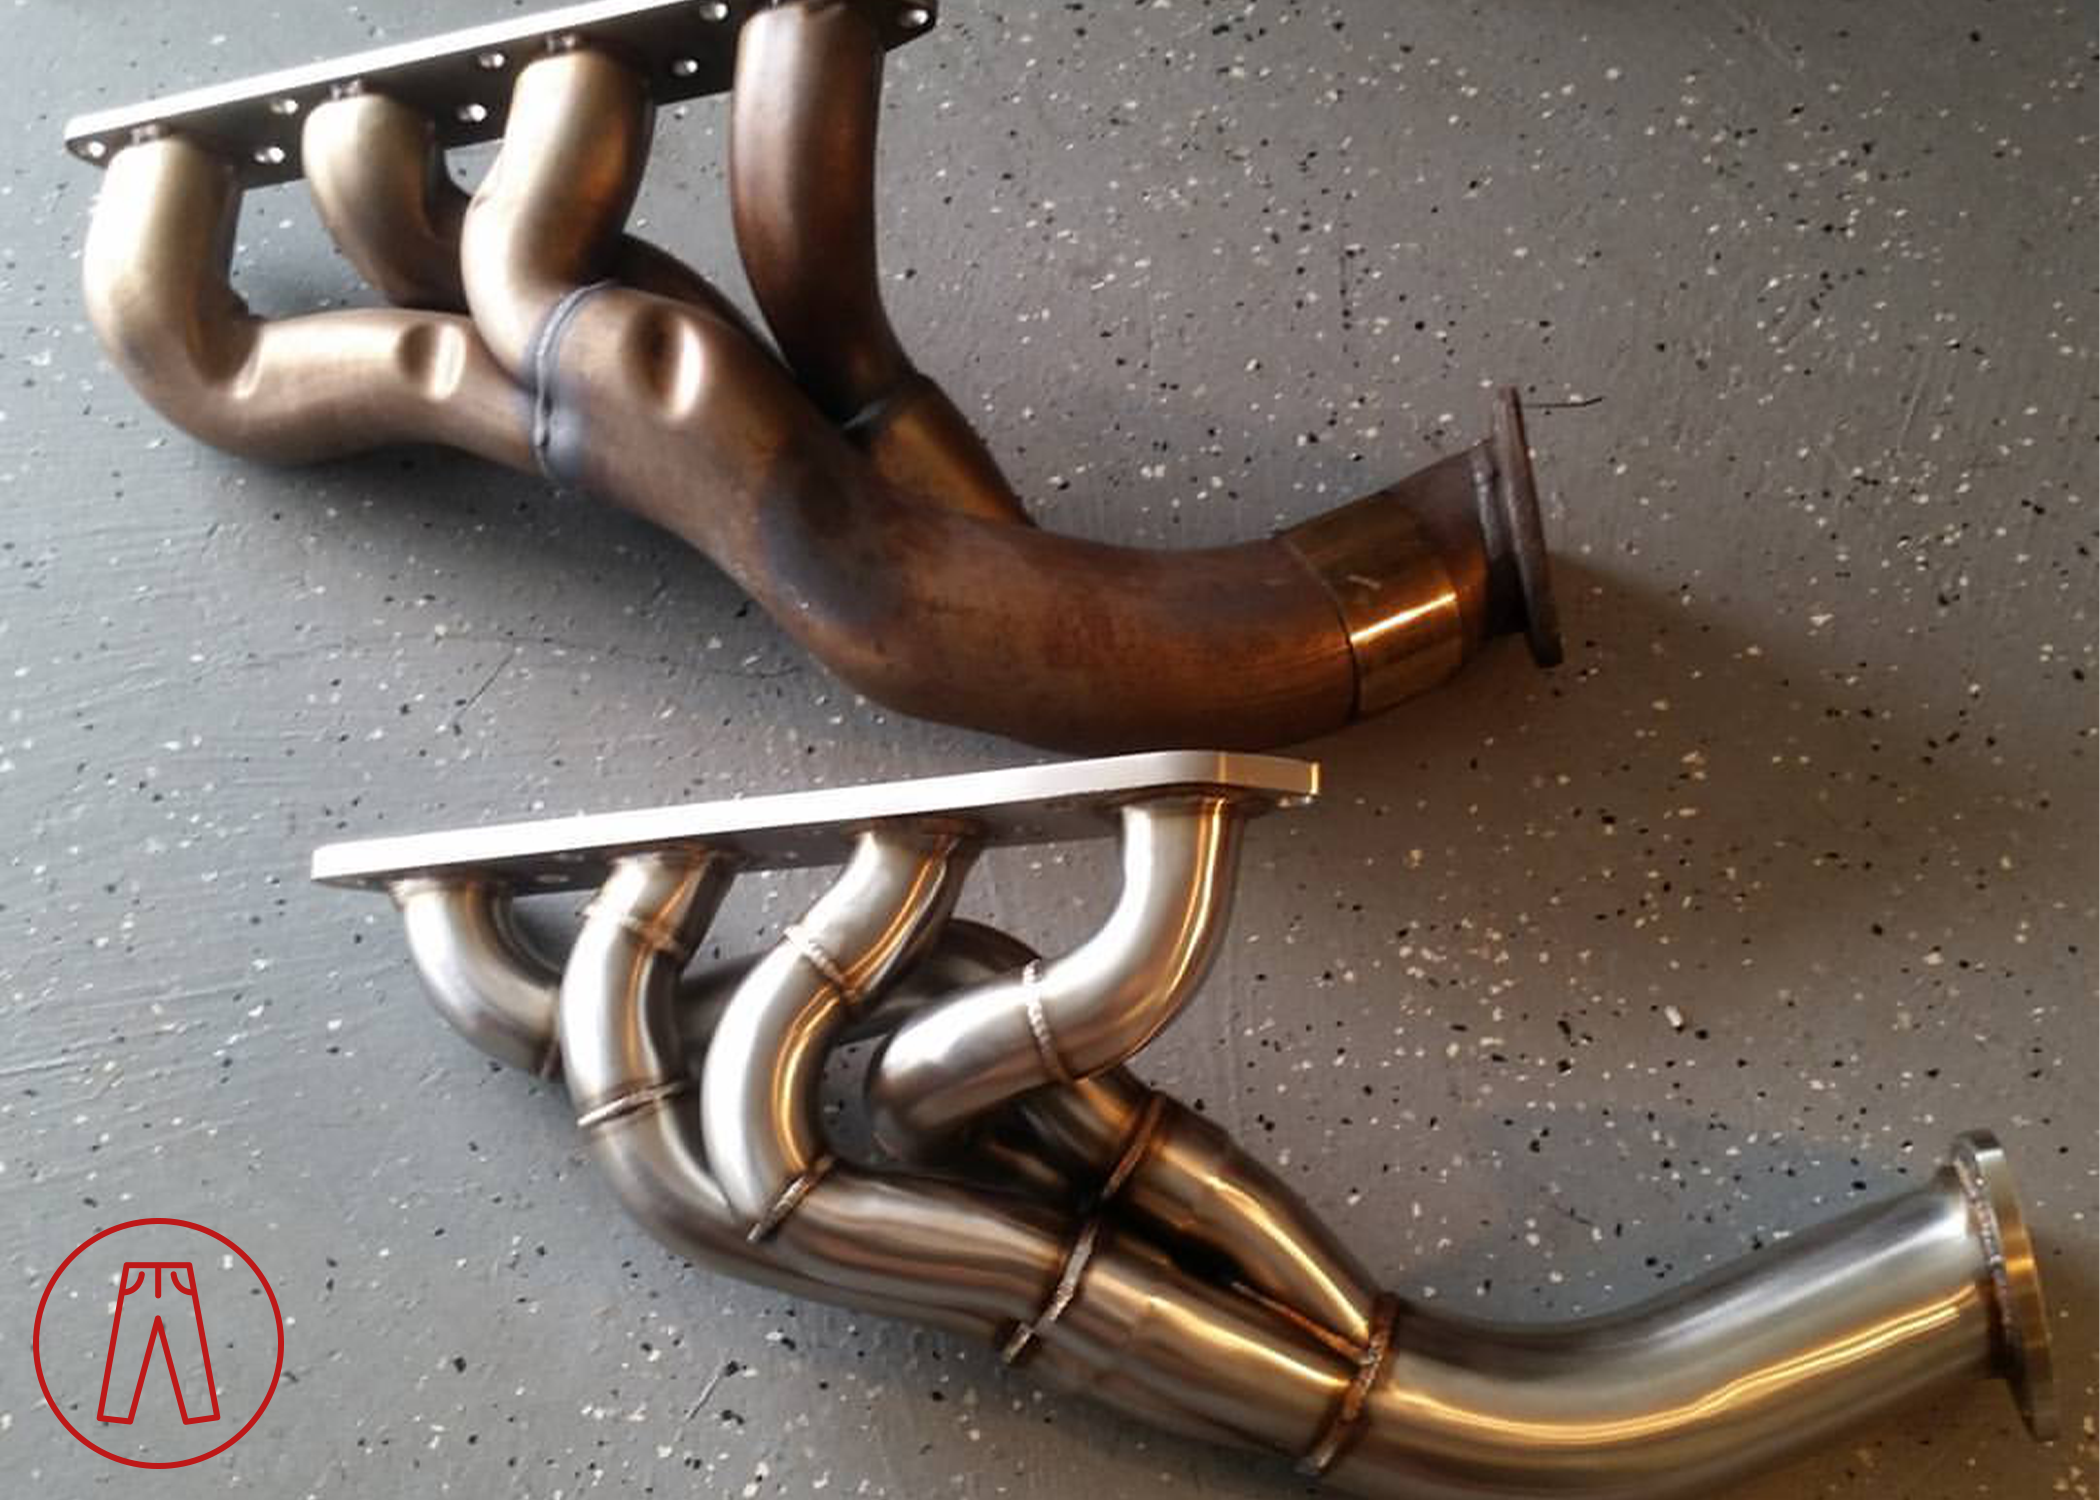
OEM (top) vs VelocityAP (bottom) left-hand exhaust manifold comparison.
While installing these, I also decided to eliminate the EGR. The EGR recirculation pipe attaches to the right-hand exhaust manifold, so I used plug where the EGR valve was and a blanking plate to block off the recirculation port on the exhaust manifold. The engine tune was adjusted to accommodate this, so I didn’t have any issues.
Cozy on the Inside
Believe it or not, inside the car is where you spend most of your time while driving. That makes it important to ensure you’re as comfortable as can be and happy with your surroundings. I absolutely was just that, but… you know… I can’t leave well enough alone, can I?
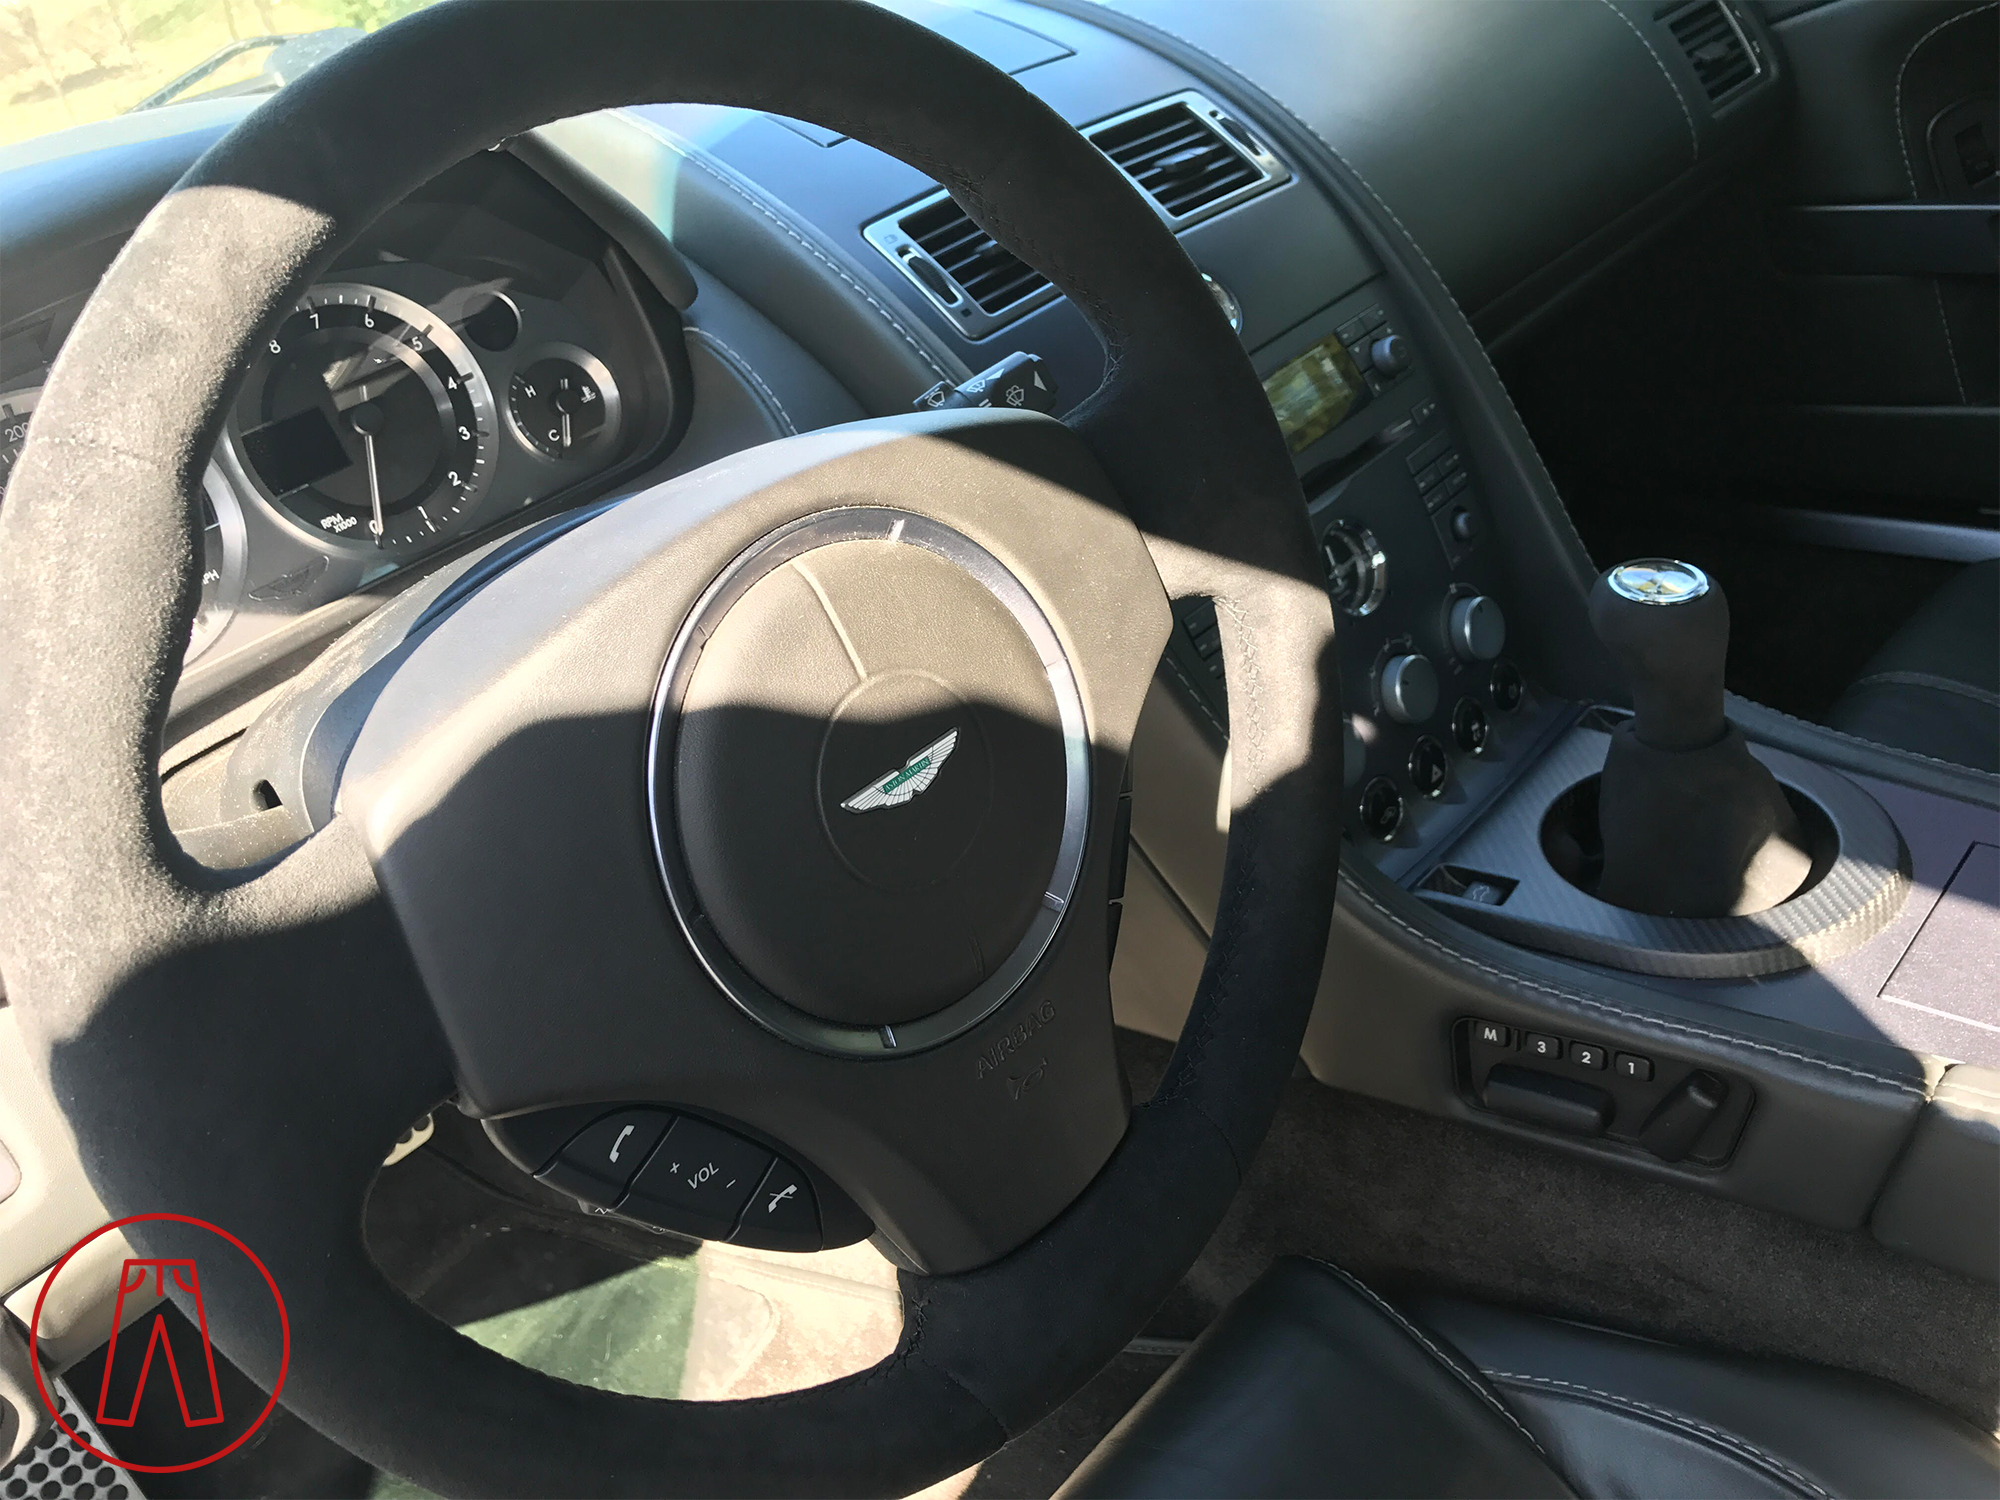
One of the things in the manual V8 Vantage that sticks out like a sore thumb is the gear shift surround trim piece. This chonky boy is made of milled aluminum and doesn’t match anything else in the cabin (funny enough, it matches the aluminum DBS shift knob perfectly). As a fan of carbon fiber, I went ahead and swapped out the original aluminum trim piece for the carbon fiber one that Aston Martin also has available.
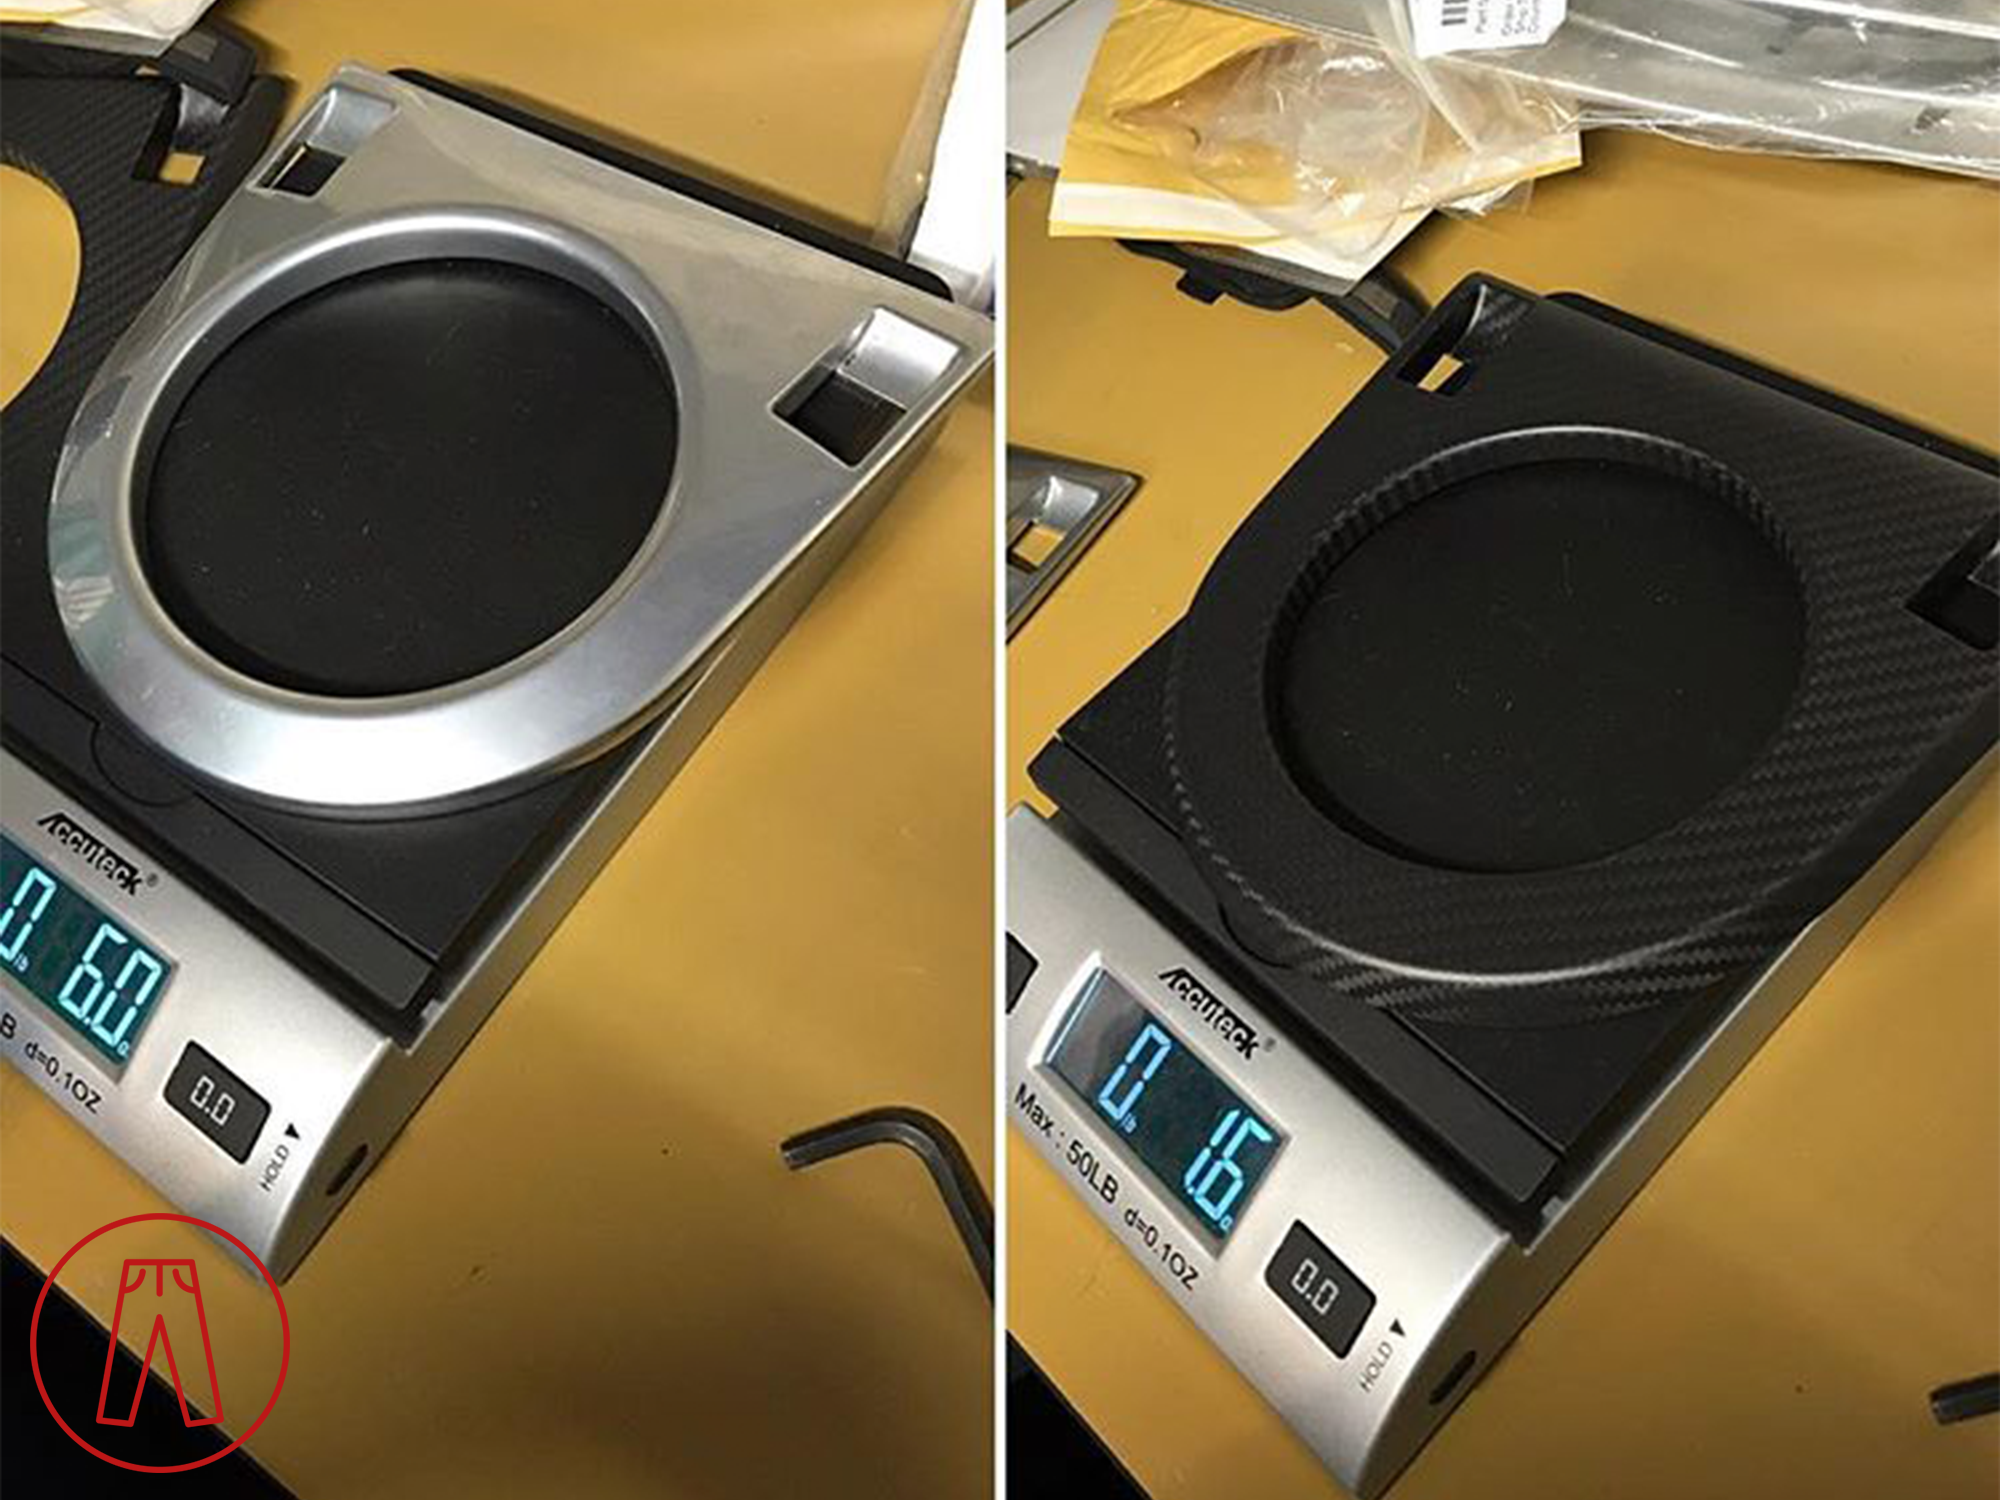
Nice weight savings going from the original milled aluminum shifter trim to the carbon fiber one.
At the same time, I also replaced the standard leather shift knob and steering wheel with Alcantara ones, these also being from Aston Martin. I love the way these look and feel when they’re clean, but that’s kind of the issue… they’re incredibly difficult to keep clean! Unless you plan to maintain them as needed, it’s hard to recommend them even though I quite like them myself.
The End of the First Stage
There were other little things I’d done along the way during that time. For example, I’d upgraded my brake fluid to Motul RBF 600 (a must for track days), and I replaced my fender liners, taking off the sound insulation while installing the new ones. That saved me a half a kilo of weight across all four insulation pads. Fun stuff.
At this point, I’d improved almost every aspect of my V8 Vantage in some way. The wheels and tires improved handling and even ride comfort (the OEM Bridgestones are trash). I’d increased its performance and given it a sportier look to match. And, altogether, I dropped over 60 kg (over 130 lbs). All in all, I was pretty happy with it.
And then…
Round Two
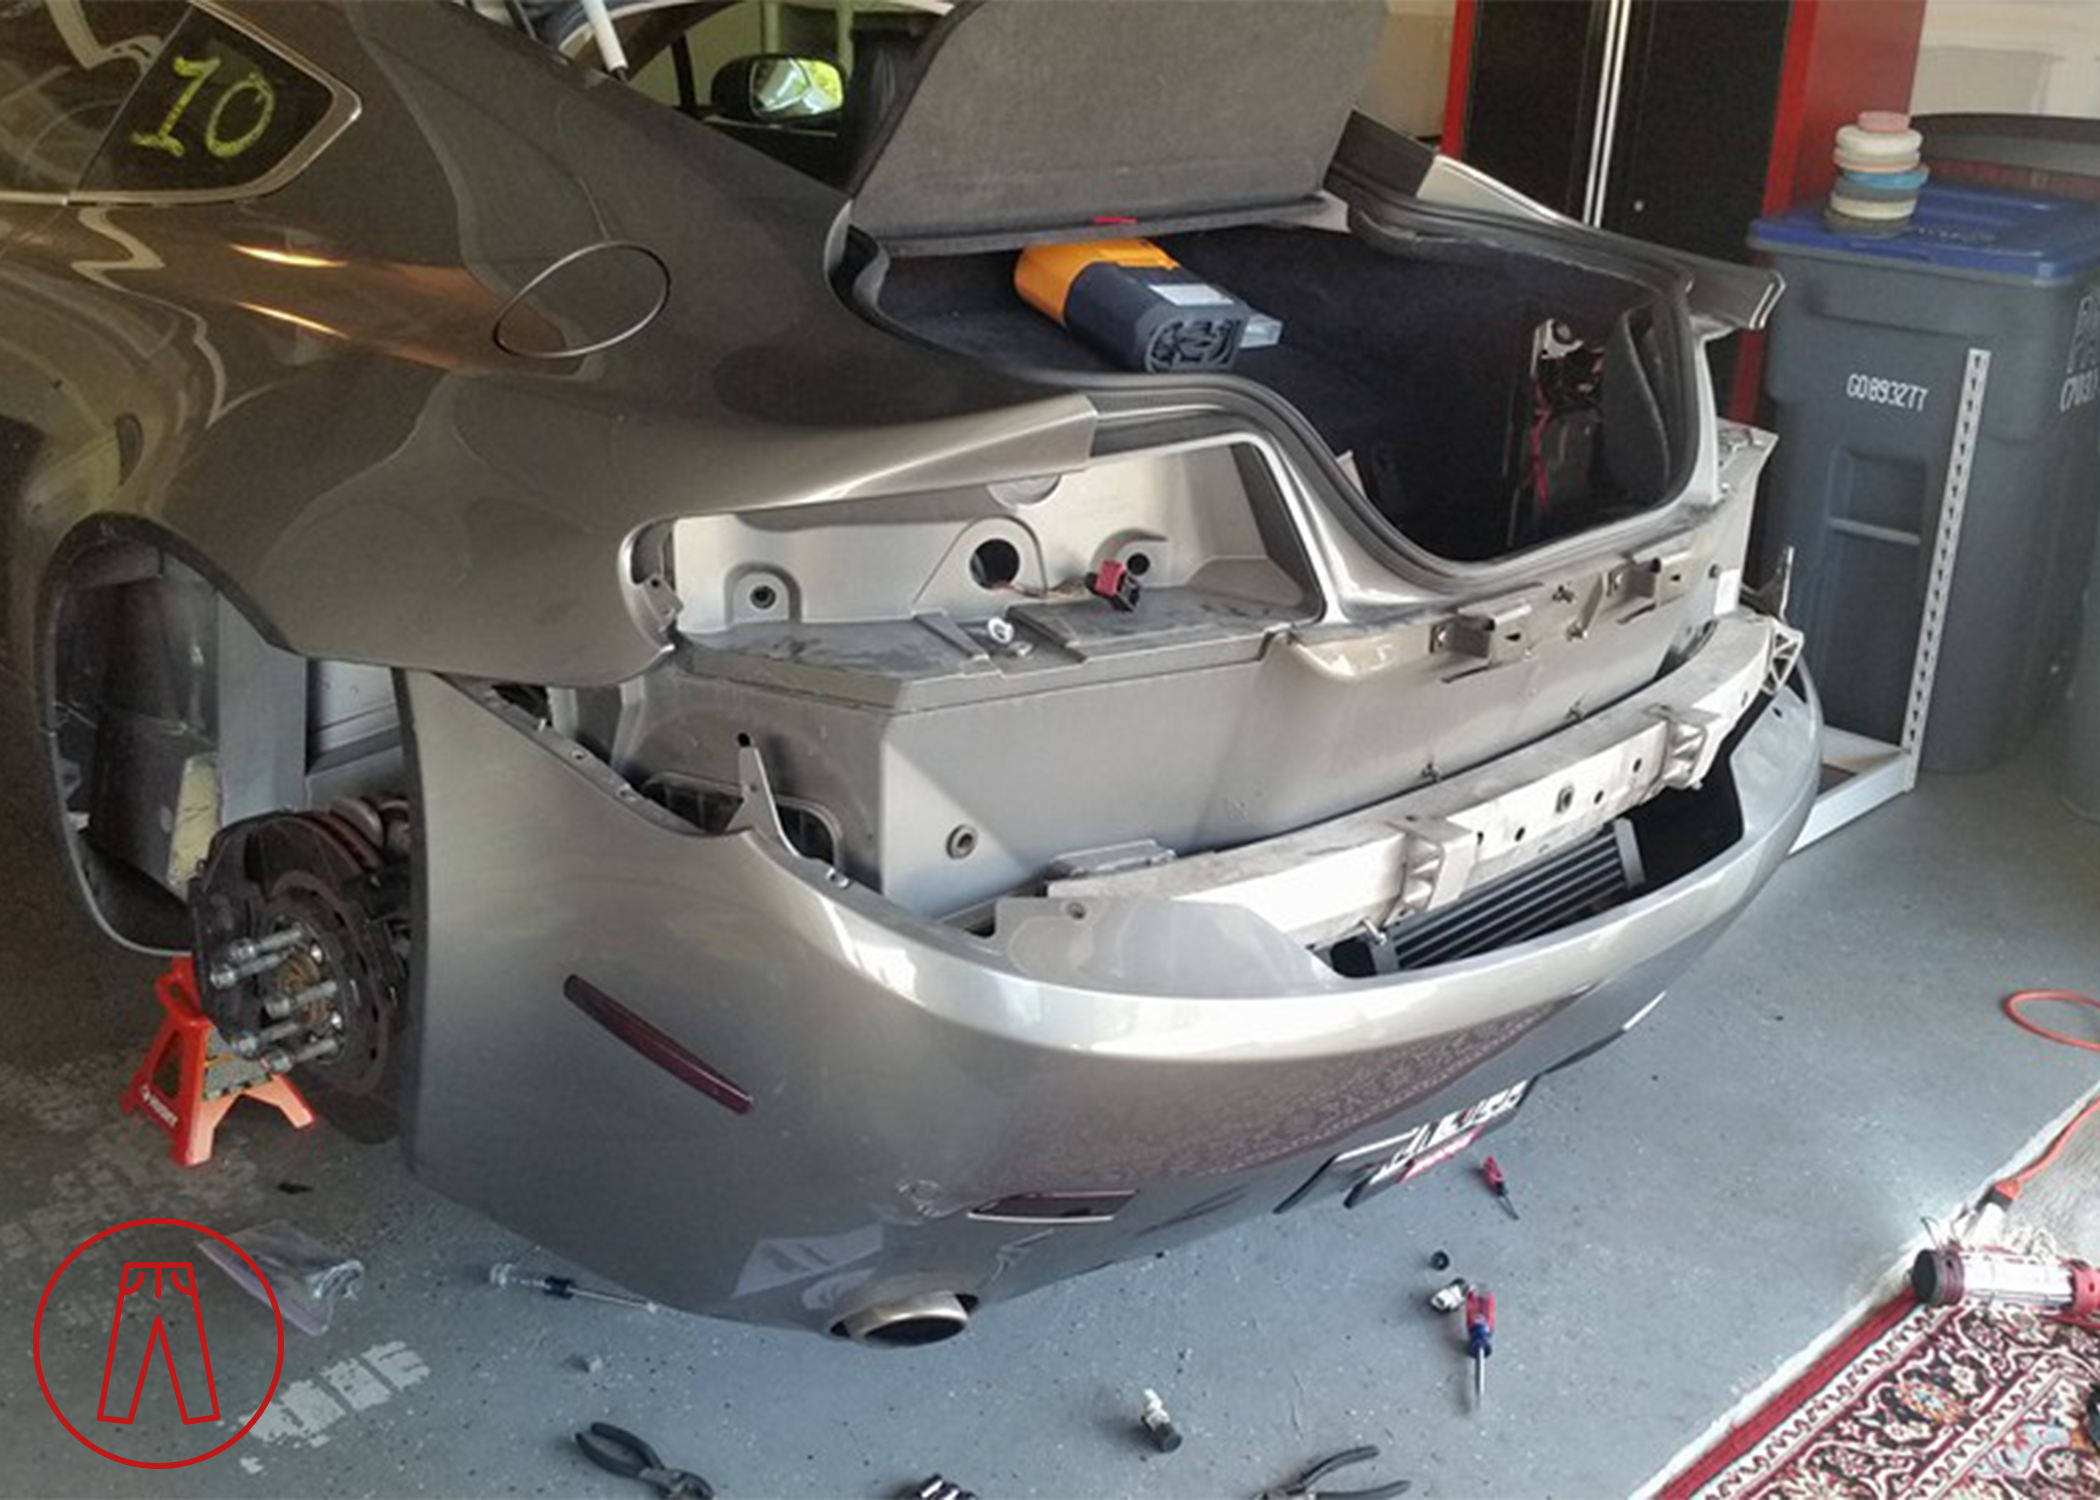
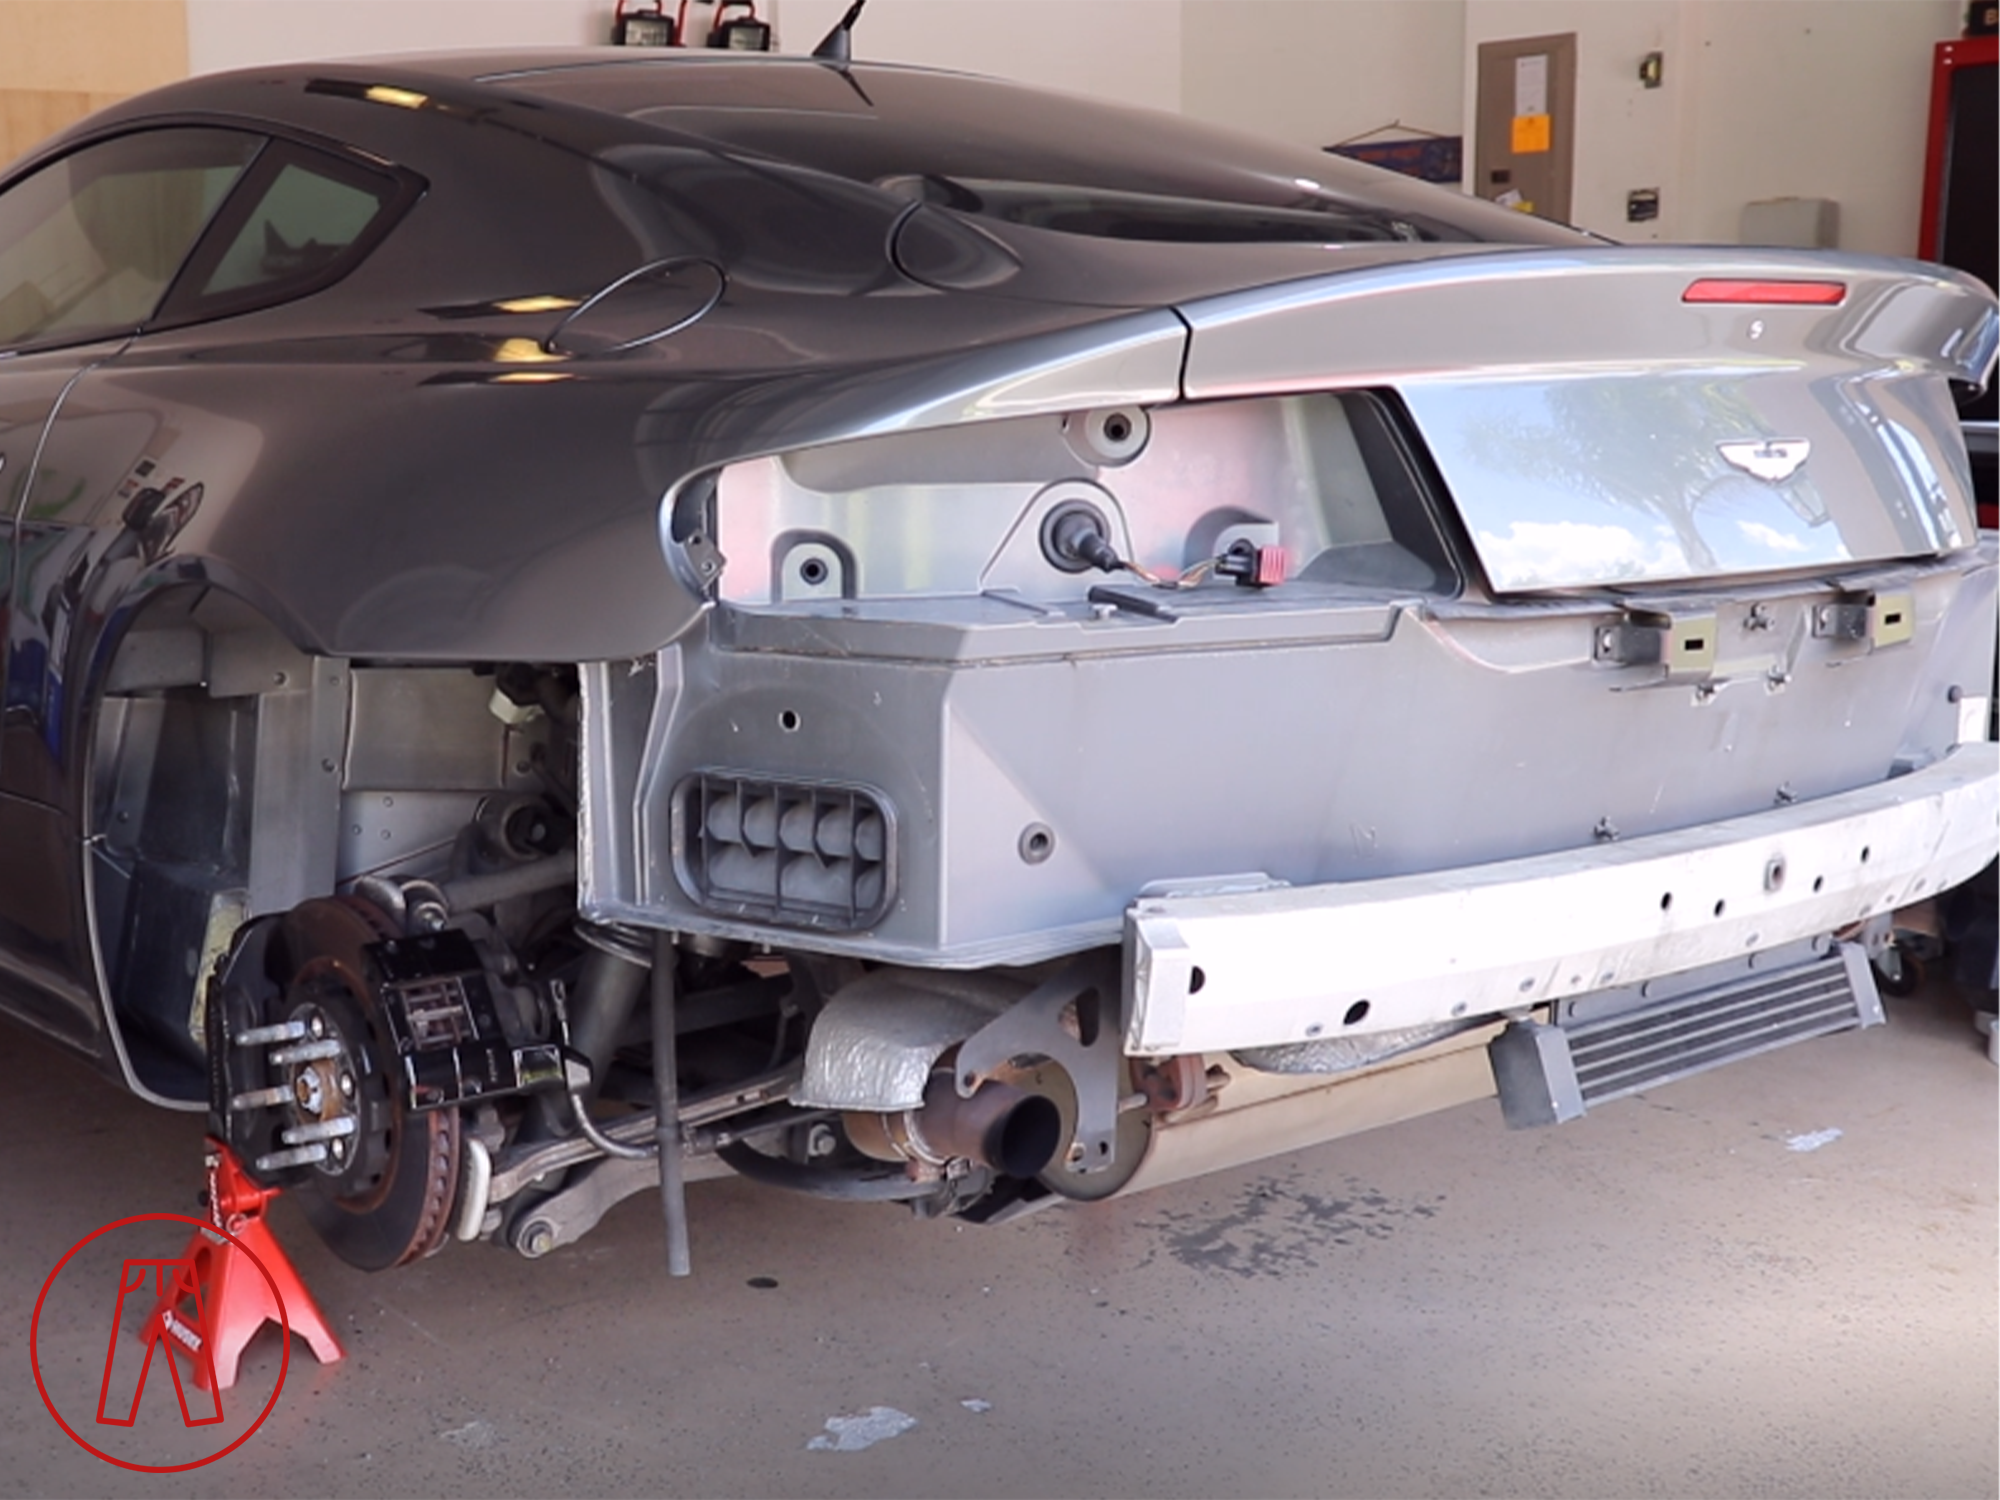
I was minding my own business during a track day at Summit Point when a tire wall jumped out and assaulted me for no reason whatsoever. The unprovoked attack resulted in much of the passenger side of my car needing to be replaced. I just so happened to be recording when the incident took place and I put the video on Youtube. Here’s a picture showing the aftermath.
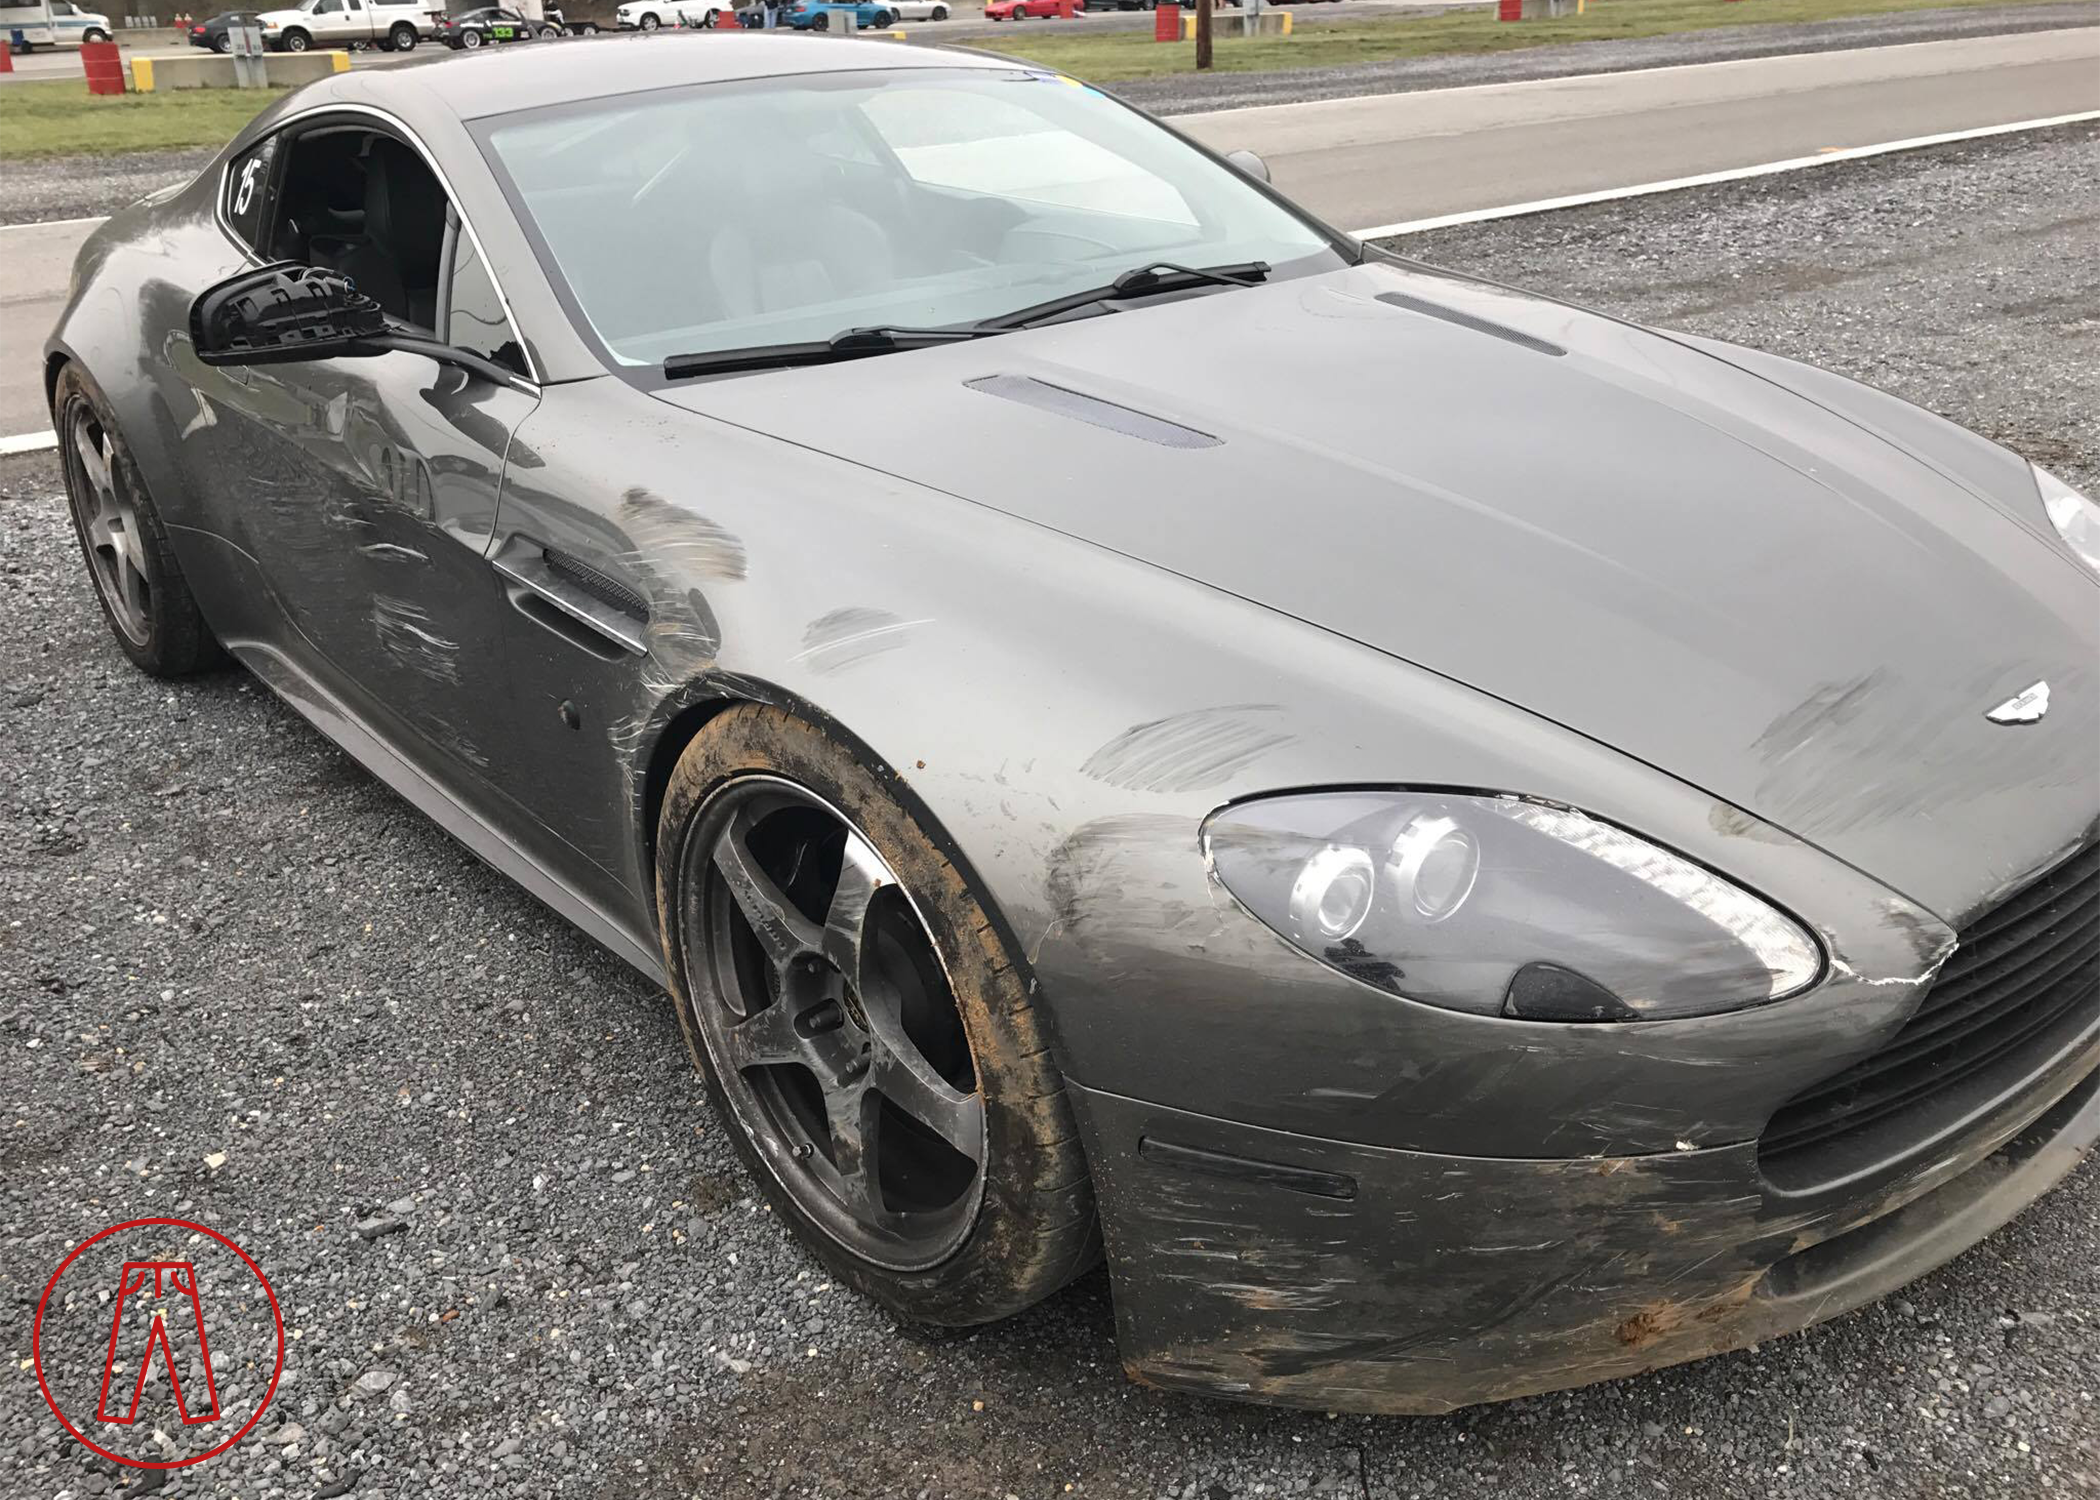
Simply put, I reacted too slowly coming out of a corner on cold tires - I should have straightened out the steering earlier and when I finally did, the rear end came around. Lesson learned, moving on.
The circumstances beyond that are a little funny, though. Remember how I talked about a 4-bar grille before? Well, that isn’t the same grille in the picture - I had an 8-bar grille on my car when I crashed. The reason is because my 4-bar grille had been destroyed just a week prior.
Long story short, my girlfriend at the time had driven my car to work one day. She parked, got out, and walked away… then heard a crash. Turns out, she’d forgotten to put the handbrake on (or didn’t put it on all the way) when she parked and my car rolled into a pole. I got an repair estimate, filed an insurance claim, and the money was deposited into my account on Tuesday. My already-booked track day was on Saturday.
“I don’t need track insurance, I’ve already got an insurance payout.”
I borrowed another grille to replace my busted one, turned a blind eye to the knocked-in hood, and pretended everything was fine. And then… everything wasn’t fine. At least I already had a chunk of change to do the repairs, right?
Race Car Parts
It just so happened that I had a “dream list” of parts I wanted to get, as many of us do, but it had only been fantasy since I couldn’t justify the cost and I didn’t actually need them. Apparently I did in fact need them, and it was decreed to be so by the honourable Lord Wall of Tires.
A popular way to update the look of an early V8 Vantage is to get the newer front and rear bumpers that Aston Martin started using in 2011, made all the easier as Aston Martin sell a conversion kit to do so. But honestly, that never really interested me. I wanted my car to be unique, and putting on the newer bumpers wouldn’t do anything other than make it look like any other facelift V8 Vantage. Instead, I got creative.
My original plan was to buy the hood from a Vantage GT12, which I think looks fantastic. My original plan was not implemented when I found out that the GT12 bonnet costs as much as a car. My backup plan was the hood of a V12 Vantage, and that’s what I went with.
I did change one thing, though. I’m not a huge fan of the hood vent louvers - they’ve always seemed a bit fussy to me (not to mention being really expensive). So I went with the mesh vent inserts that were introduced on the V12 Vantage S manual (the “dogleg”). Not only are these much less expensive, but I think they look better, too. To me, they’re just the right balance of being more aggressively styled without looking like they’re trying to hard.

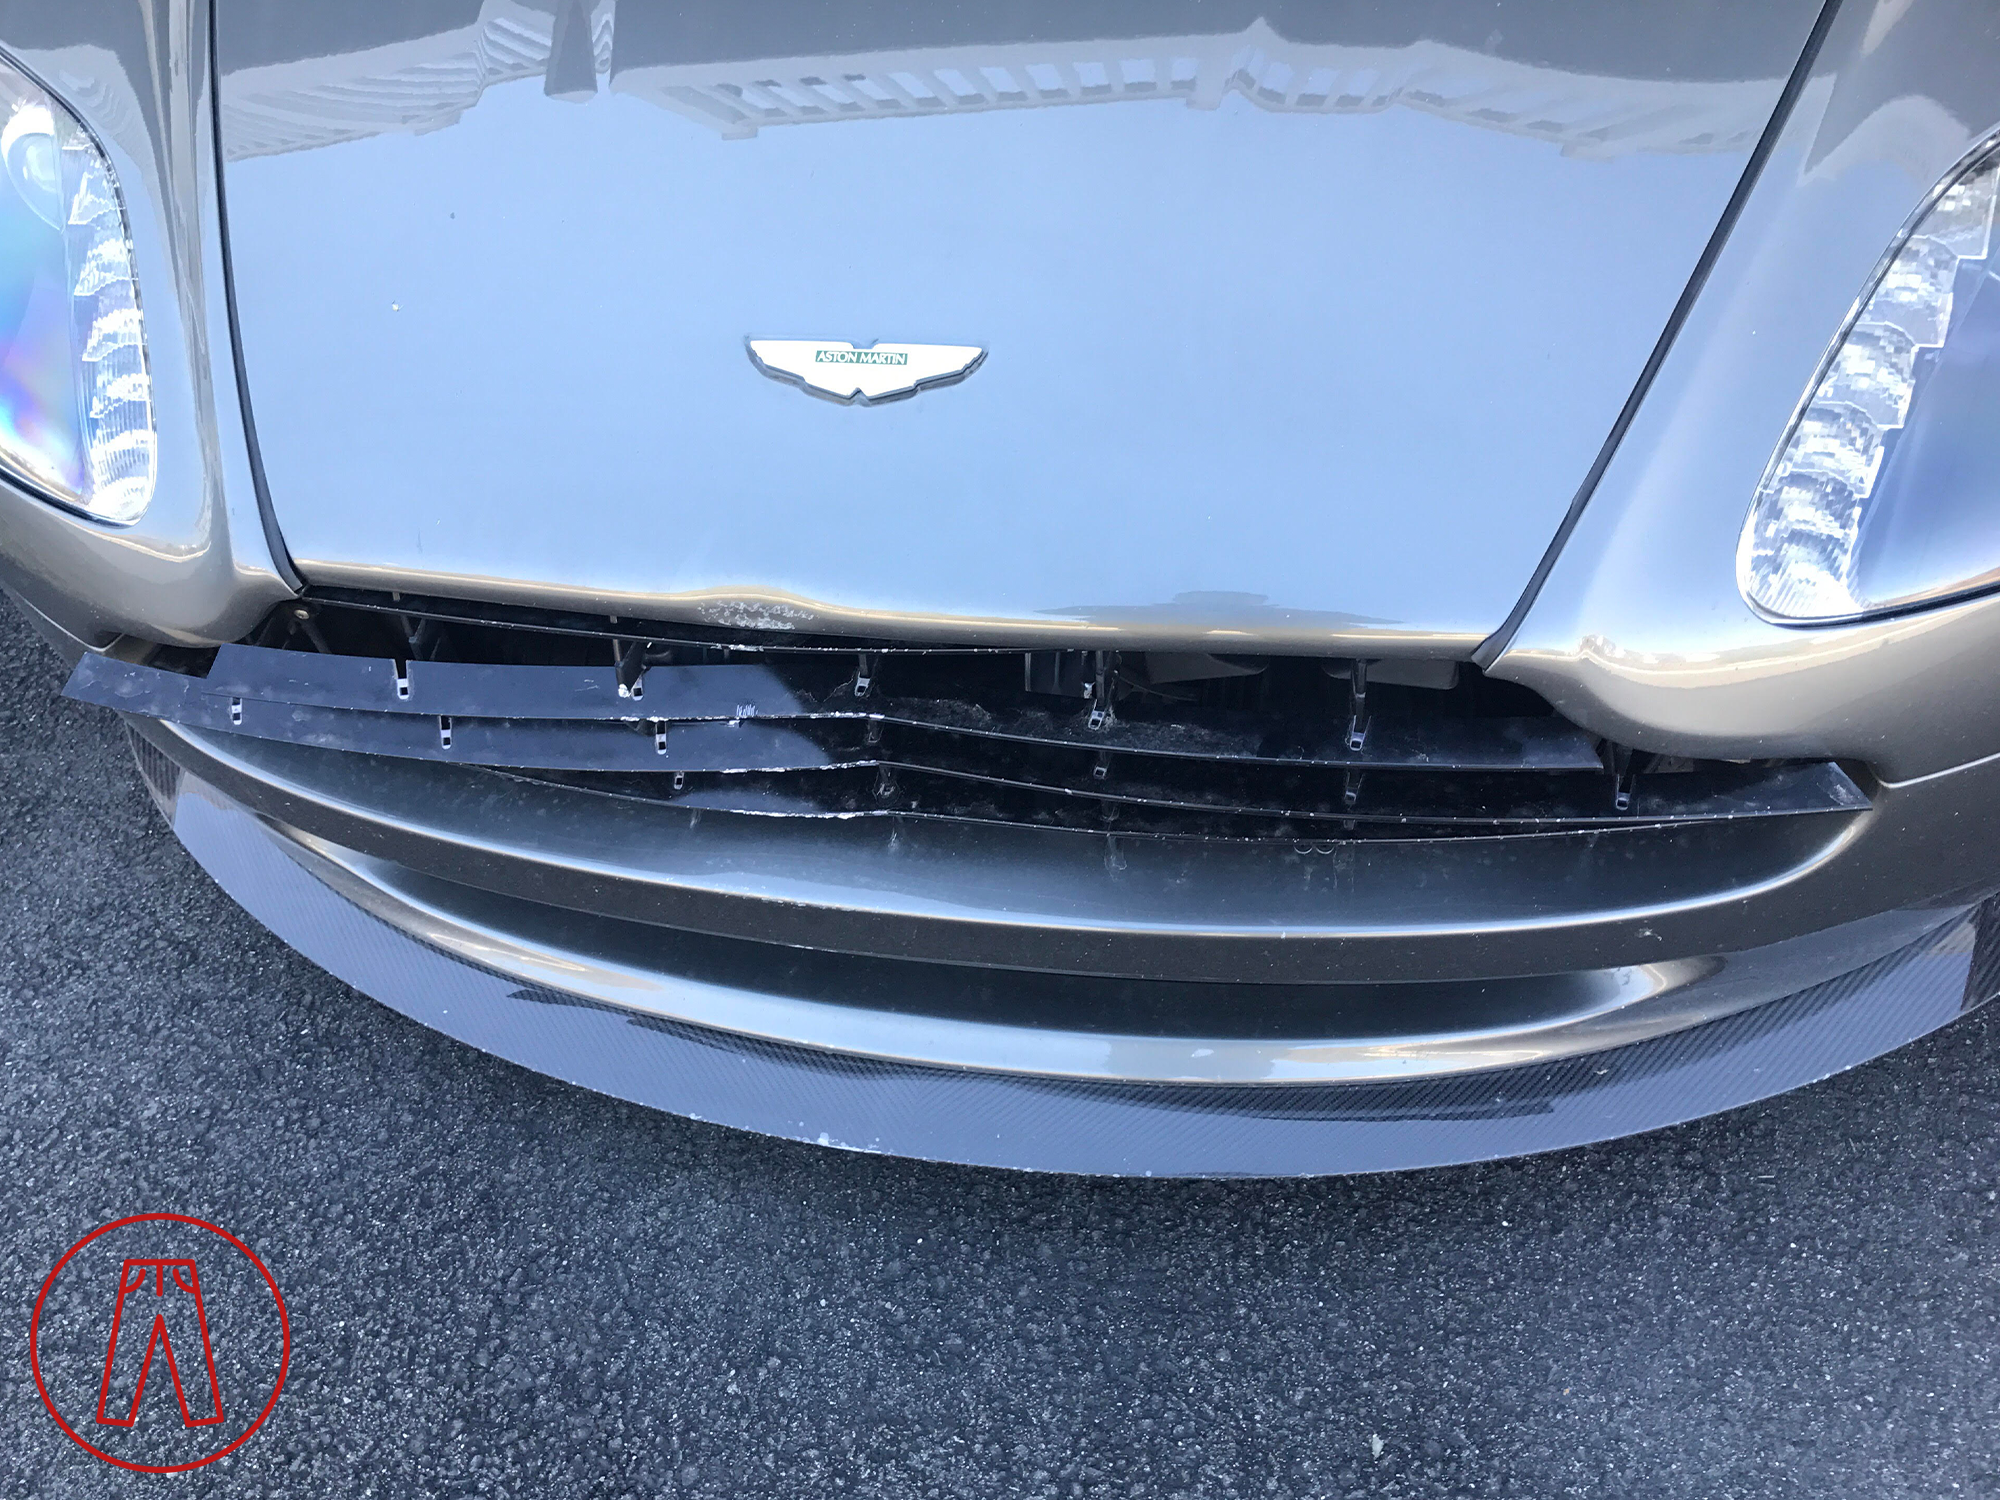
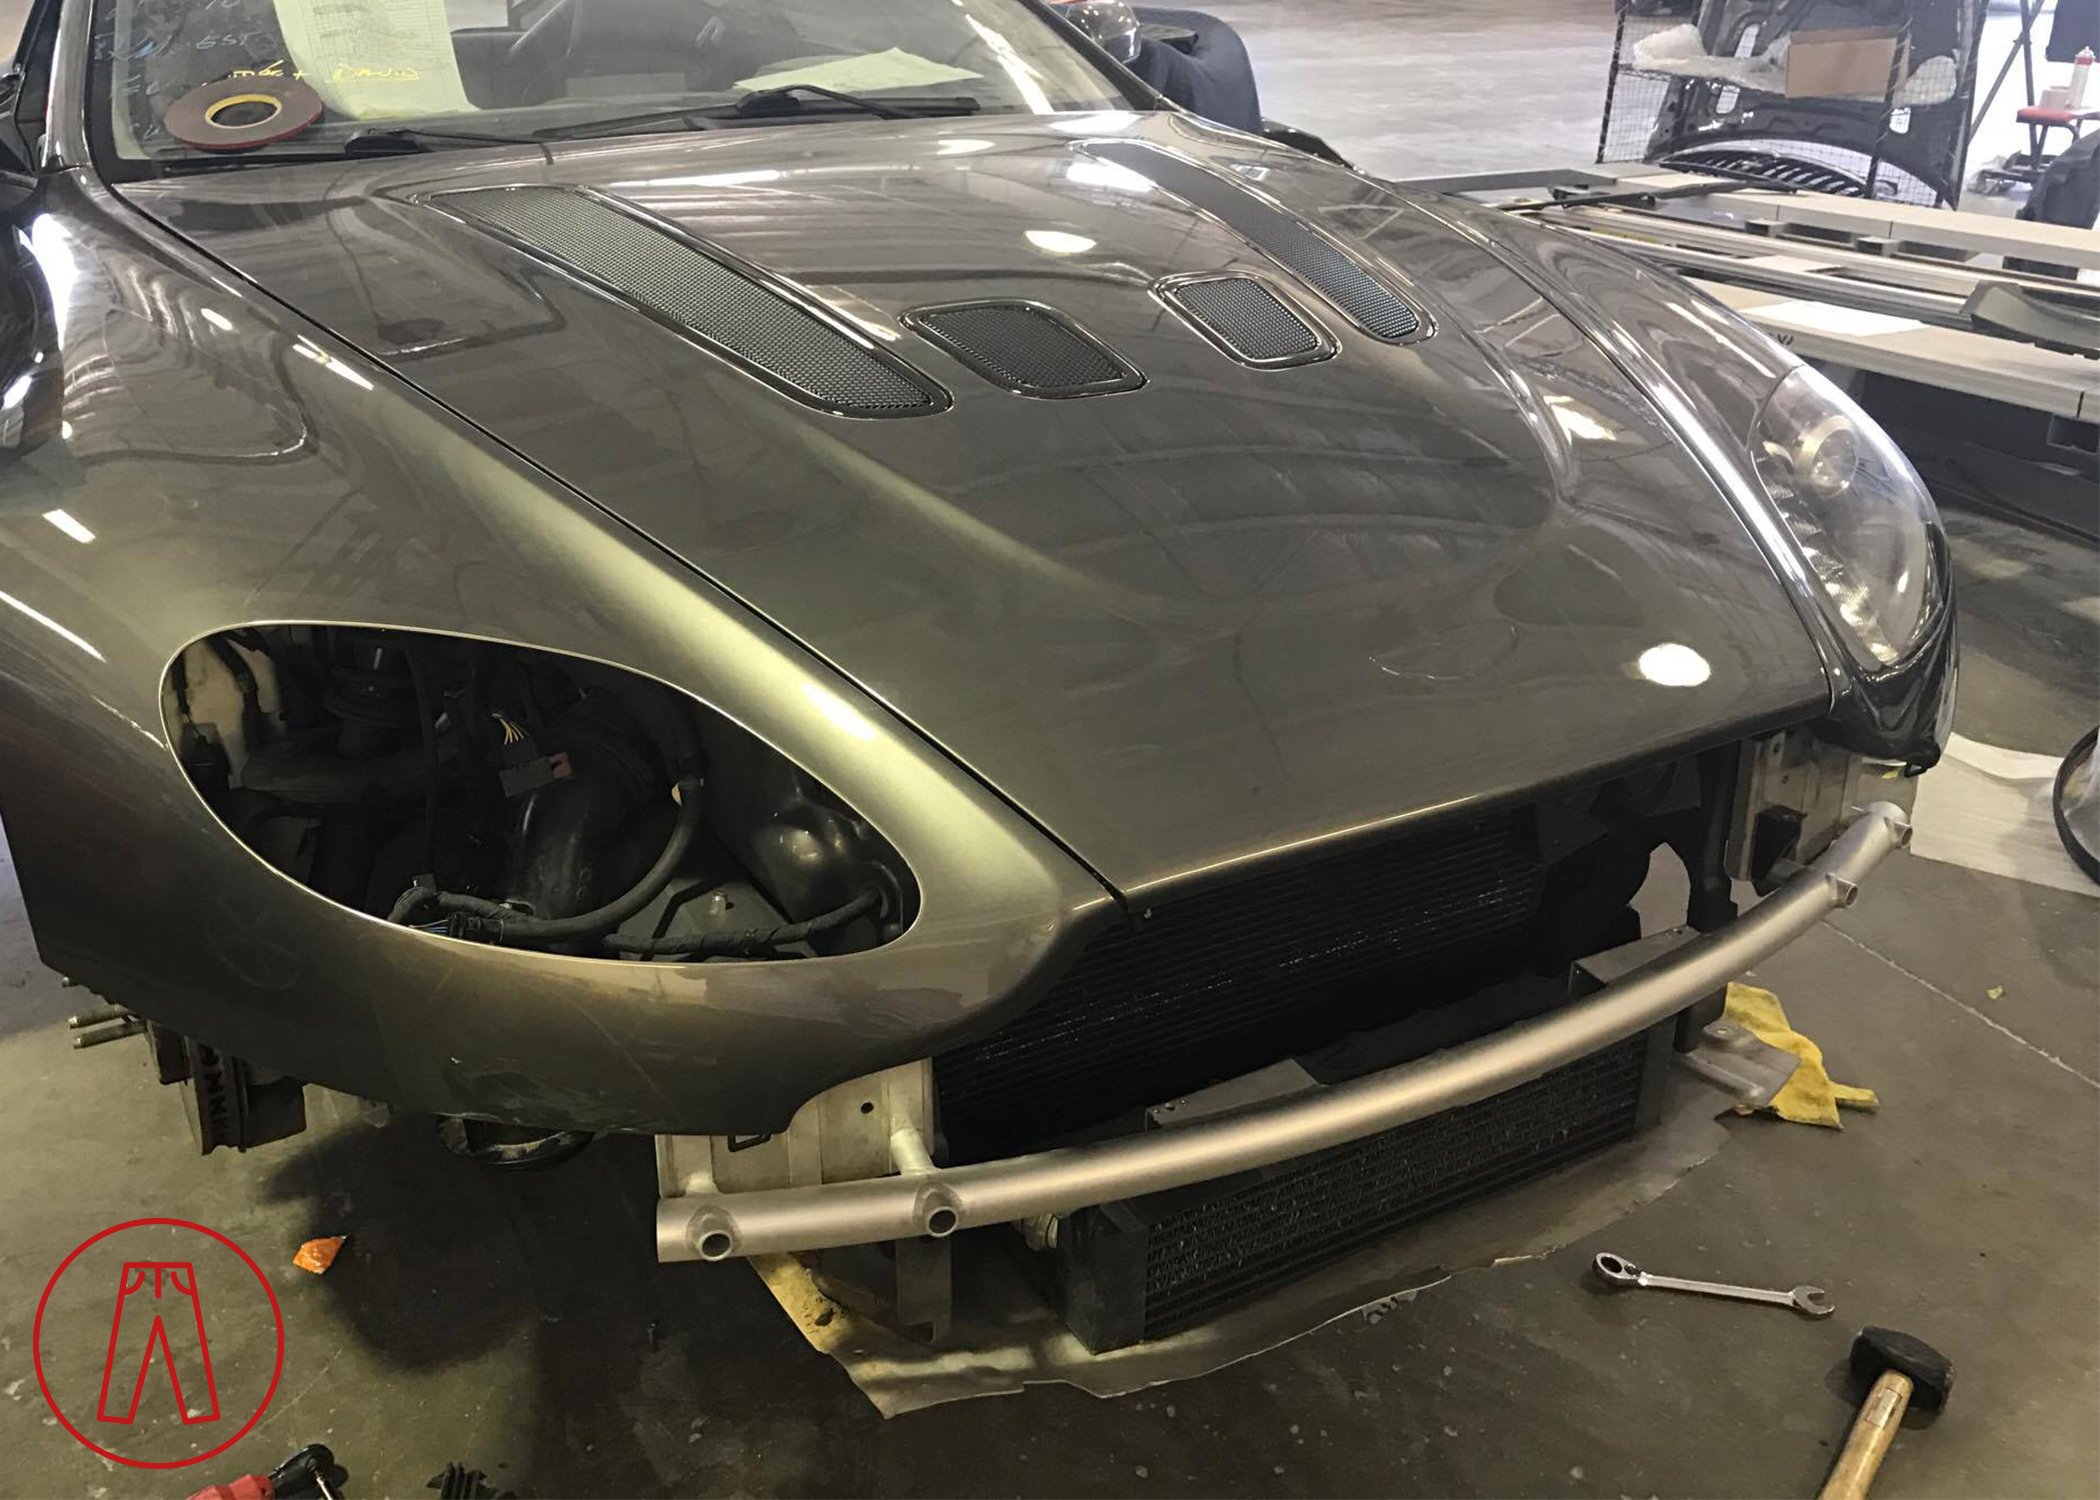
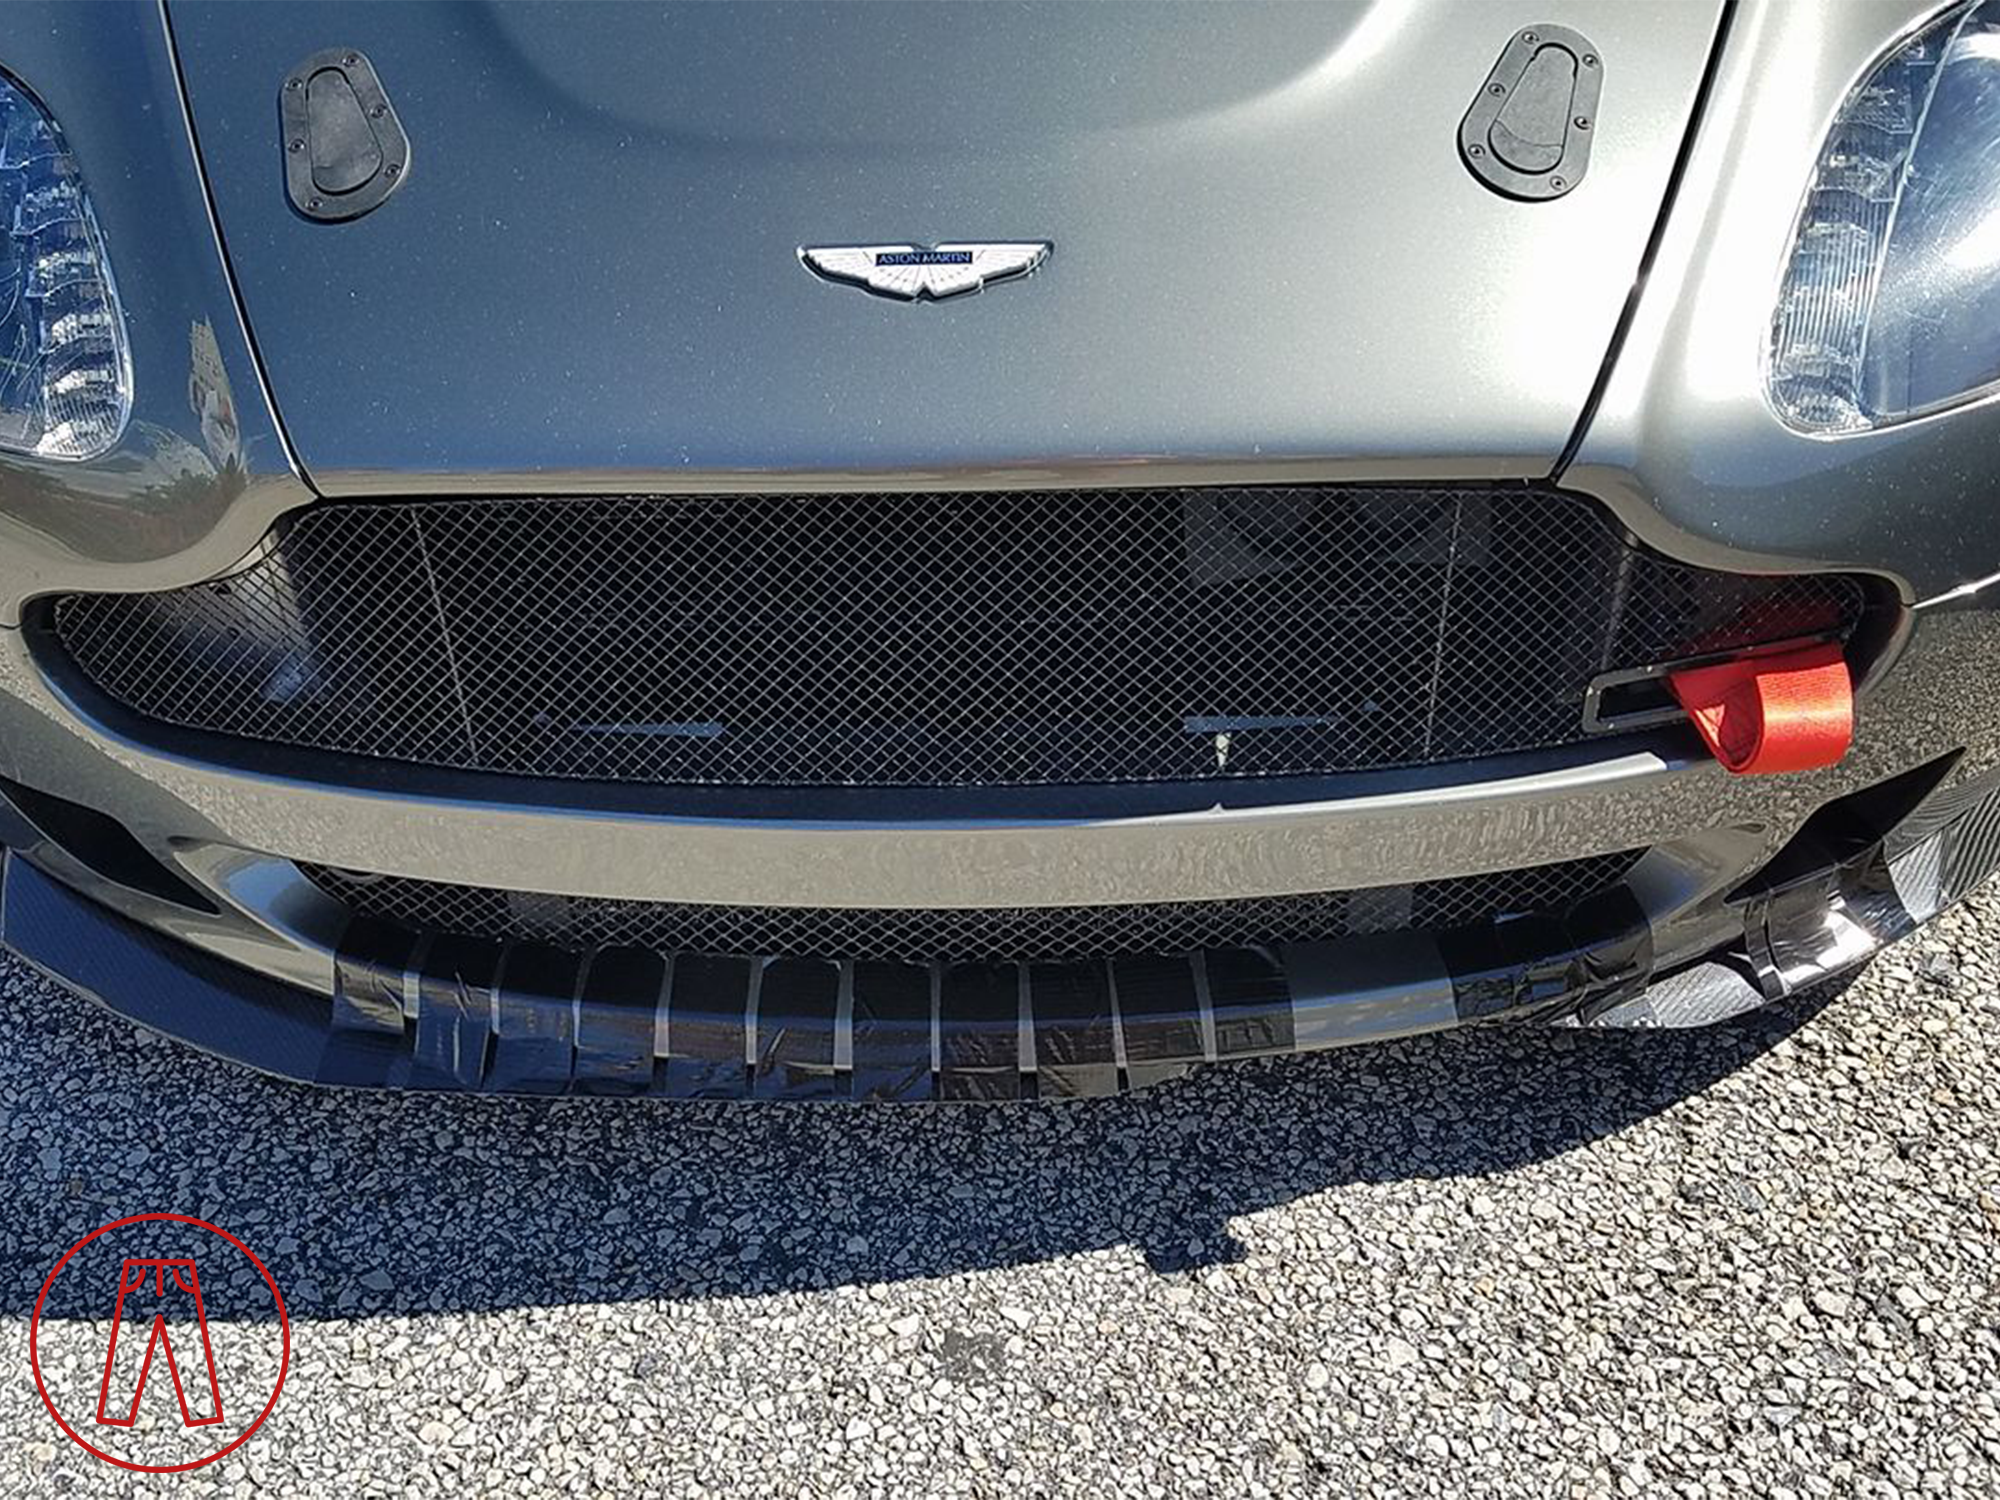
The main thing I wanted during the rebuild was the front end from a Vantage GT4, and I was able to get it. The GT4 front bumper fascia starts life as a standard Euro-spec item, license plate mounting holes included. Prodrive, the builder of the GT4, then cut holes on each side of the lower opening and attached carbon fiber inlets that are used to channel air to cool the front brakes. I had the body shop fill in the holes since I don’t have a European license plate, and I don’t have brake cooling ducts on this car (it’s one of many low-priority projects I’ll get to some day) so instead I just left the inlets open to the area behind the fascia.
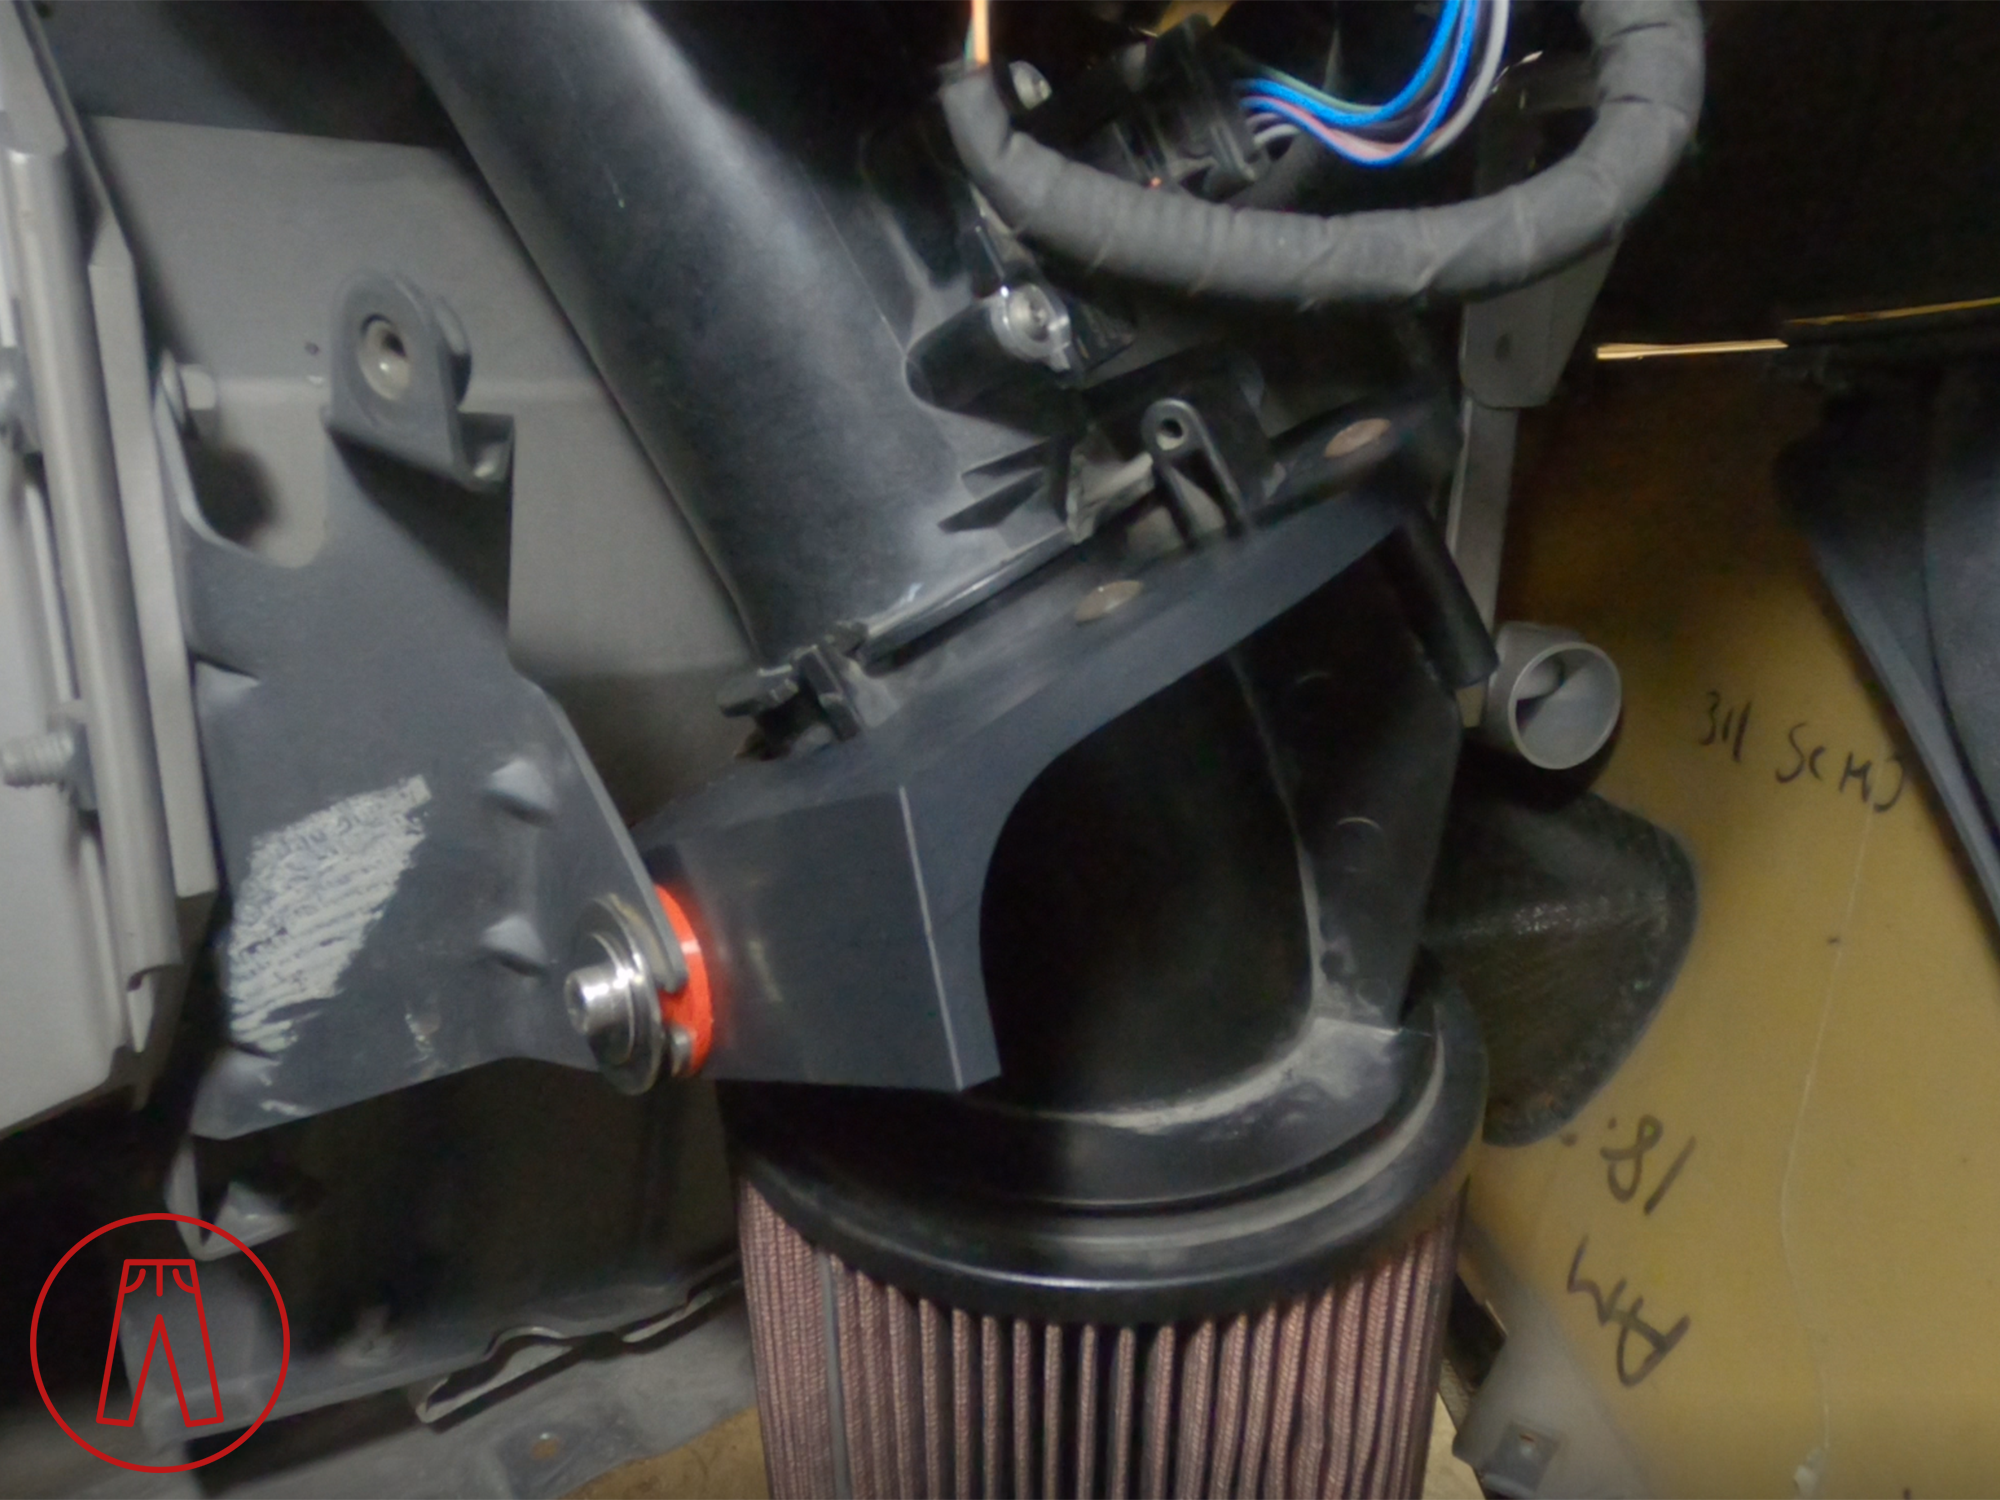
The brake cooling duct inlets would not be able to work with the factory air boxes as the ducting has to pass through the space where the air boxes are. But that was fine for me because I wasn’t planning to use them anymore, and my right-side air box was a wee-bit mangled and was headed to the trash bin anyway.

I used a set of Redpants Air Box Delete Brackets to keep the intakes secure despite the air boxes no longer being in place. I personally like having this setup, but it isn’t for everyone. One of the main reasons car manufacturers use air boxes is to protect the intake filters, and that’s especially important with an Aston Martin. The intake filters sit less than 130mm (less than 5 inches) off the ground, making them susceptible to damage from tall curbs, large debris, tire walls, or deep water. So long as you don’t hit anything (like I’ve done and destroyed an air box) or drive through an area with flash flooding (like I’ve also done and stalled my engine due to water getting into the intake), then you’ll be fine.
Just… don’t do dumb stuff like I’ve done.
Removing the air boxes and air inlet that sits behind the front grille dropped a little bit of weight out of the front of the car, but I wasn’t done yet. I also got the lightweight bumper beam that was an optional upgrade for GT4 race cars.
The road-going V8 Vantage doesn’t have a traditional bumper beam in the front. Instead, it has a front bumper armature. The armature acts as both a crash structure and as the mounting point for several things in the nose of the car, like the grille, license plate, intake inlet, tow hook, hood safety catch, and even the headlights. Since I also got the Aston Martin Racing lightweight front bumper beam, the armature is no longer on the car and I had to manage losing all those mounting points.
Mounting brackets needed to be fabricated for the oil cooler, but new ones were included for the headlights. I can no longer insert a normal tow hook, so the tow strap is required. As many of you that follow me are aware: yes, that tow strap is very functional and at this point I’ve used it enough to wear out my first one and I’m now on my second.
The Aston Martin Racing mesh grille on my car is different than the AMR lightweight grille, which is similar in concept but entirely different in construction. I have to use this grille because the slatted grilles mount to the armature. The Aston Martin Racing grille also has a slot to accommodate the tow strap. This grille may not be the prettiest thing, and the tow strap does look a bit goofy on a street car, but it’s all entirely functional.
Probably the other most scoffed-at item on my car after the tow strap is the set of Aerocatch hood pins. Again, these are functional and required for safety as I no longer have the secondary latch that is released from under the leading edge of the hood.
I’m sure all of that sounds like a lot of hassle just to accommodate a metal bar and, yes, it surely is. But I dropped several kilos of weight out of the nose of my car and that’s what’s really important, isn’t it?
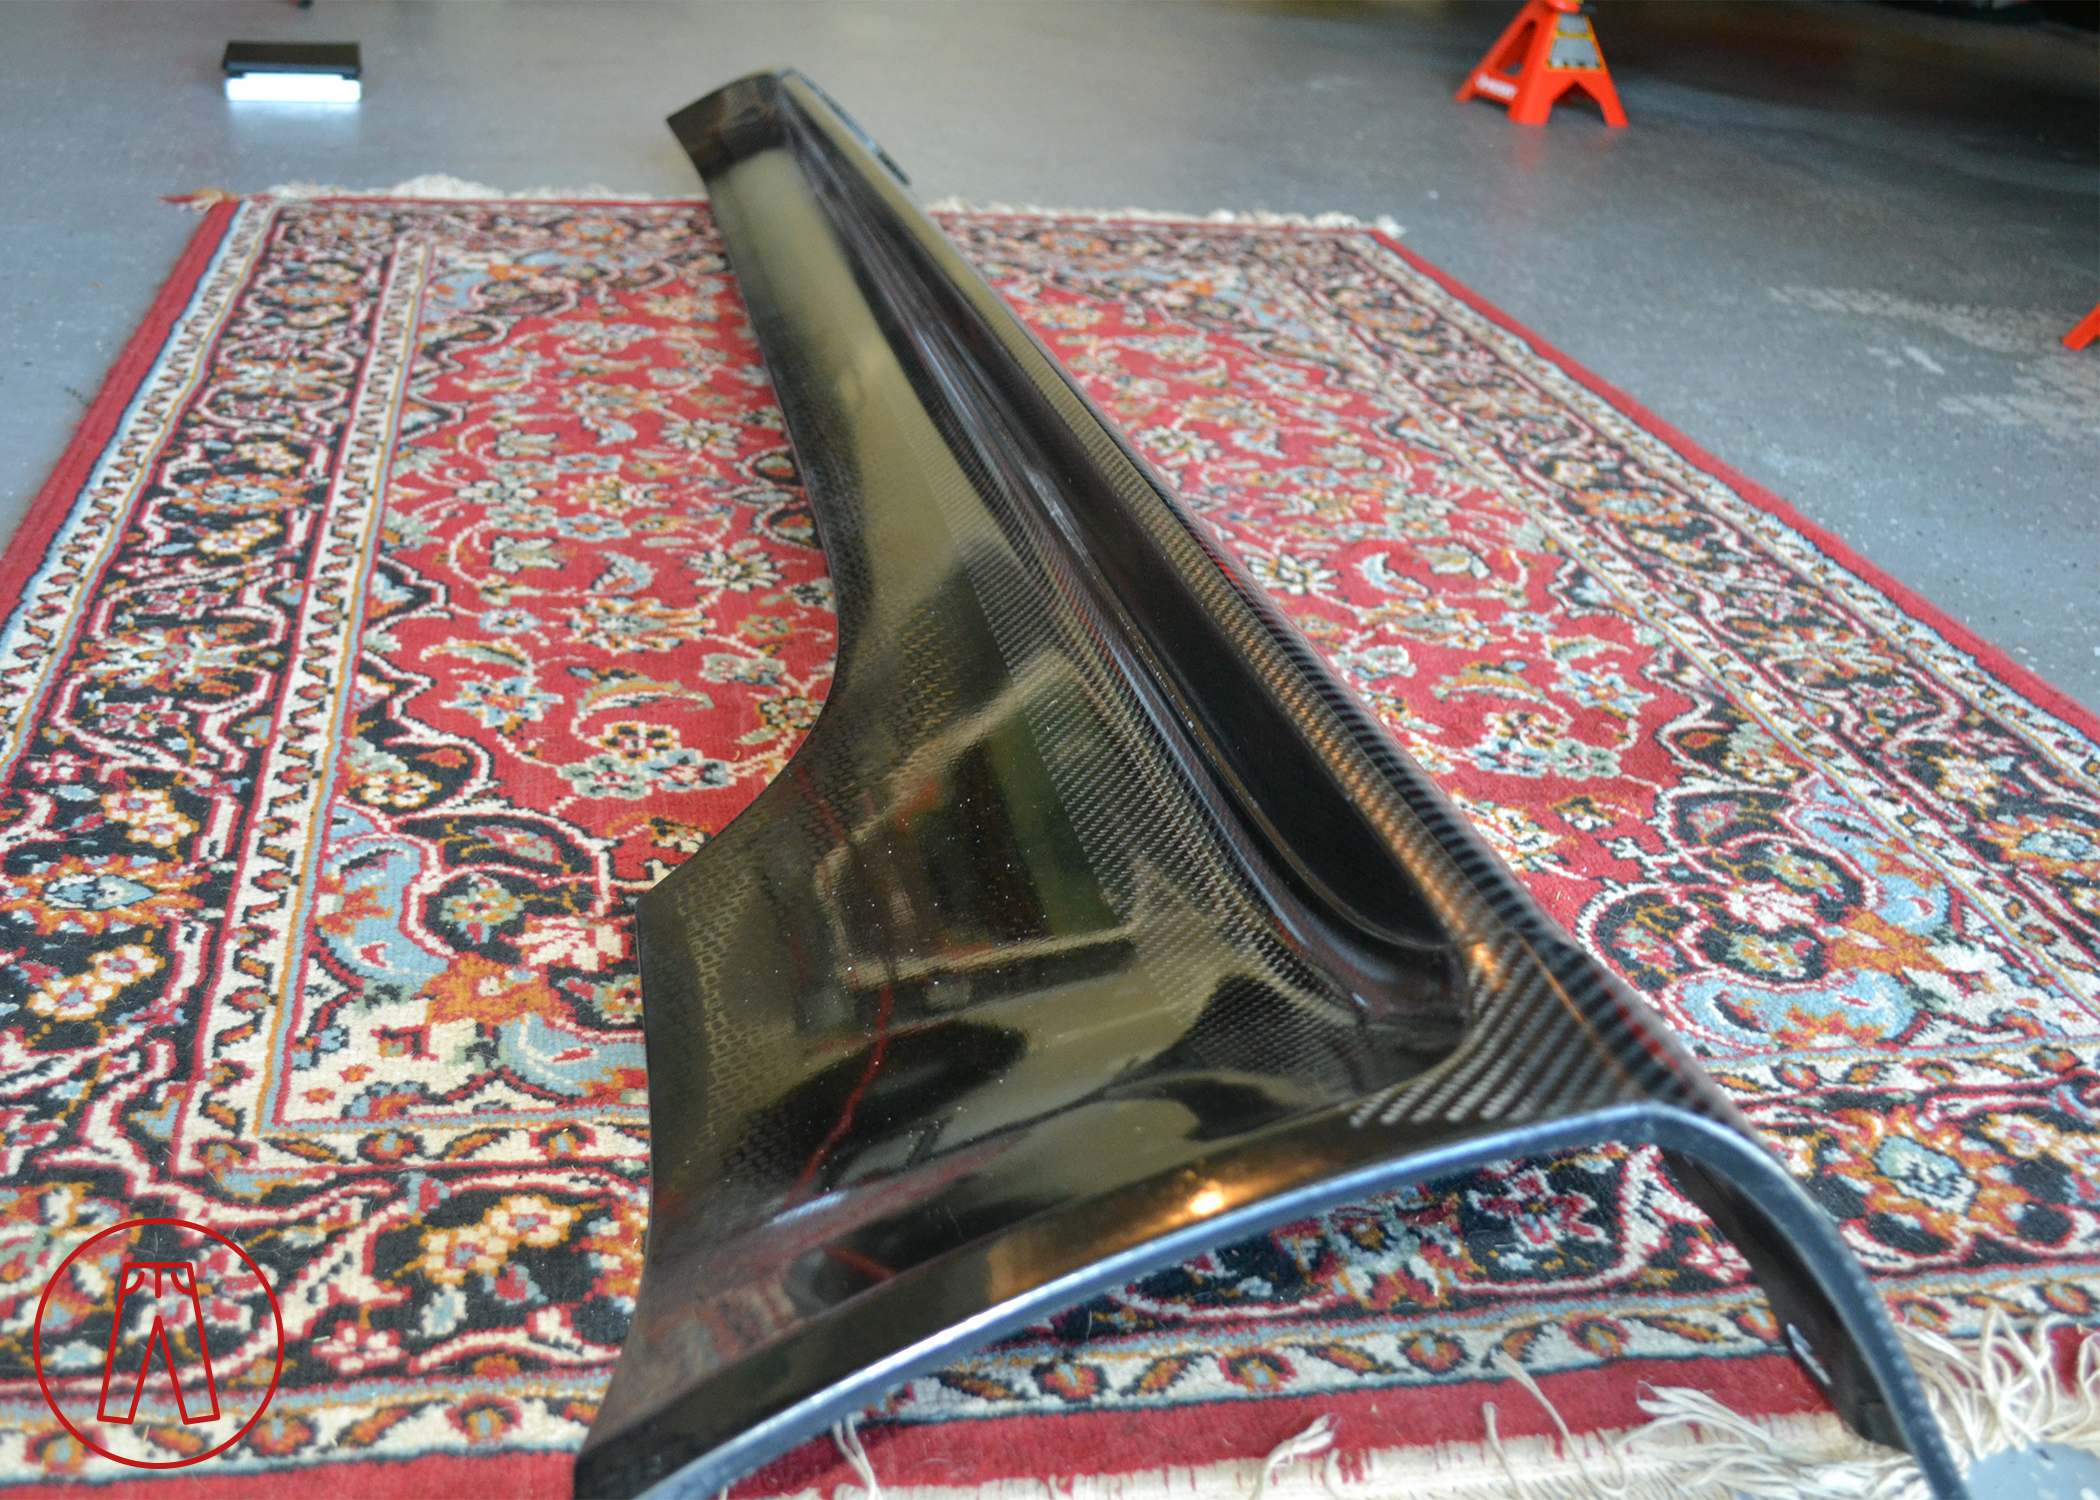
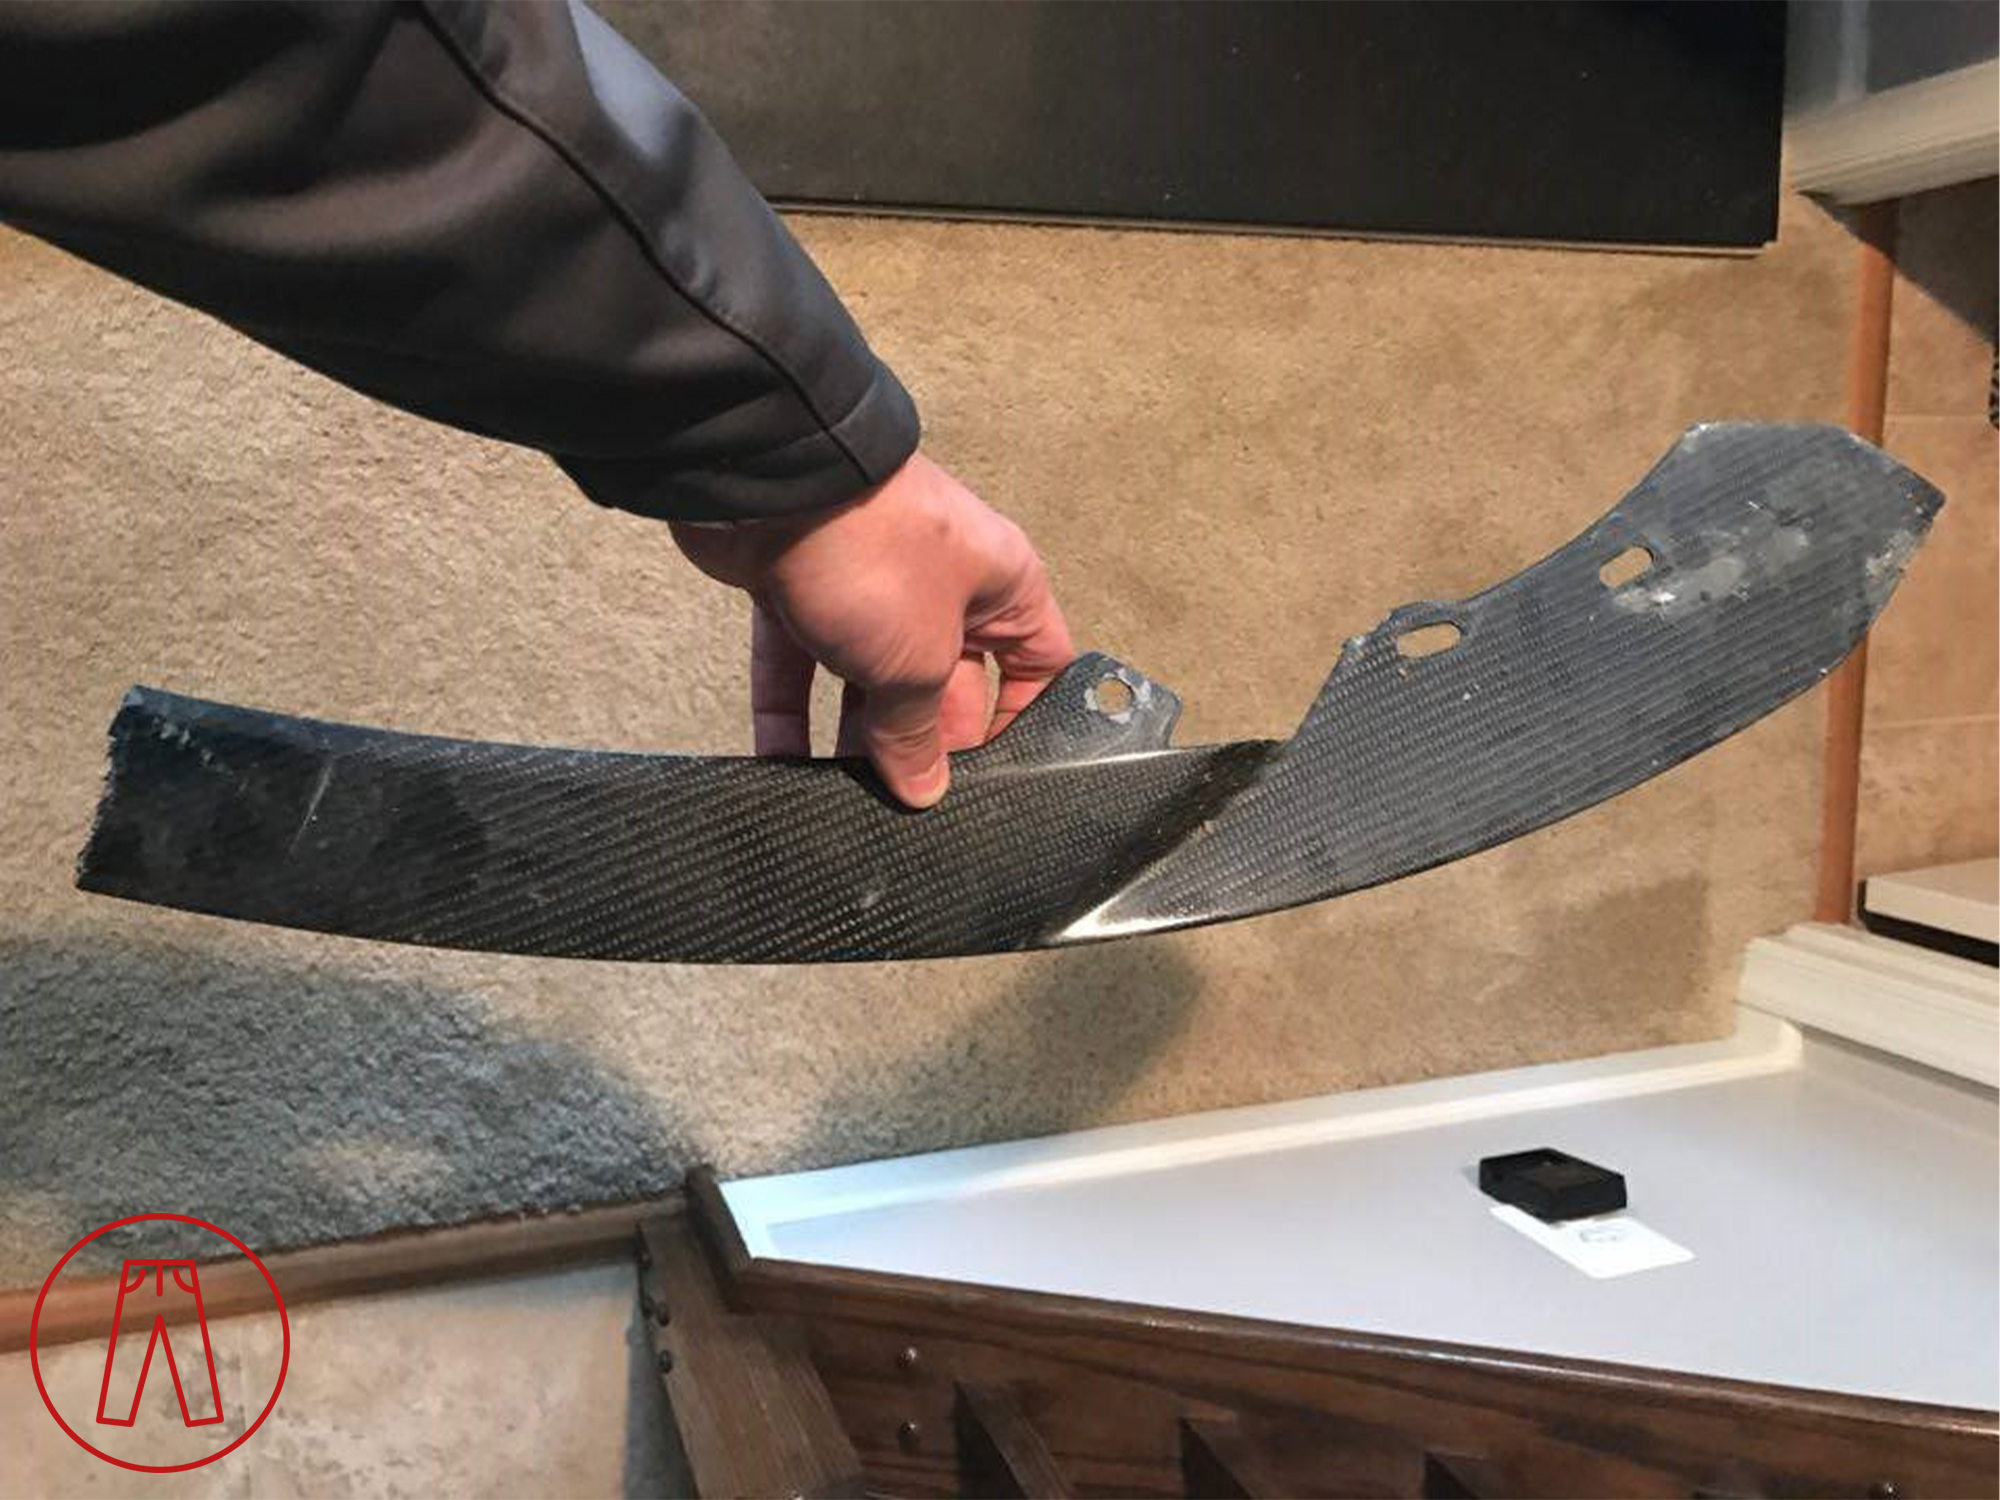
My VCollection front splitter was obliterated in the crash, so I had to get a new one of those, too. Here’s all that remained.
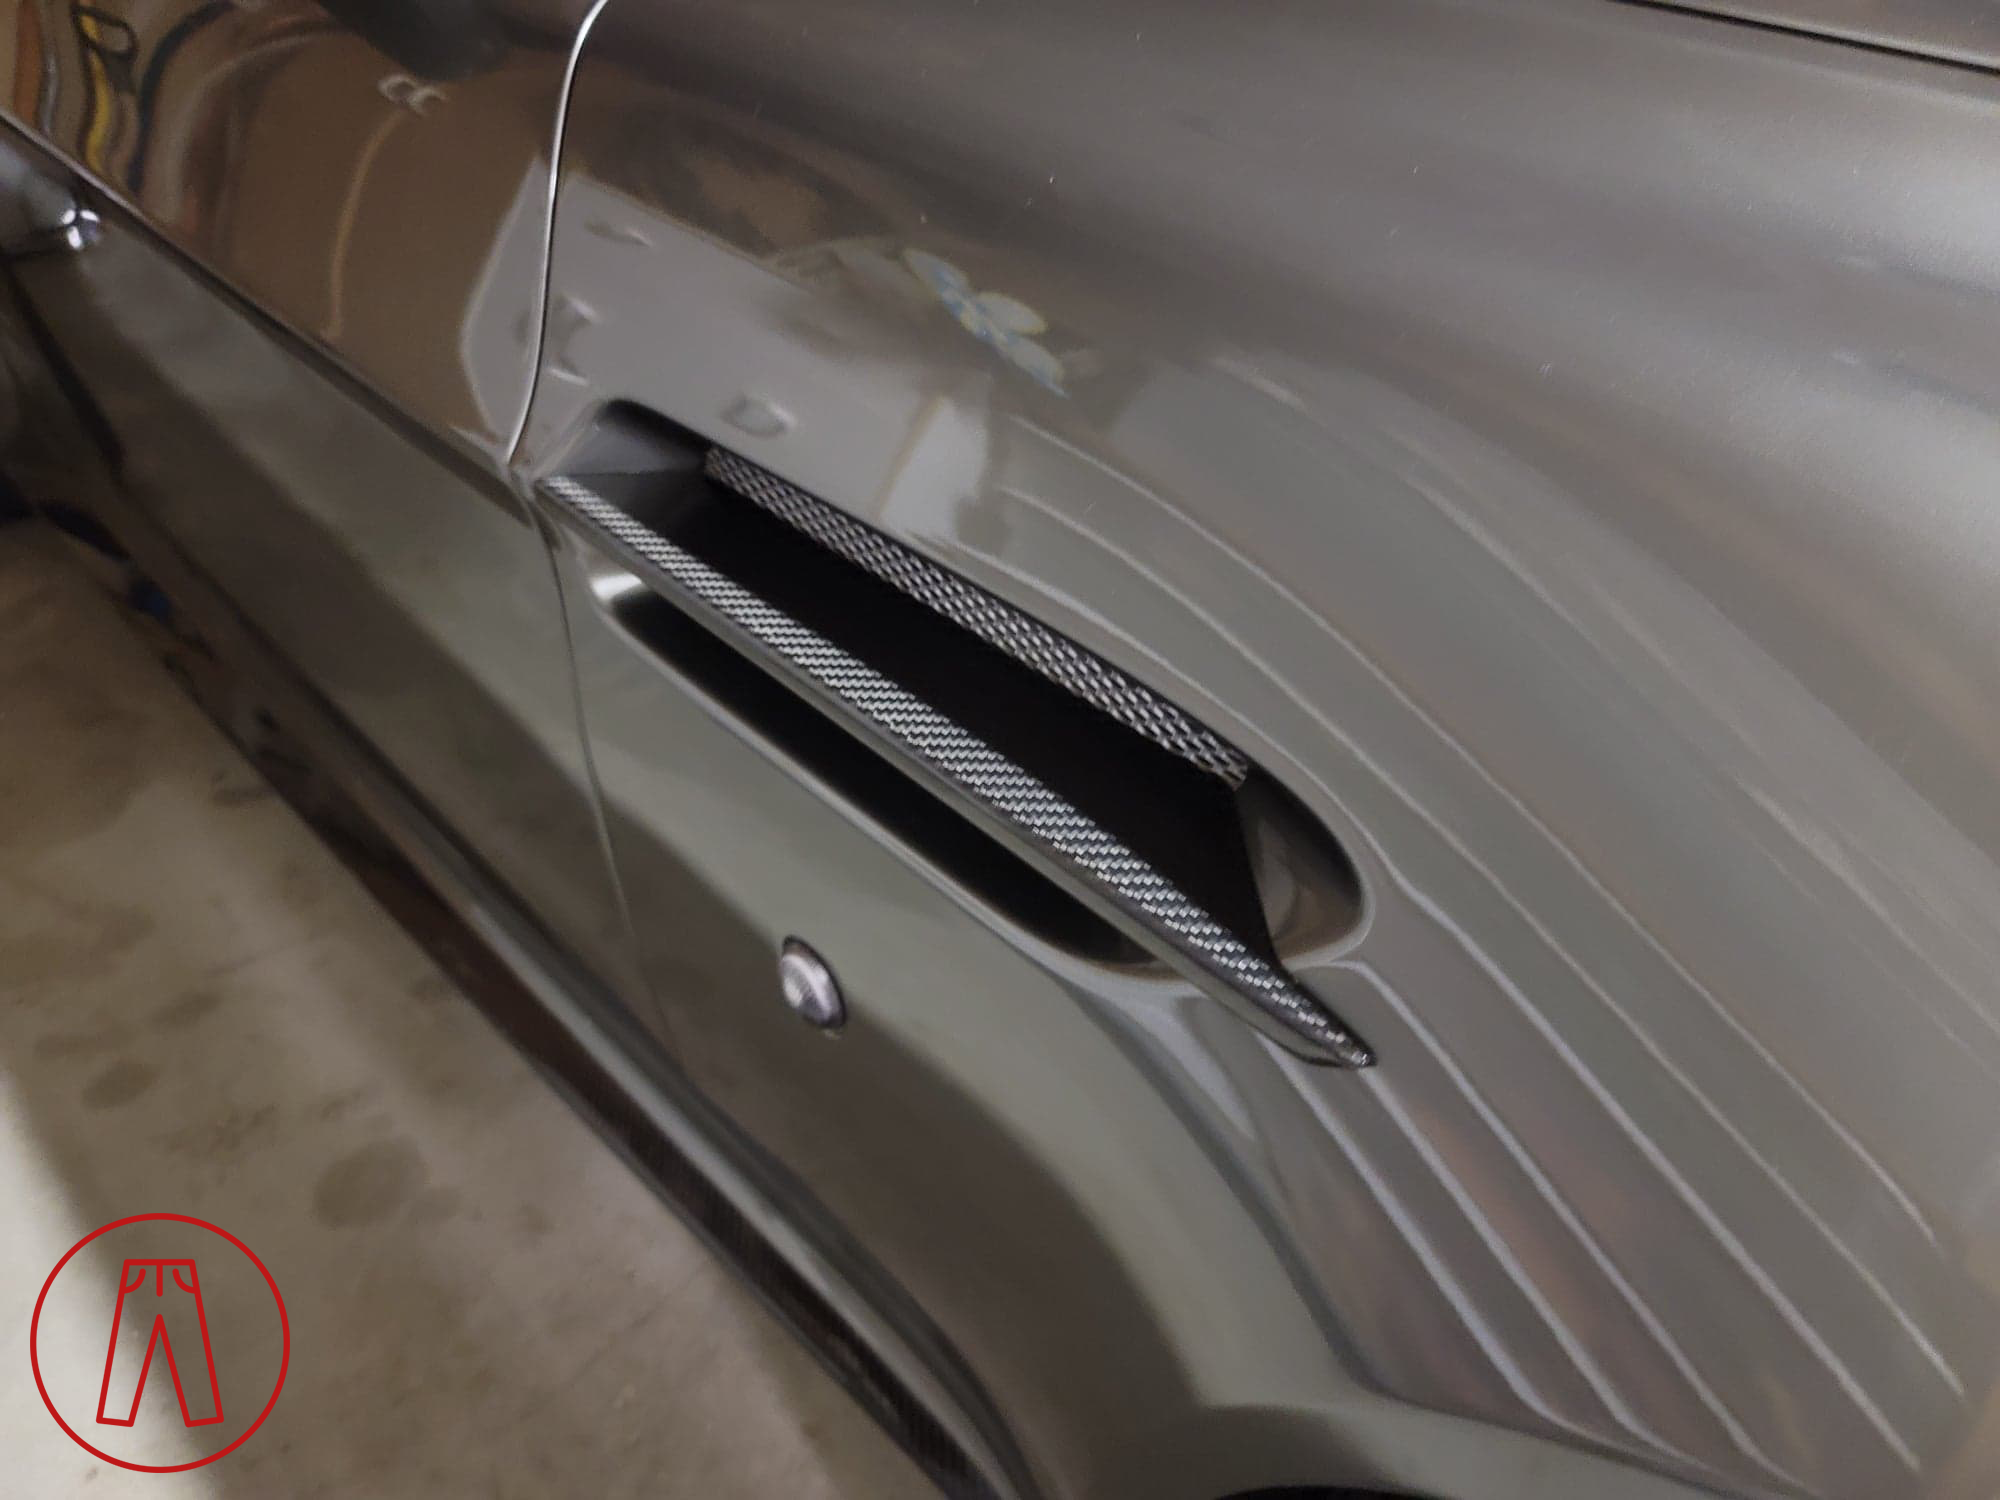
To continue the carbon fiber theme a bit further, I got a pair of OEM carbon fiber fender vent strakes. These added to the racy look of the car while dropping some weight - the chrome pieces were shockingly heavy for what they are and the carbon fiber replacements weigh virtually nothing by comparison. Okay, sure, I’m making it sound like a bag of concrete was taken out of the car when in reality it was only a kilo and a half, but every bit adds up and the weight surprised me given the size of the chrome pieces.
My rear diffuser survived the crash but the rear bumper cover had taken a hit. It was repairable, but instead I opted to get a European rear bumper cover. European-market Astons didn’t have corner markers and, since I was getting a European front end, I wanted the rear to match. Aside from the corner markers being absent, the other two differences are the license plate lights being different and the lack of “bumperettes” on either side of the rear license plate.
US-market cars have extra extrusions on the rear bumper beams so they can pass Federal requirements for low-speed accidents. These extrusions stick out just far enough that the rear bumper cover rubbed against them, so Aston Martin adapter the bumper cover for the US market by cutting holes were the extrusions are and screwing on caps (the bumperettes) to cover them. You can see what I mean in this picture:
Cutting off the two extrusions next to where the license plate goes allows the European rear bumper cover to fit. (Only the inner ones needed to be removed. The outer ones were fine as they were.)
It’s a really small detail that I don’t think most people ever notice, but it looks much cleaner in my eye.
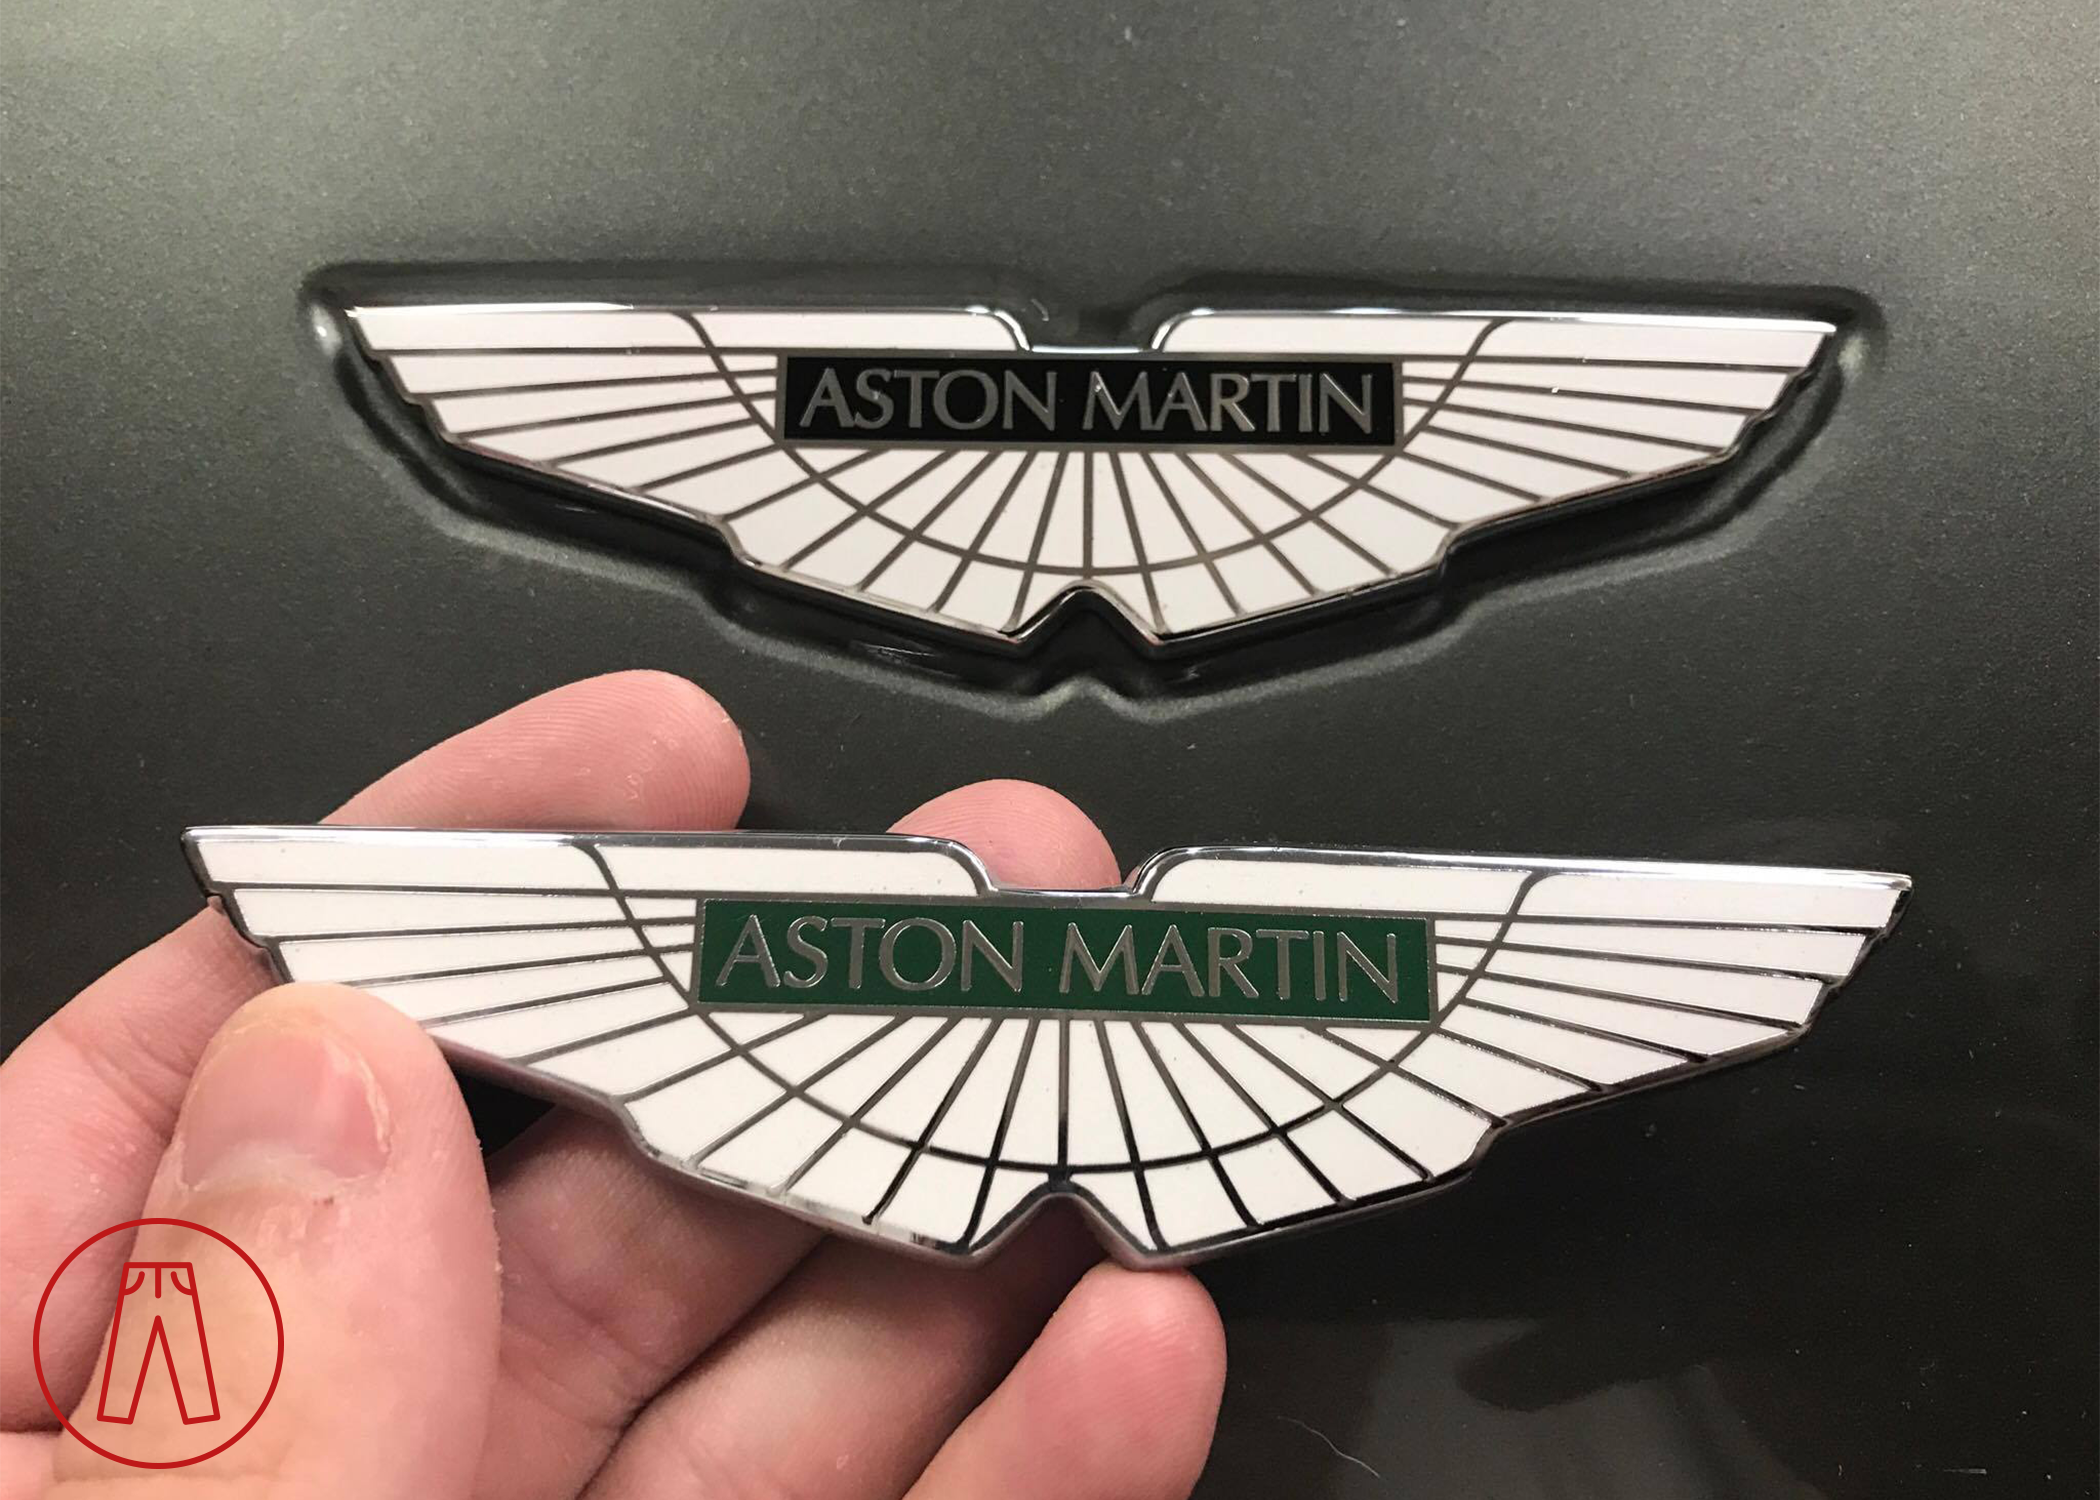
The final touch was to replace the hood and trunk emblems with the one used on S models, which has black filling instead of green.
If anyone has noticed that for a long time I’ve had a messed up headlight, it was actually during these repairs that my headlight was marred. Basically, a small bit of the clear vinyl protective film on the headlight had started to peel back. The technician at the body shop, in all his wisdom, decided for whatever brilliant reason to take hold of that little bit of loose edge and rip the whole thing off.
It did not come off cleanly because it isn’t supposed to be removed like that. No, not cleanly at all. Rather, it tore away the top layer of the headlight lens across a few sections, leaving me with this:
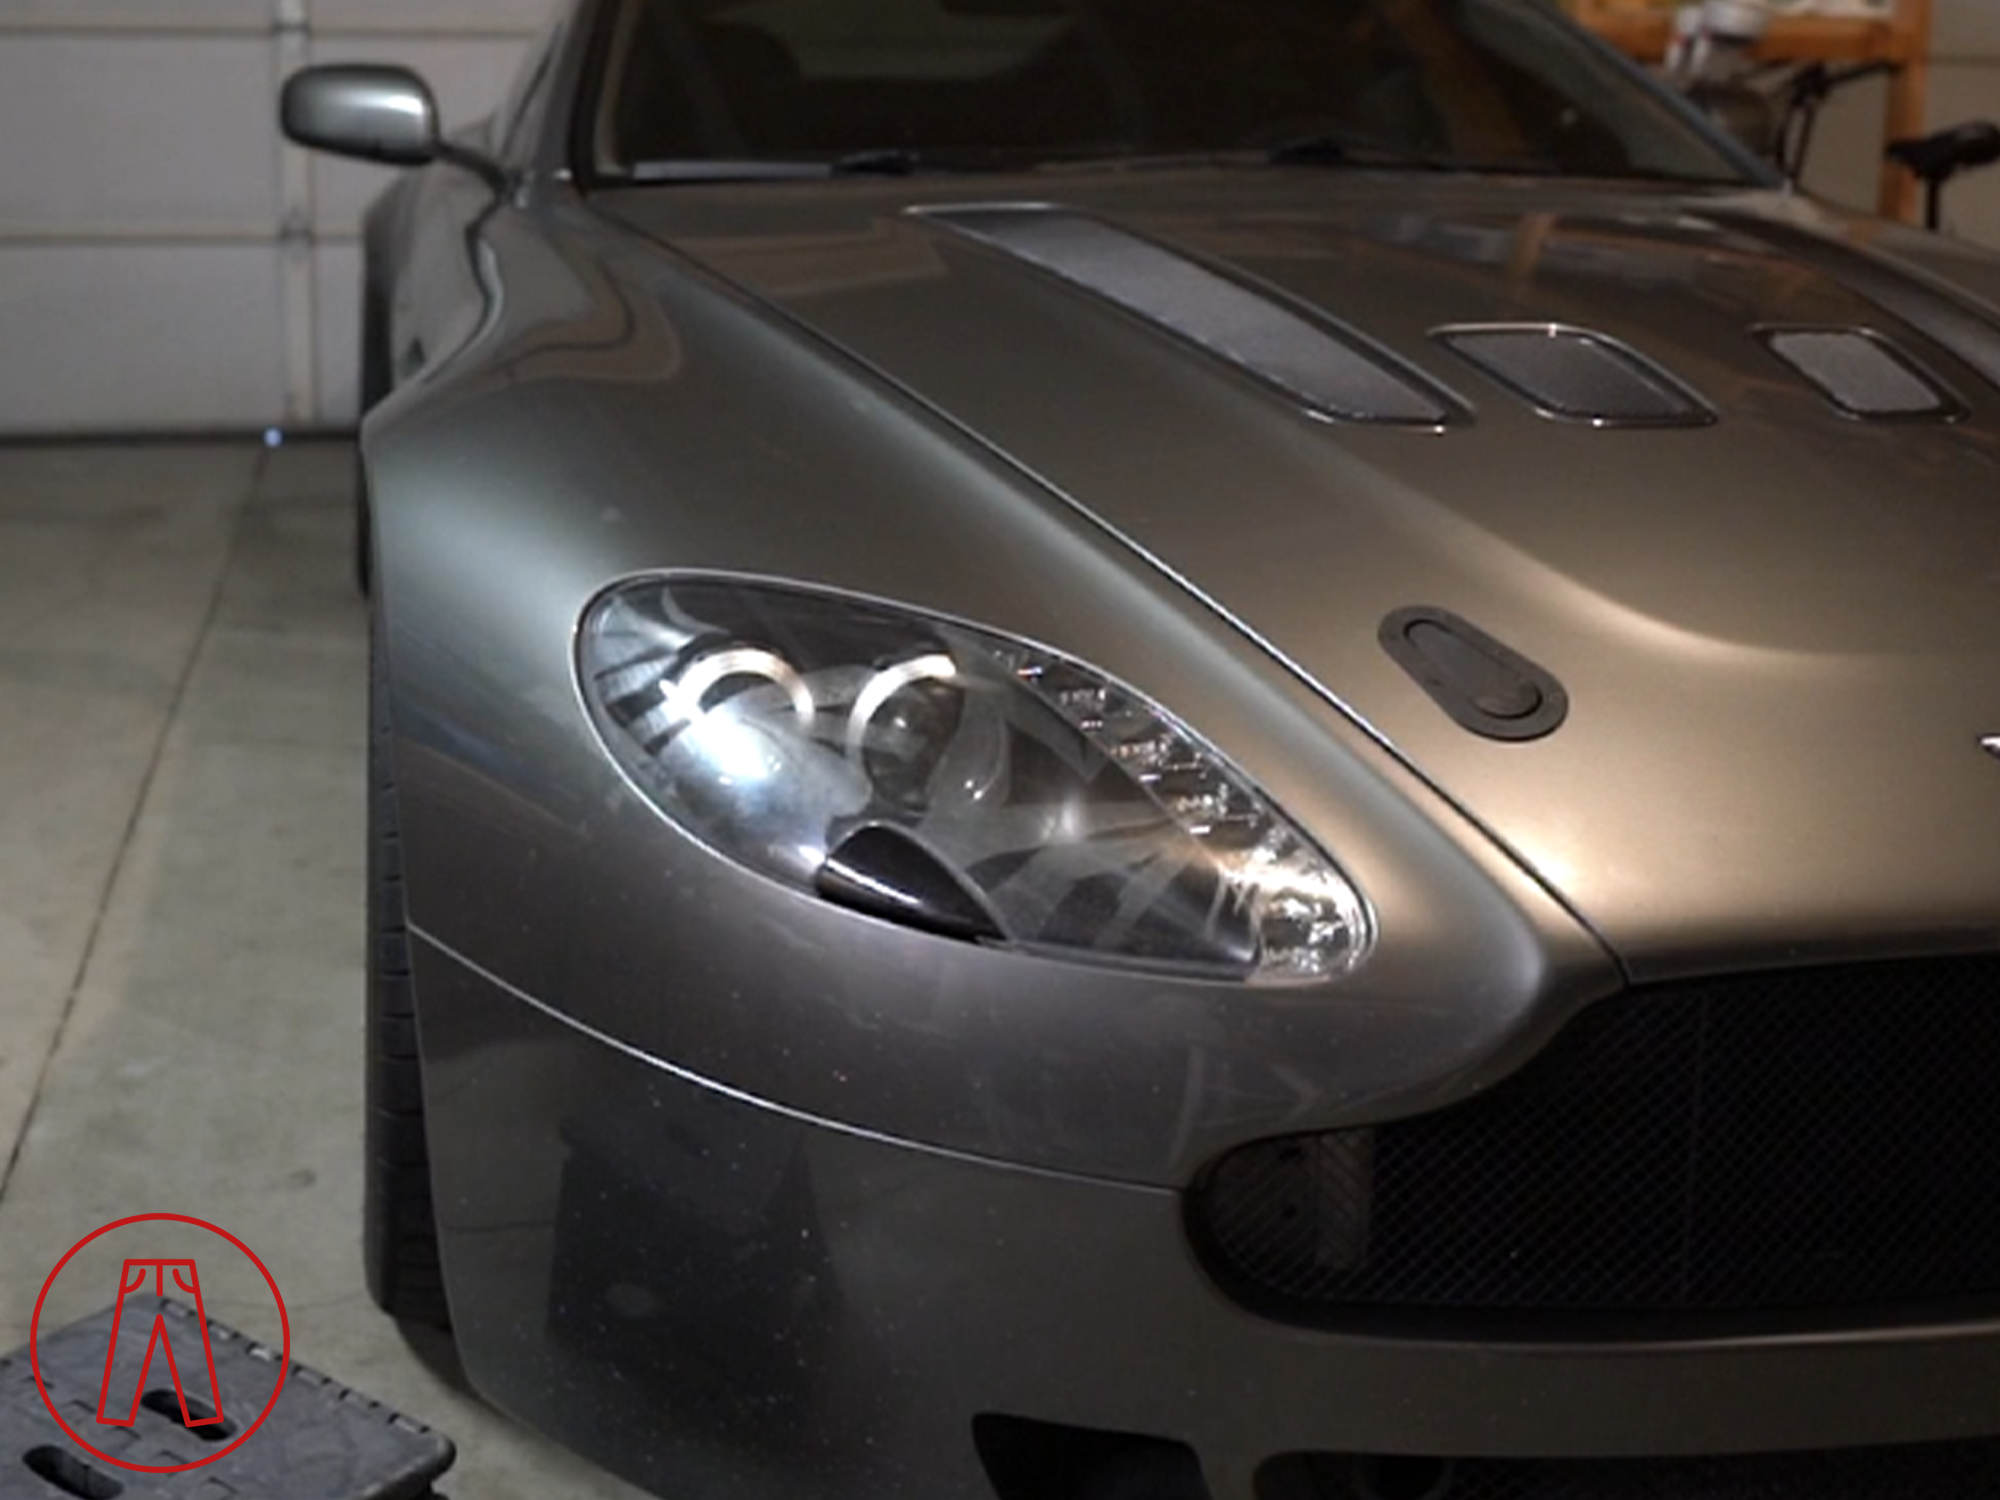
That’s not a reflection you’re seeing on the headlight lens. That’s the actual surface of the lens after the bonehead ripped the vinyl off. At that point the shop had messed up on some many things that I was too pissed to deal with it. They were a terrible shop, despite being one of the more well-known ones in northern Virginia, and all I wanted was to get my car back so I could be done with them as soon as possible.
I ended up leaving the headlight like that for the next several years to serve as a warning to others. I use my car as a platform to help educate other Aston Martin owners and things like this can help prevent someone else from making the same mistake as that technician.
New Wheels and Going Dark
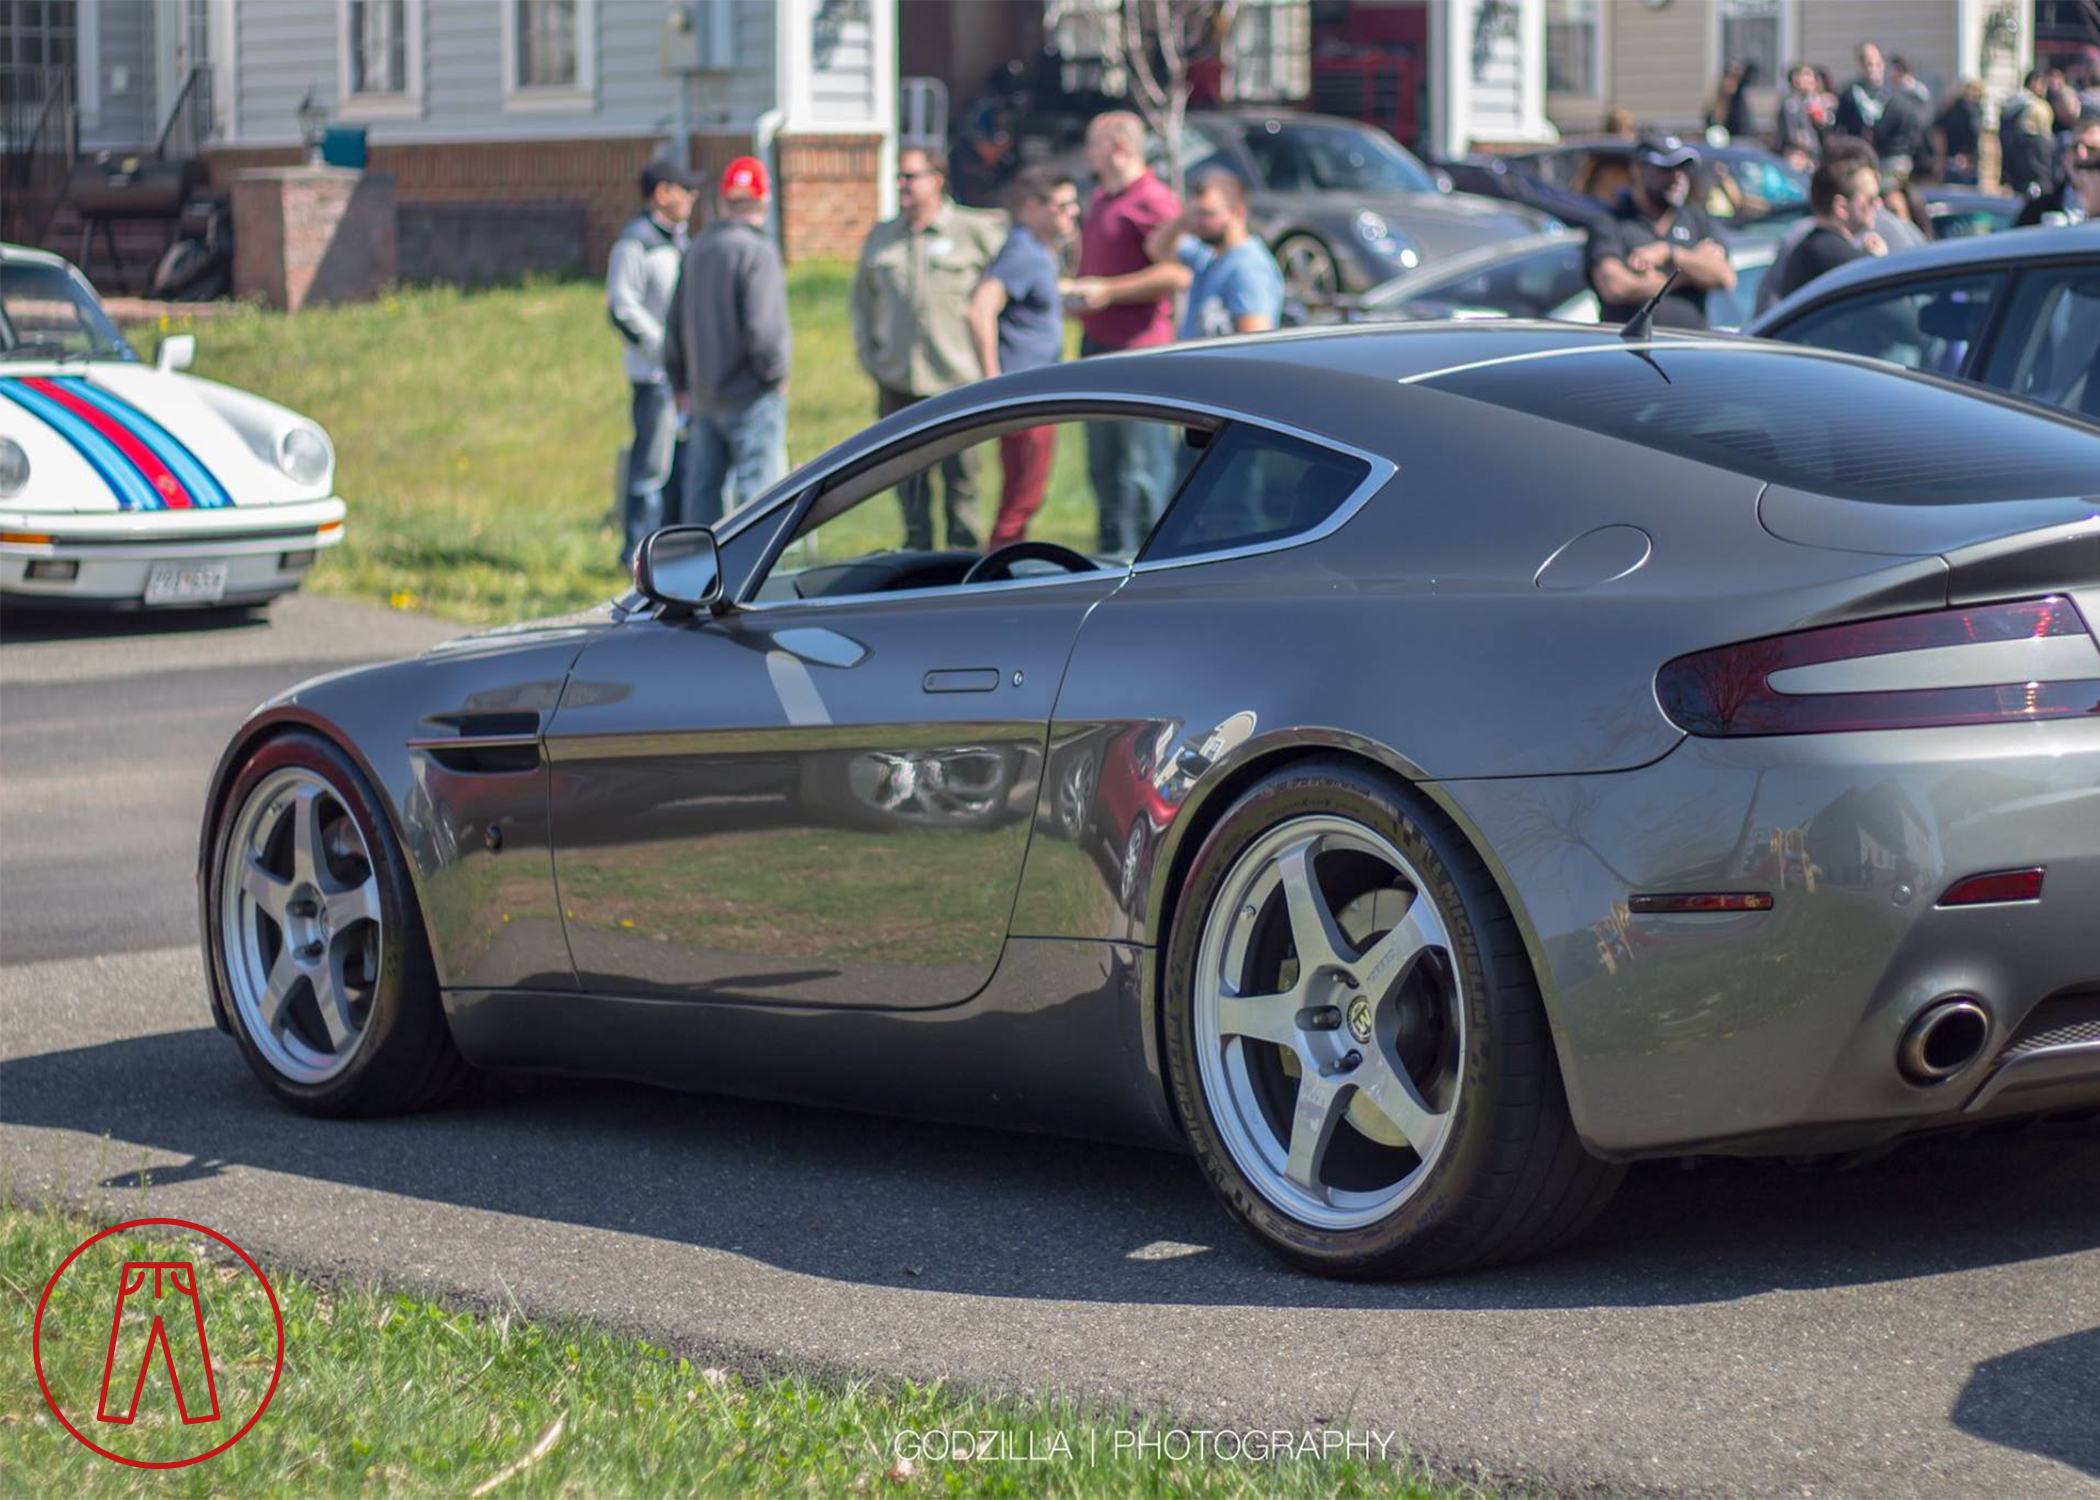
Some time after installing all the race car parts and rebuilding my car, I bought a second one - another 2007 V8 Vantage with manual transmission, but this one in Ferrari’s Rosso Corsa red. A previous owner had put some black vinyl on certain parts of it and painted the wheels black and, honestly, I hated it. The quality of the work was terrible and it just had an overall immature feel to it. My original thought was to just fix up what had already been done and keep the red/black theme and, to that end, I ordered a new set of gloss black BC Forged RZ05 wheels. Out of curiosity I put the wheels on my grey V8 Vantage and absolutely loved the way they looked, so I decided they were staying on the car and I think the results speak for themselves.
Oddly enough, I don’t even like black wheels. I think black hides all the contours and details and makes most wheels look bland. But these looked incredible.
You probably can’t tell from the pictures because most of the difference is hidden under the car, but these wheels and tires are actually quite a bit wider than my previous ones. While the RT50s had been sized to match the OEM 7-spoke wheels at 8.5” wide in front and 9.5” wide in the rear, these RZ05s are 9.5” wide in front and 11” wide in the rear. Likewise, the tires when from 245 front and 285 rear (originally 235 front and 275 rear) to 265 front and 305 rear.
Given I’d removed almost all of the brightwork on the car, I figured I might as well complete the job. I swapped out the black window trim and black chrome exhaust tips for the ones included as part of the Exterior Black Pack. That package of parts also includes a Carbon Edition 6-Bar grille but, since I can’t use a slatted grille on my car, I sold that off to recuperate some of the cost for the other bits that I did use.
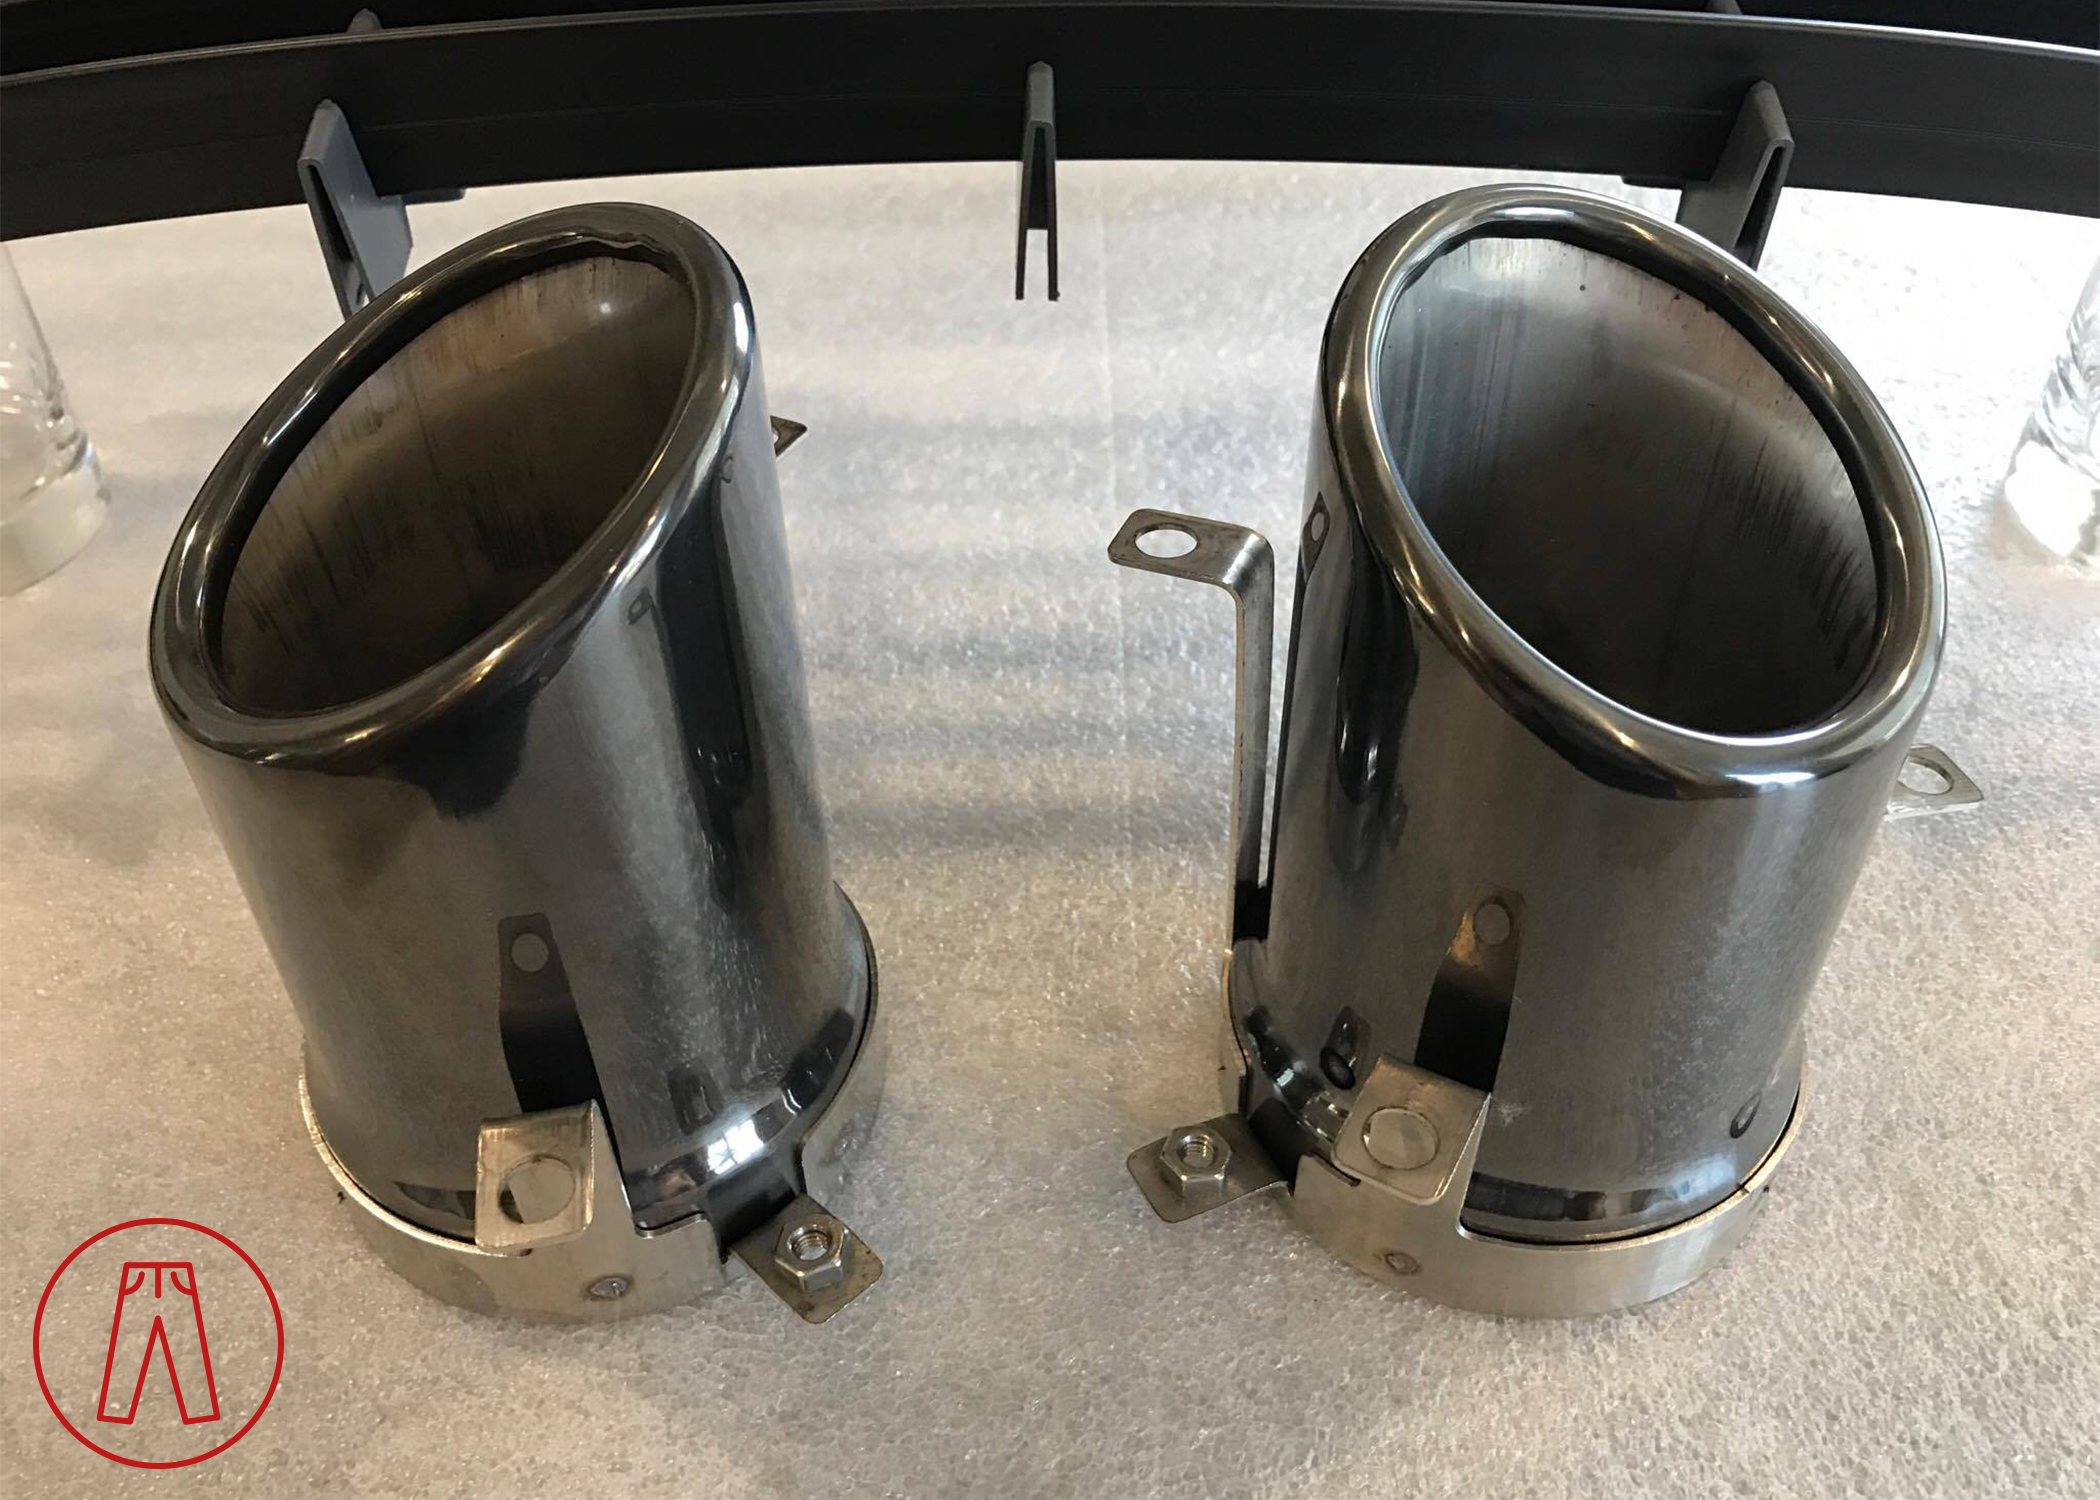
Zircotech black chrome exhaust tips.
Once again I found myself entirely happy with how my car was. I’d absolutely nailed the aesthetics, dropped a bunch more weight, and really put together what I thought was the pinnacle of what this car could be.
Within reason, of course.
But I’m not exactly reasonable, am I?
Third Time Was Not the Charm
Back in those days, I was living in northern Virginia and doing a lot of weekend rallies and group drives through Virginia, Maryland, Pennsylvania, and even into New Jersey. My group of friends preferred the roads less traveled, which made for some wonderful drives but occasionally came with a surprise or two.
One of my favorite stories is about how I had lost my ability to shift during a rally. I had [admitted] shifted too hard and one of the shifter cables came loose. I was able to use a tow truck as a makeshift lift, crawl under my car, and reconnect the shifter cable, fixing the issue and allowing me to continue the rally after the short delay. The same thing happened a few months later, albeit under far more casual circumstances and much softer driving (I can only assume the shifter cable had been slowly working itself loose and finally fell off). I was able to limp my car home while stuck in 4th gear - including having to stop at traffic lights - and reconnected the shifter cable once again. This time, I added some reinforcement.
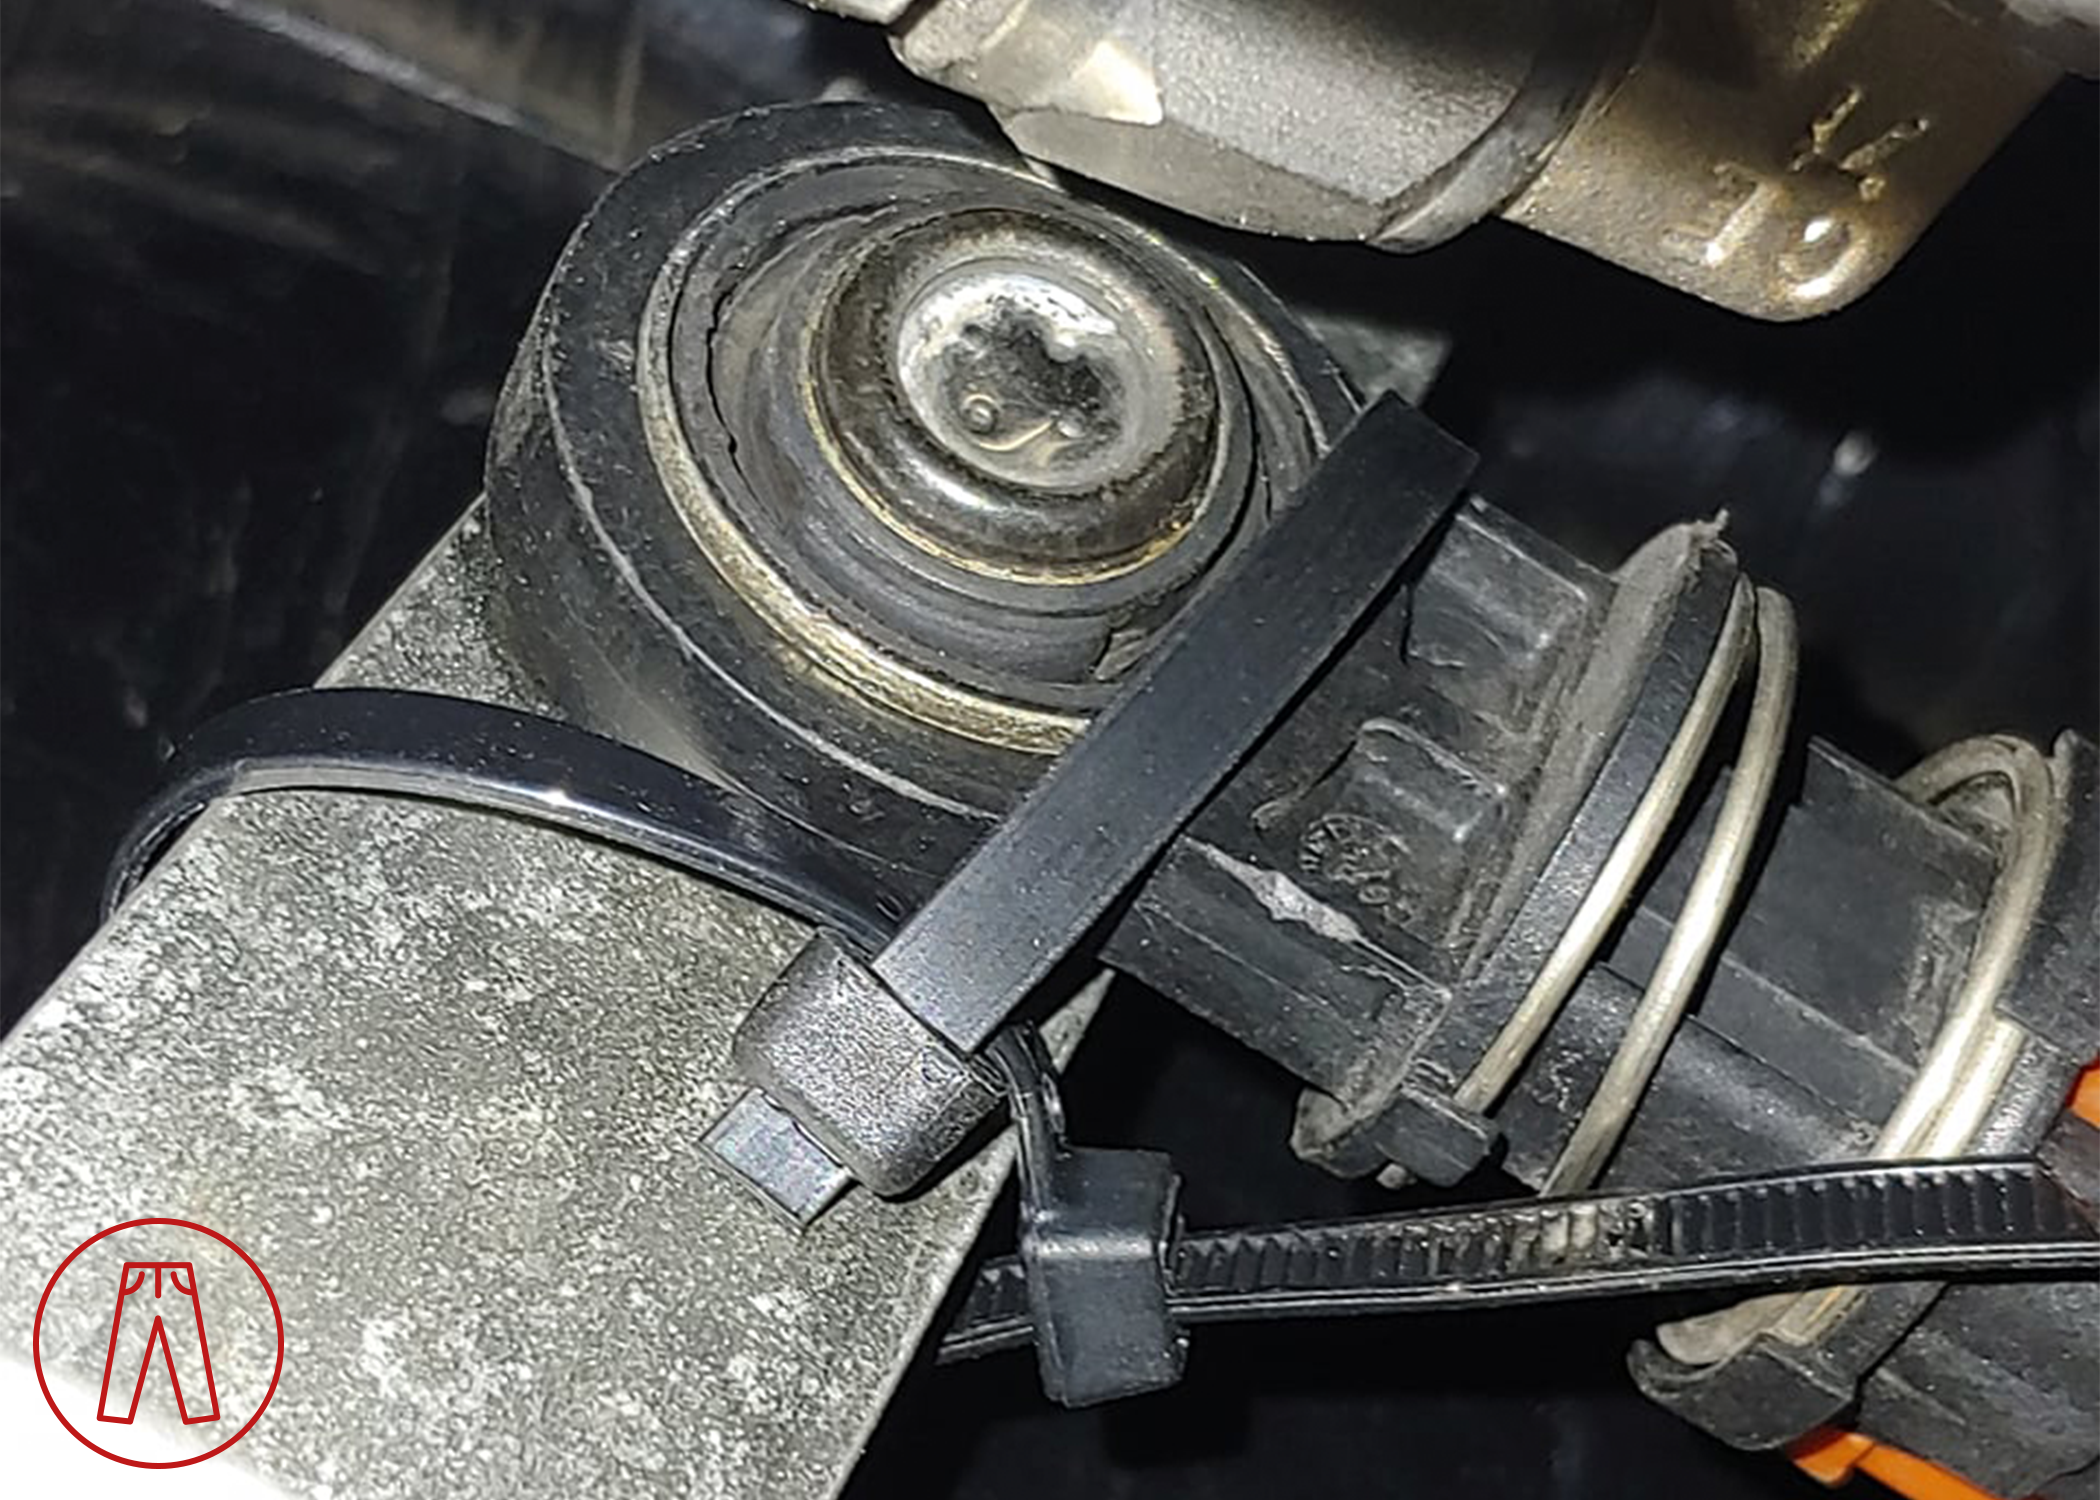
It may look janky, but I wasn’t wrong in doing this.
I came up with the idea of using a pair of zip ties to help ensure the shifter linkage couldn’t pop off the transmission’s input control arm again. It may sound sloppy, but I later found out that Aston Martin Racing themselves advised doing this exact same thing with safety wire on their manual-transmission race cars.
This pic was halfway during the process, as I had done it a few times to try to get the right balance of freedom of movement for the linkage and cable, and securing the connection without being too loose.
I have no problem saying that the H&R springs I’d had on my car gave the car a perfect stance. It was just low enough and the rake was just right, and my car still had decent enough ride quality. Despite that, I almost never recommended them when people asked me what I thought, simply because they were too low to be practical. I cannot count the number of speed bumps that I bottomed out on or how many sloped driveways or ramps that I scraped on (some resulting in rather horrendous sounds echoing out for all to hear). I was able to live with them, but I also found myself constantly planning ahead to account for clearance issues, including scouting speed bumps and parking garage ramps before attempting to use them on a near-daily basis.
Light painting in photography still baffles me.
Somewhat related to the issues I had with the springs was my VCollection front lip. Again, it had a seriously cool aesthetic but came with some seriously uncool caveats. The smallest of these caveats was installing it was a bit tedious - it was long and semi-rigid, and getting all the holes to line up for it, the front bumper fascia, the undertray, and the fender liners could be a chore. The medium-er caveat was that it protruded quite a bit and it was easy to accidentally hit curbs with it when pulling forward into a parking spot. The chore of installing the lip wasn’t really a big deal, and some extra caution (and a front camera) mitigated the protrusion, but the bigly-est caveat was that semi-rigid construction.
The way the VCollection front splitter was designed was effectively based on form over function. It looked awesome but wasn’t ever meant to be used in high-performance environments. It was only ever meant to be cosmetic, and that’s entirely fine unless you have the magnetism for mayhem that I have.
I was crossing a bridge during a rally - one of those bridges that has pavement laid in segments to allow for expansion and contraction and movement of the road surface. The segments weren’t perfectly smooth so I was getting a bump-and-settle ride over the span. Between air pushing the front lip down at speed and the compression of the suspension over the road surface, my front lip bent down enough to catch the lip of one of the pavement segments, it folded in under itself, and it exploded.
I had no choice but to drive with it for a while until I get to a parts store and see what I could rig up to keep everything together. Even though I was driving well under the speed limit, the busted lip was still allowing enough air to flow over the undertray that it was forcing the undertray down into the pavement. I gritted my teeth and forced myself to grin n’ bear it even though I knew I’d be making things worse… and then it got much worse - I saw a pizza box in the road too late to avoid it and scooped it up with my dangling undertray. Since I didn’t see it in my rear-view mirror, I knew it was still under my car. I immediately pulled over, reached under my car, and pulled out the flaming cardboard box.
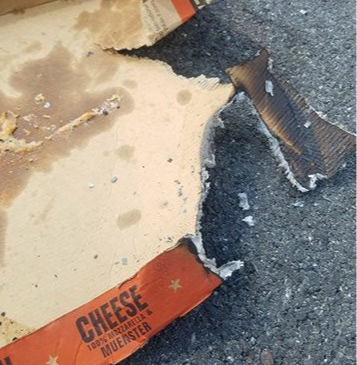
When I said the pizza box was flaming, I mean that it was literally on fire with flames and all.
It had gotten lodged against an exhaust manifold (which wasn’t heat shielded or ceramic coated), and it caught on fire. It couldn’t just fall out because it was wedged between the exhaust manifold and undertray, so it would have stayed there until it burned away completely.
Had I not pulled it out as quickly as I did, I have absolutely no doubt that it would have caused some very serious fire damage to my car, if not burned it down completely.
I eventually made it to a parts store and bought some zip ties and tape. I used the zip ties to secure the remnants of the front lip, the front bumper fascia, the undertray, and the fender liners. Then I used the tape to help reduce the amount of air that could get between each of those and force them apart. It was ugly, but it worked.
In hindsight, the whole thing makes for a great story. At the time, it was just a wee-bit embarrassing. It happened during a busy weekend - we were going to a charity even hosted by a buddy of mine called Breakfast in the Garage, then to another event called Supercars on State Street. Rolling in with my car’s face looking pummeled as it did, knowing that there’d be photographers documenting it, was humbling. But hey, at least it almost blended in (kinda but not really).

This was my second carbon fiber front splitter from VCollection. The first one was destroyed when I made a mistake during a track day. The second one was destroyed because my usage requirements exceeded the splitter’s design and performance thresholds. I had a chat with VCollection about it and they did offer to make me a custom one that would be reinforced to help prevent flexing at higher speeds, even offering me a super-generous discount on it. I wanted to go a different route, though, so I politely declined.
As with most of my projects, the different route never came - I had a design in mind but never actually attempted to turn it into reality, so the flimsy plastic OEM front valance that held things together in the meantime lasted far longer than I’d expected. I did eventually change it, though, and I’ll cover that later.
A Cozy Cabin Boy
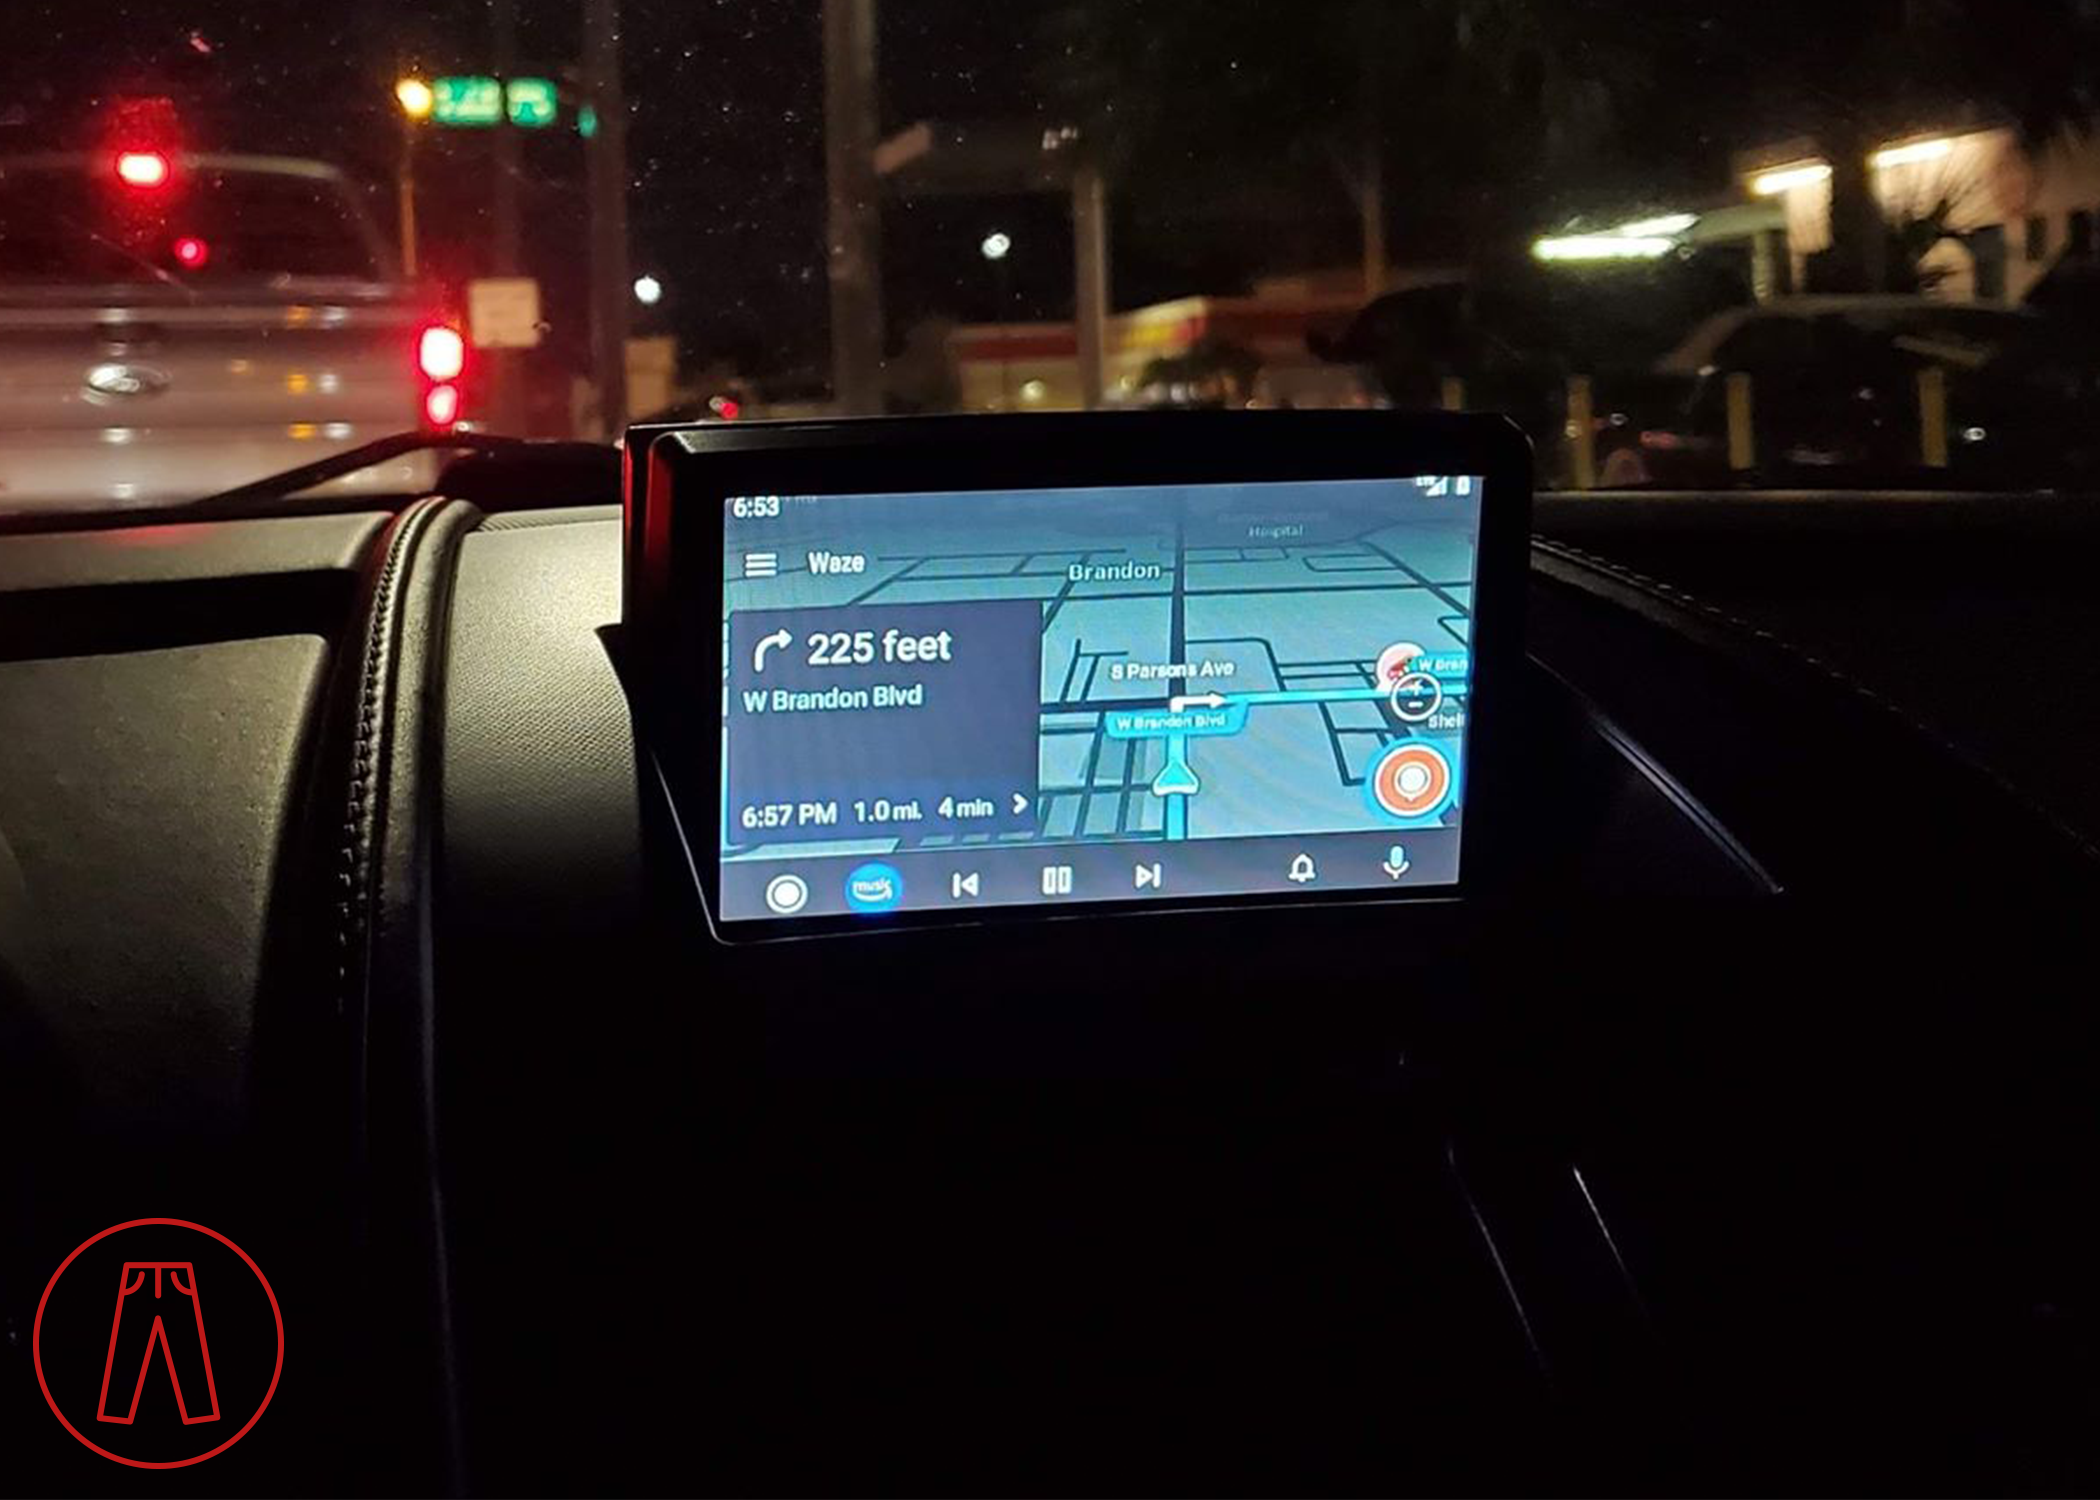
One of the biggest gripes people have with this generation of Aston Martins is the infotainment system. Yes, it’s plucked from Volvo. Yes, it was already outdated as soon as it was release. And yes, it was barely passable even back then and woefully inadequate now. But it could be upgraded. At the time, I was working with a company in England that offered a screen mirroring kit. The Volvo electronics and CAN bus system made installation a bit convoluted but it is still to this day one of my favorite upgrades I did to this car. It even included front and rear cameras.
It wasn’t the most elegant thing, but I could plug my cell phone in and anything that was on its screen would also be displayed on the car’s navigation screen. I’d have music streaming to the car’s audio system while Waze showed me how to get to the same grocery store I go to twice a week but I still use my navigation system anyway because what is even wrong with me. When I wasn’t being codependent, or if I was on a long drive and my next turn wasn’t for another 230 miles, I could [hypothetically] have YouTube or Netflix playing on my car’s navigation screen. How cool is that?
Eventually, that product was no longer on offer and the newest thing came out - fully integrated Apple CarPlay and Android Auto. Along with an HD screen, this was a much cleaner product and installation.
It was more modern, I could connect wirelessly, and the HD screen was a nice bonus as well. But for me, this system wasn’t all that reliable. It’d freeze up from time to time, and I often wouldn’t notice it until I was way off course. I’d have to reboot the system to get it to work again, which involved car cabin gymnastics or, later, having a shiny red button that I had to press to force the system to restart.
Don’t get me wrong, I love being able to have the modern functionality in my built-in-a-shed British car, I just wish it was reliable.
Changing the seats in a car is a huge modification - it’ll have an immediate and constant effect on the driver and can make the car feel completely different as a whole. That’s why I wanted a seat that could hold me better than the factory seats, which didn’t have nearly enough support during track days, and still be comfortable enough for daily driving.
The Cobra Nogaro fit the bill for this perfectly. I was able to get the seats wrapped in OEM Phantom Grey leather to perfectly match the rest of the interior, and even had the shells painted OEM Mercury Silver to match the paint on the car (not that you can really tell with this color).
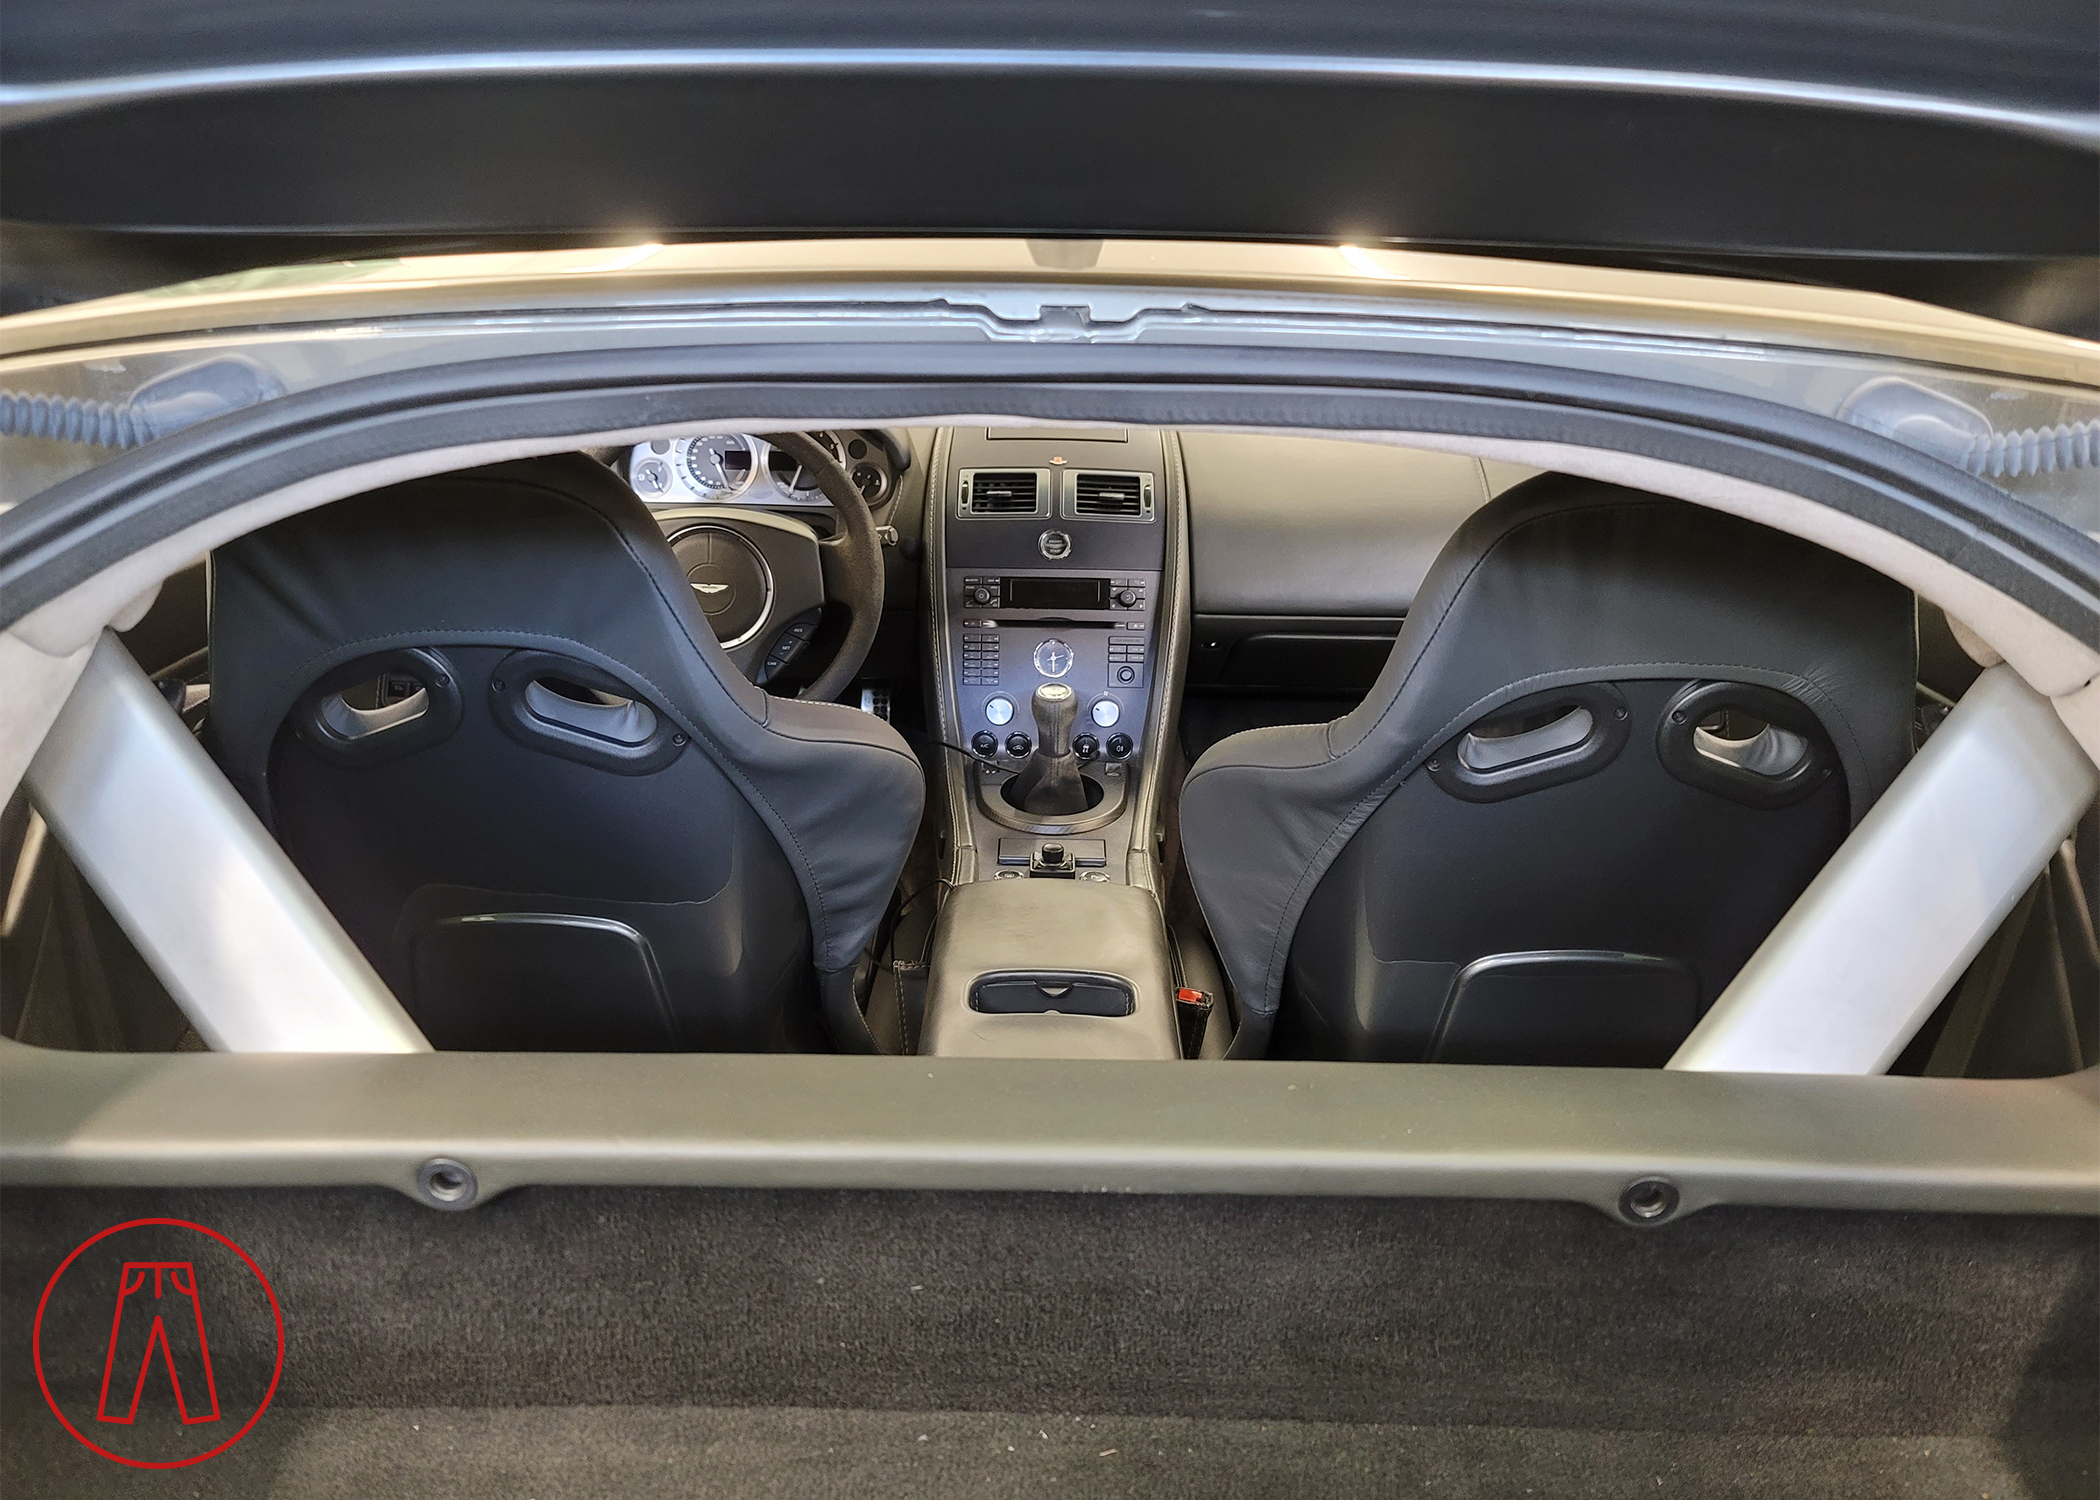
My main concern was comfort during long drives, but even after my 4100+ mile (6700 km) cross-country road trip across the US, I didn’t have any comfort issues at all and they did far better than I expected in that regard.
Getting these seats was an interesting process because we had at test a few things to make sure they’d turn out right. It was so particular that the Managing Director of Cobra personally oversaw the project. I’m incredibly happy with how they turned out and the only thing I’d do differently would be to get them in carbon fiber - but that’s far more expensive and I’ve got a budget to mind.

Just because we were careful doesn’t mean everything went smoothly, though. The bases that I originally received where the low-rise version. These made the seat sit so low that it couldn’t slide forward or back because the bottom of the seat shell was dragging on the carpet. That was an easy fix by just switching the bases out with the taller standard ones, but the other issue I had with these seats still plagues me to this day.
The OEM seats have air bags built into the side bolsters. Unplugging them (including to remove the seat entirely) causes not one, but two warning lights, plus a warning message to boot. These warnings can be easily avoided by plugging a resistor into the connector for the air bag, but that’s not the only obstacle to trouble-free installation of aftermarket seats in an Aston Martin V8 Vantage. The passenger seat in US cars has sensors in it that detect if there is someone sitting in it. This is actually a small array of sensors and a simple resistor won’t do the trick. Instead, the car’s firmware has to be rewritten to make it think it’s a European car. That requires an AMDS, which I don’t have. So, I’m just dealing with it for now. It’s annoying, but at this point I’m so used to warning lights that I actually get worried when I don’t have any.
I also wrote an Article about the seats with a little more info in case you want to read more about them.
Finishing up the detail in the interior are carbon fiber door bars and scuff plates from ECPS, both with a matte finish to match the dry carbon fiber of the OEM shifter surround that I had already installed a long while back. The standard door bars and scuff plates have a purple-ish hue to them that looks really neat in a way, but they didn’t really match anything else in the cabin. Likewise, the shifter trim I’d already installed was the only carbon fiber I had and it had nothing else to accompany it. The carbon fiber door bars and scuff plates really tied everything together, like a nice rug.

Given a person ideally spends most of their time with their car in the driver’s seat, having a nice interior can have a huge impact on how a person feels about their car. The opposite is also true. The interior being in shambles just doesn’t sit well. One of the quickest ways for an interior to make a car feel like a total shitbox is for the headliner to sag. Mine didn’t sag, though, because it’s an Aston Martin, sir. No, mine fell down completely. Fixing it required disassembling a bit of the interior but the headliner was fine to reuse, so the cost was mostly just in time and embarrassment.
The Great GMR Goat Rope
Does anyone outside of the US Military say goat rope? If not, it means debacle, fiasco, or train wreck. I was going for alliteration because I’m so clever, but then realized that “goat rope” is entirely incomprehensible without the proper Whiskey Tango Foxtrot background.
Anyway…
I first reached out to GMR way back in February 2017, saying that I was interested in supercharging my car. Their response was that the kit was only available if fitted by GMR themselves so I’d have to either bring them to the US to do the work or send my car to them so they could do it at their shop in England. Neither of those was too appealing and I put off the whole idea for a couple years. As Redpants continued to grow and I saw more potential for a supercharger kit offering, I approached GMR again. This time I was in England and wanted to stop by their shop and check out their car that they use for development and demonstrations. After a chat, we decided we’d work together to see what we could do to offer a more installation-friendly supercharger kit that could be installed by others.
A couple years later, we released a new supercharger kit, which I was able to install in my own garage. I got the highest-level kit that GMR was offer - water injection, GMR’s high-flow cats, and even a secondary air injection system to help with emissions (not that Florida cared, but I wanted to test it to see how it would do for my customers in areas that do have emissions testing). According to GMR, my car should have been able to pass emissions testing in Europe - some of the strictest in the world - with their catalysts and secondary air injection system (more on that later).
It wasn’t easy, but it was doable and I was able to supercharge my car in a way that hadn’t been possible only a few years prior.
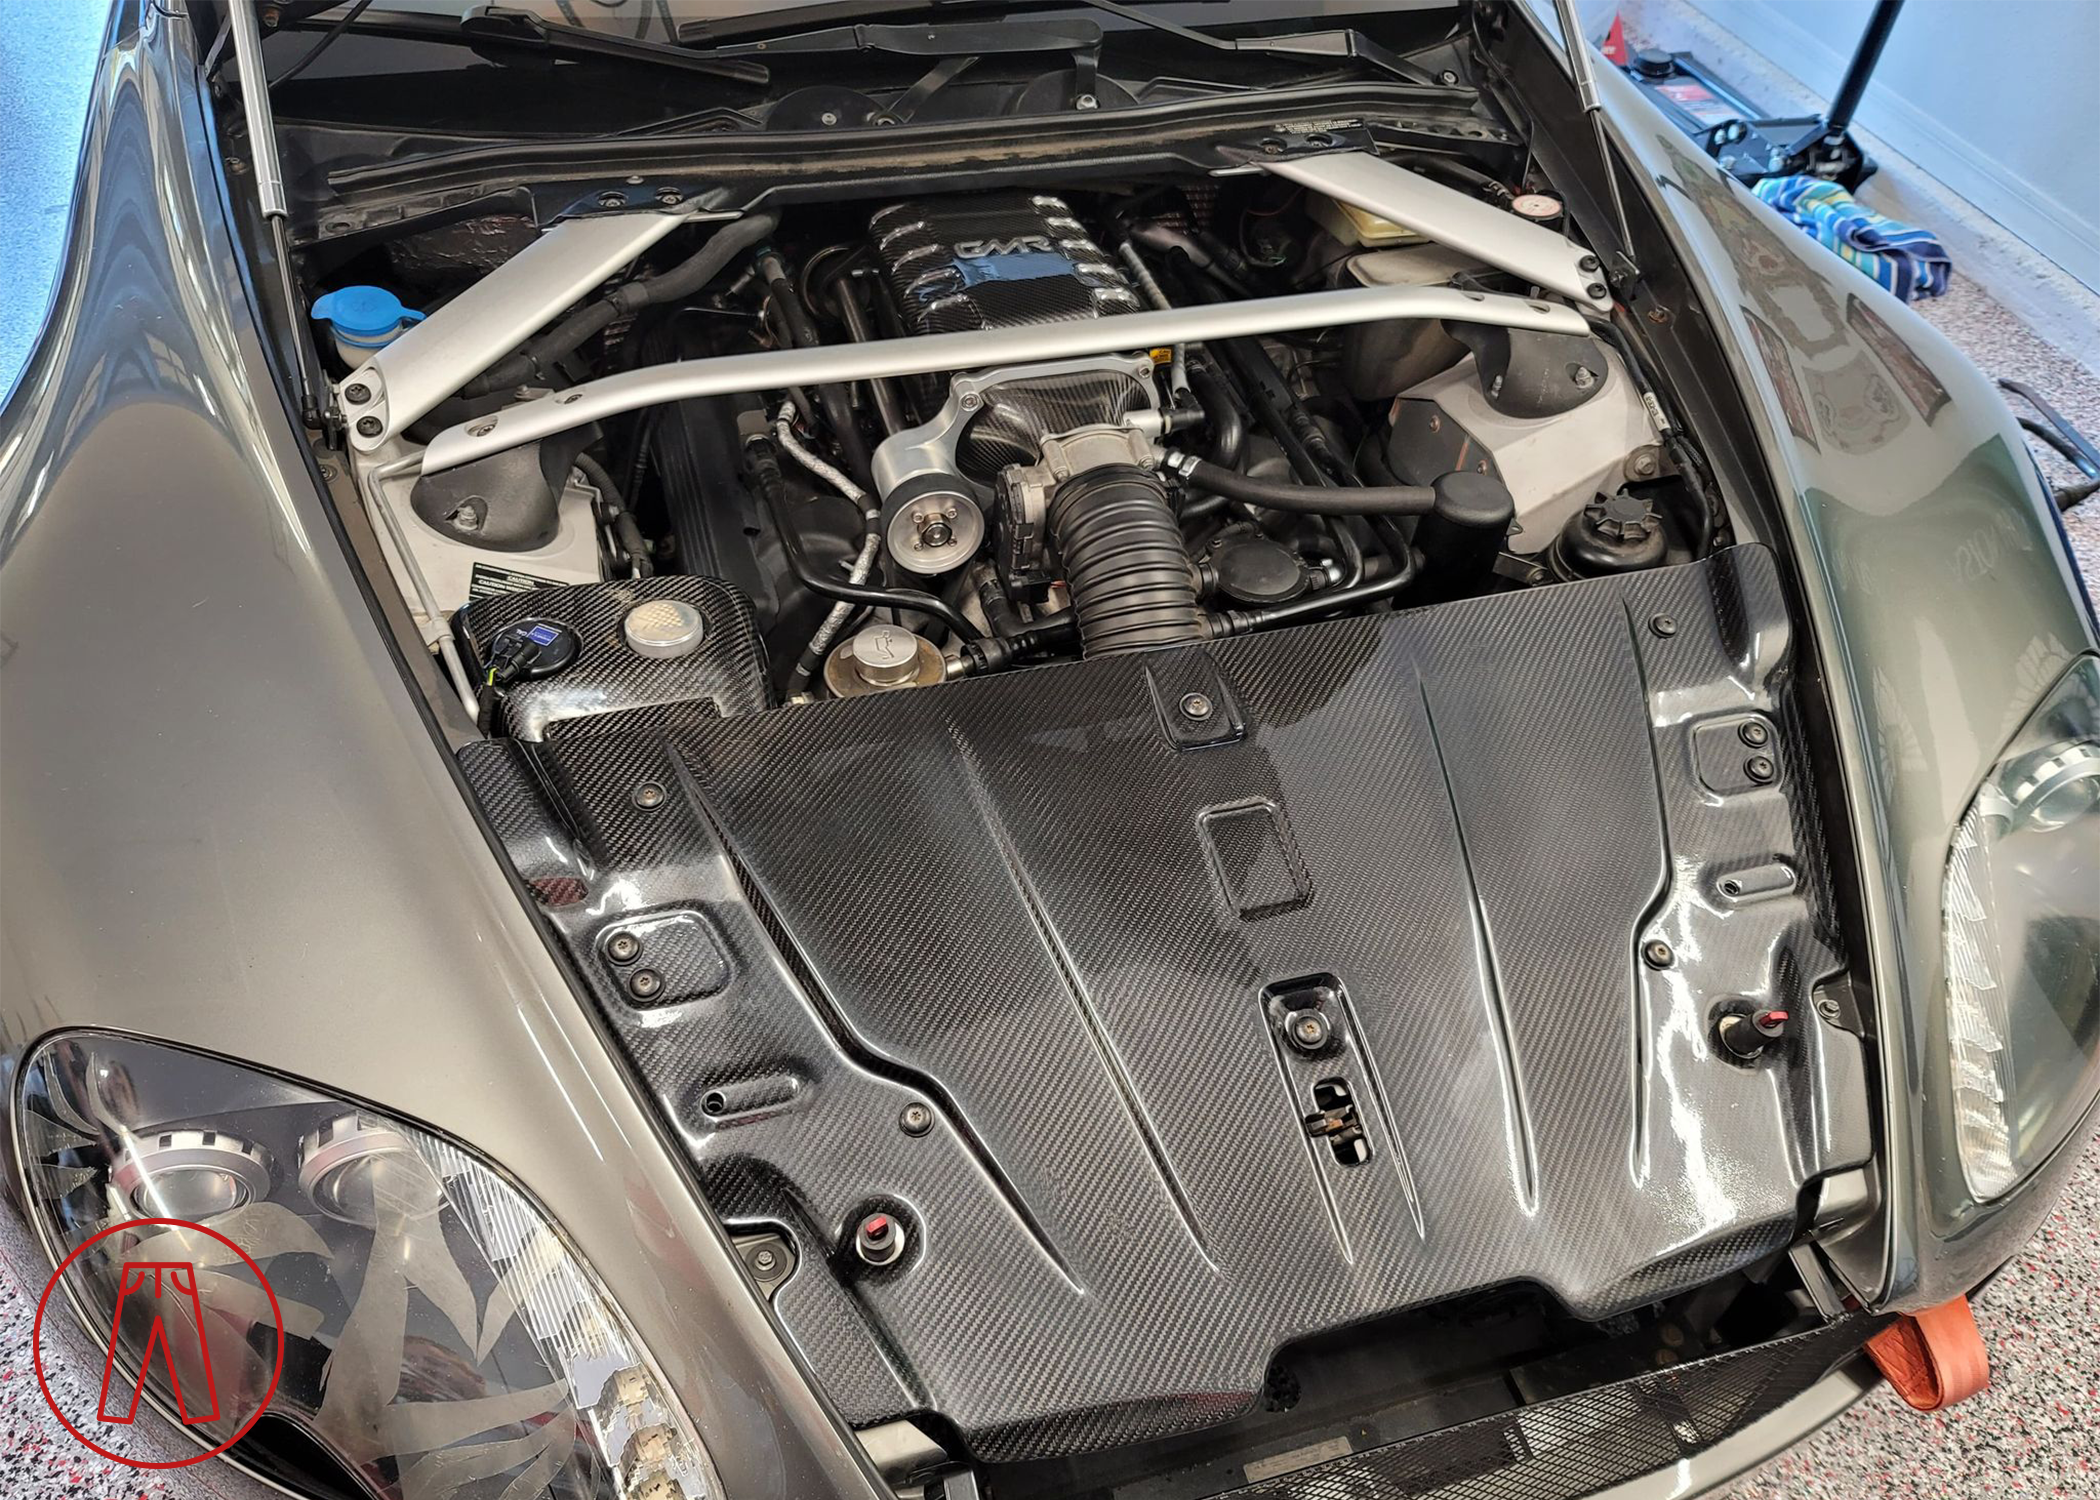
The power improvements were blatantly obvious and torque was effortless in a way the 4.3L V8 engine could never manage on its own. It completely transformed the car and turned it into a monster compared to the tame creature Aston Martin had released into the wild.
So, what went wrong? Let’s start at the beginning.
Firstly, at least some parts in the supercharger kit I received weren’t even new. Maybe I was being naïve when agreeing to a discounted price for the kit I’d be installing on my car - the one I’d be using to showcase and market GMR as a company and the product that I’d be promoting, while also being a vendor for them, which would have justified a discount - since there was no specific language clarifying that the supercharger kit I’d be buying would be brand new. Fool me once, I guess.
Secondly, a special tool is required to remove the main crank pulley from the front of the engine. GMR were supposed to supply me with the special tool but didn’t send it with the supercharger kit. I was able to make my own tool so I could remove the crank pulley and carry on, and then later received the tool from GMR after I’d already finished the whole installation.
Thirdly, they didn’t send new intake manifold gaskets. Gaskets should be replaced any time they’re removed because they may not seal properly if reused. This is true for any gasket, be it for the throttle body or catalytic converters, and it’s especially true for a big job like replacing the intake manifold definitely requires replacing its gaskets at the same time. GMR didn’t send a new pair of gaskets, something that one would reasonably assume to be included in what is supposed to be a comprehensive package.
Fourthly, there was a bunch of sediment in the reservoir for the water injection system. Here’s what came out when I filled the reservoir with water and then dumped it out:
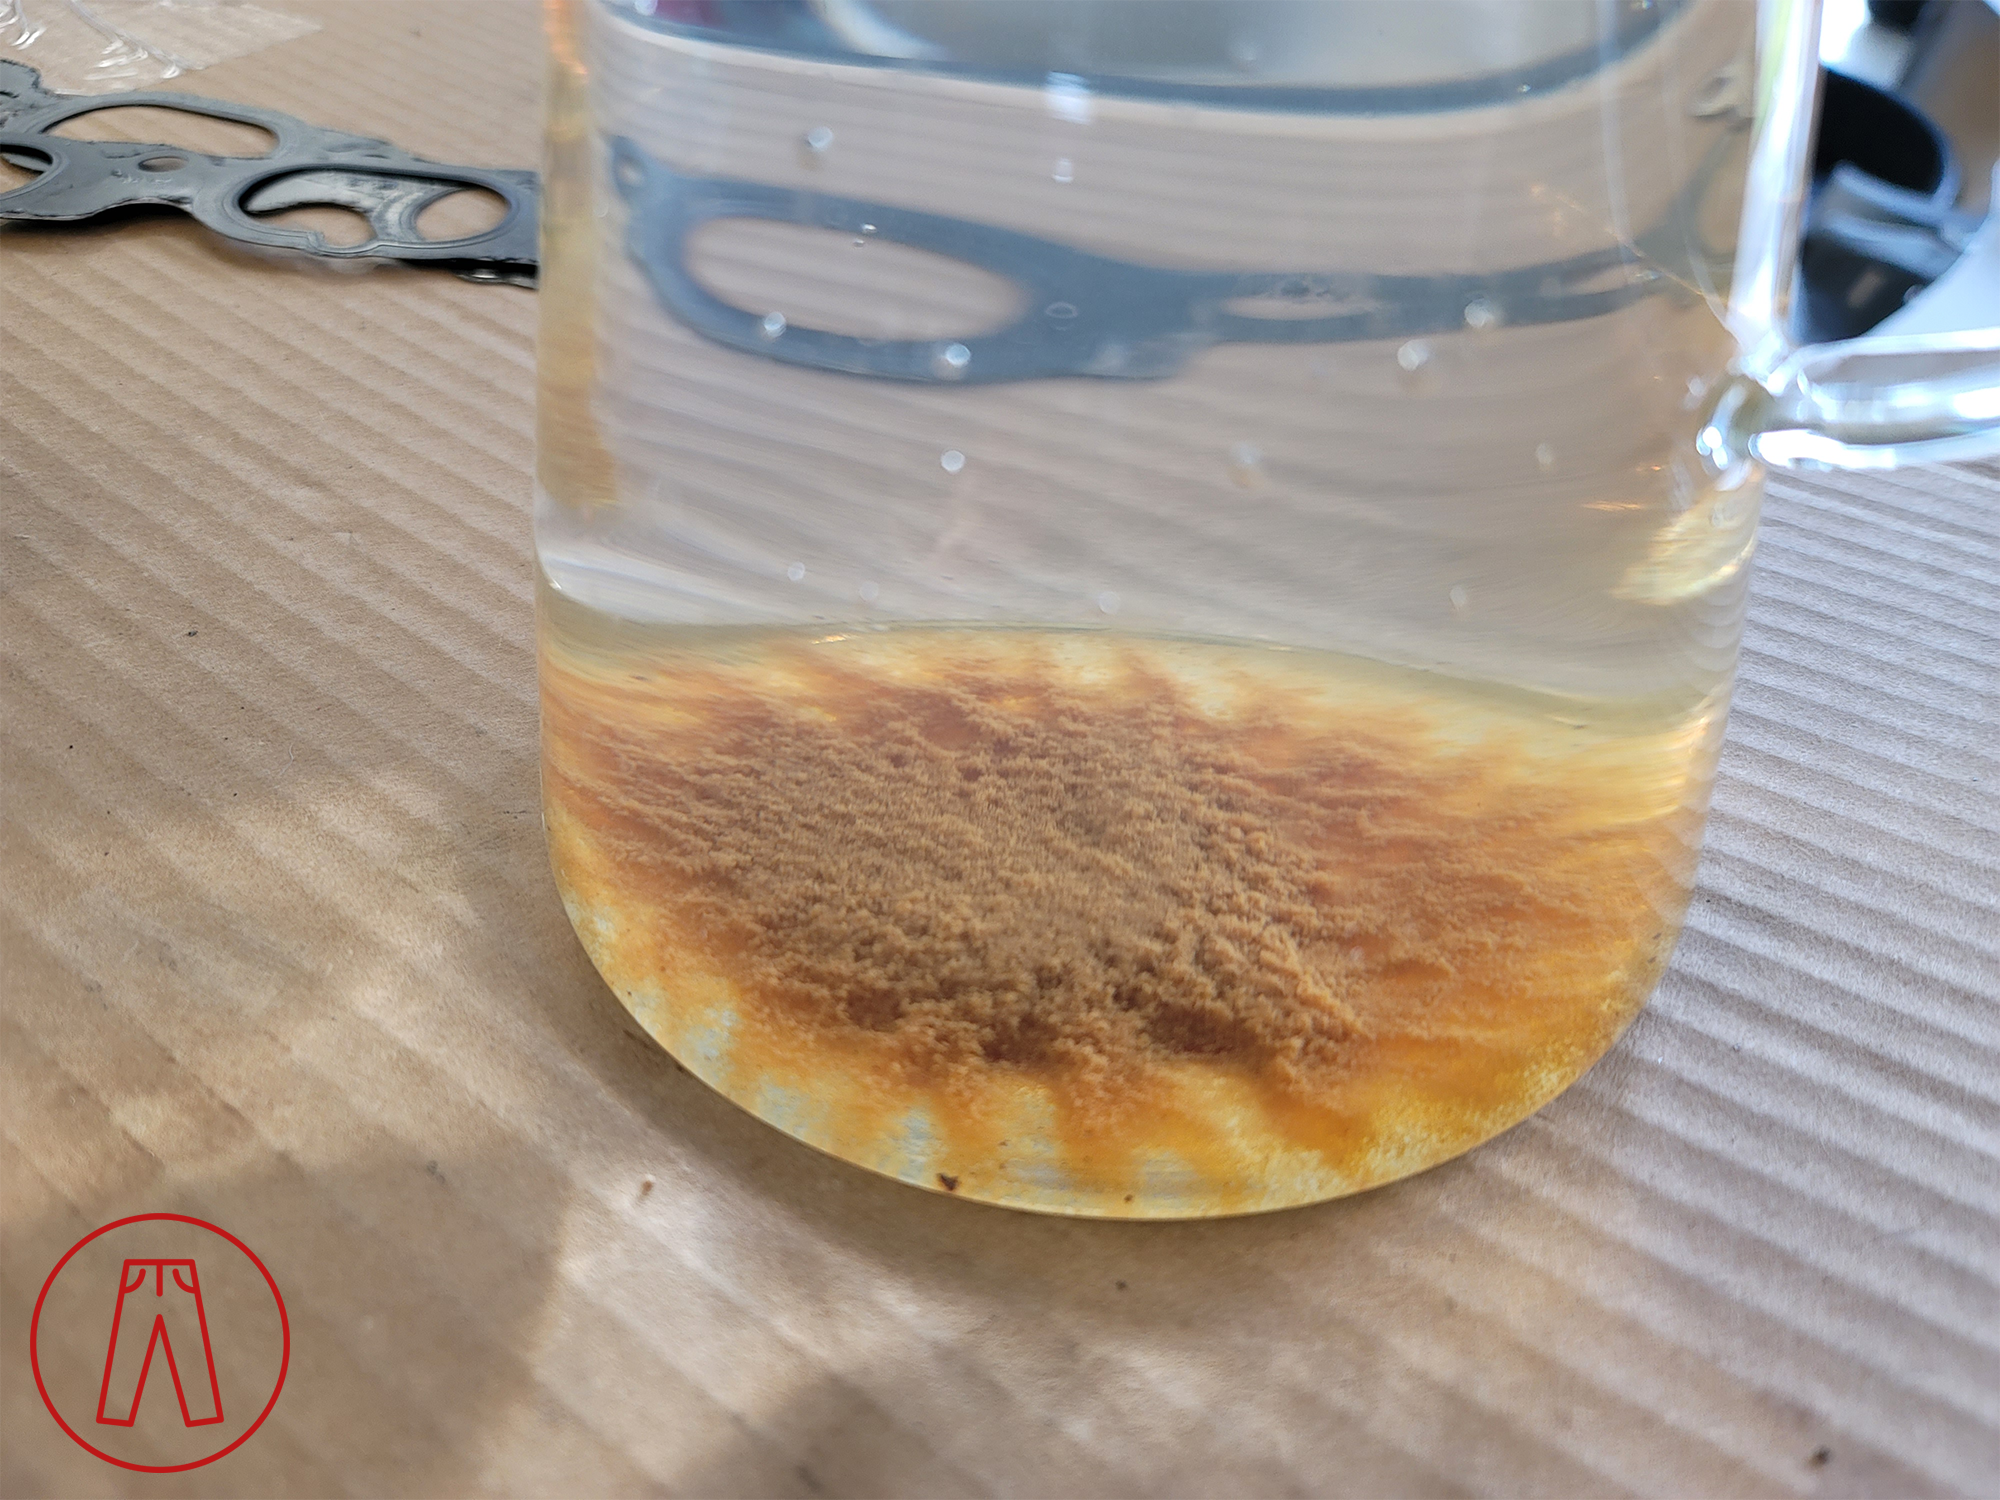
This was a large glass pitcher, not a small drinking glass - look at the intake manifold gasket in the background to help see the scale.
I’m glad I noticed this before finishing the installation, because that stuff could have easily clogged the water injector or gotten into my engine. I reported the issue to GMR, thoroughly cleaned the reservoir, and chalked it up to the supercharger kit being a used product.
In the end, I was able to install everything and was in love with the extra power my car now had. The issues I’d had with GMR up to that point were odd, but the final results were worth it (or so I thought).
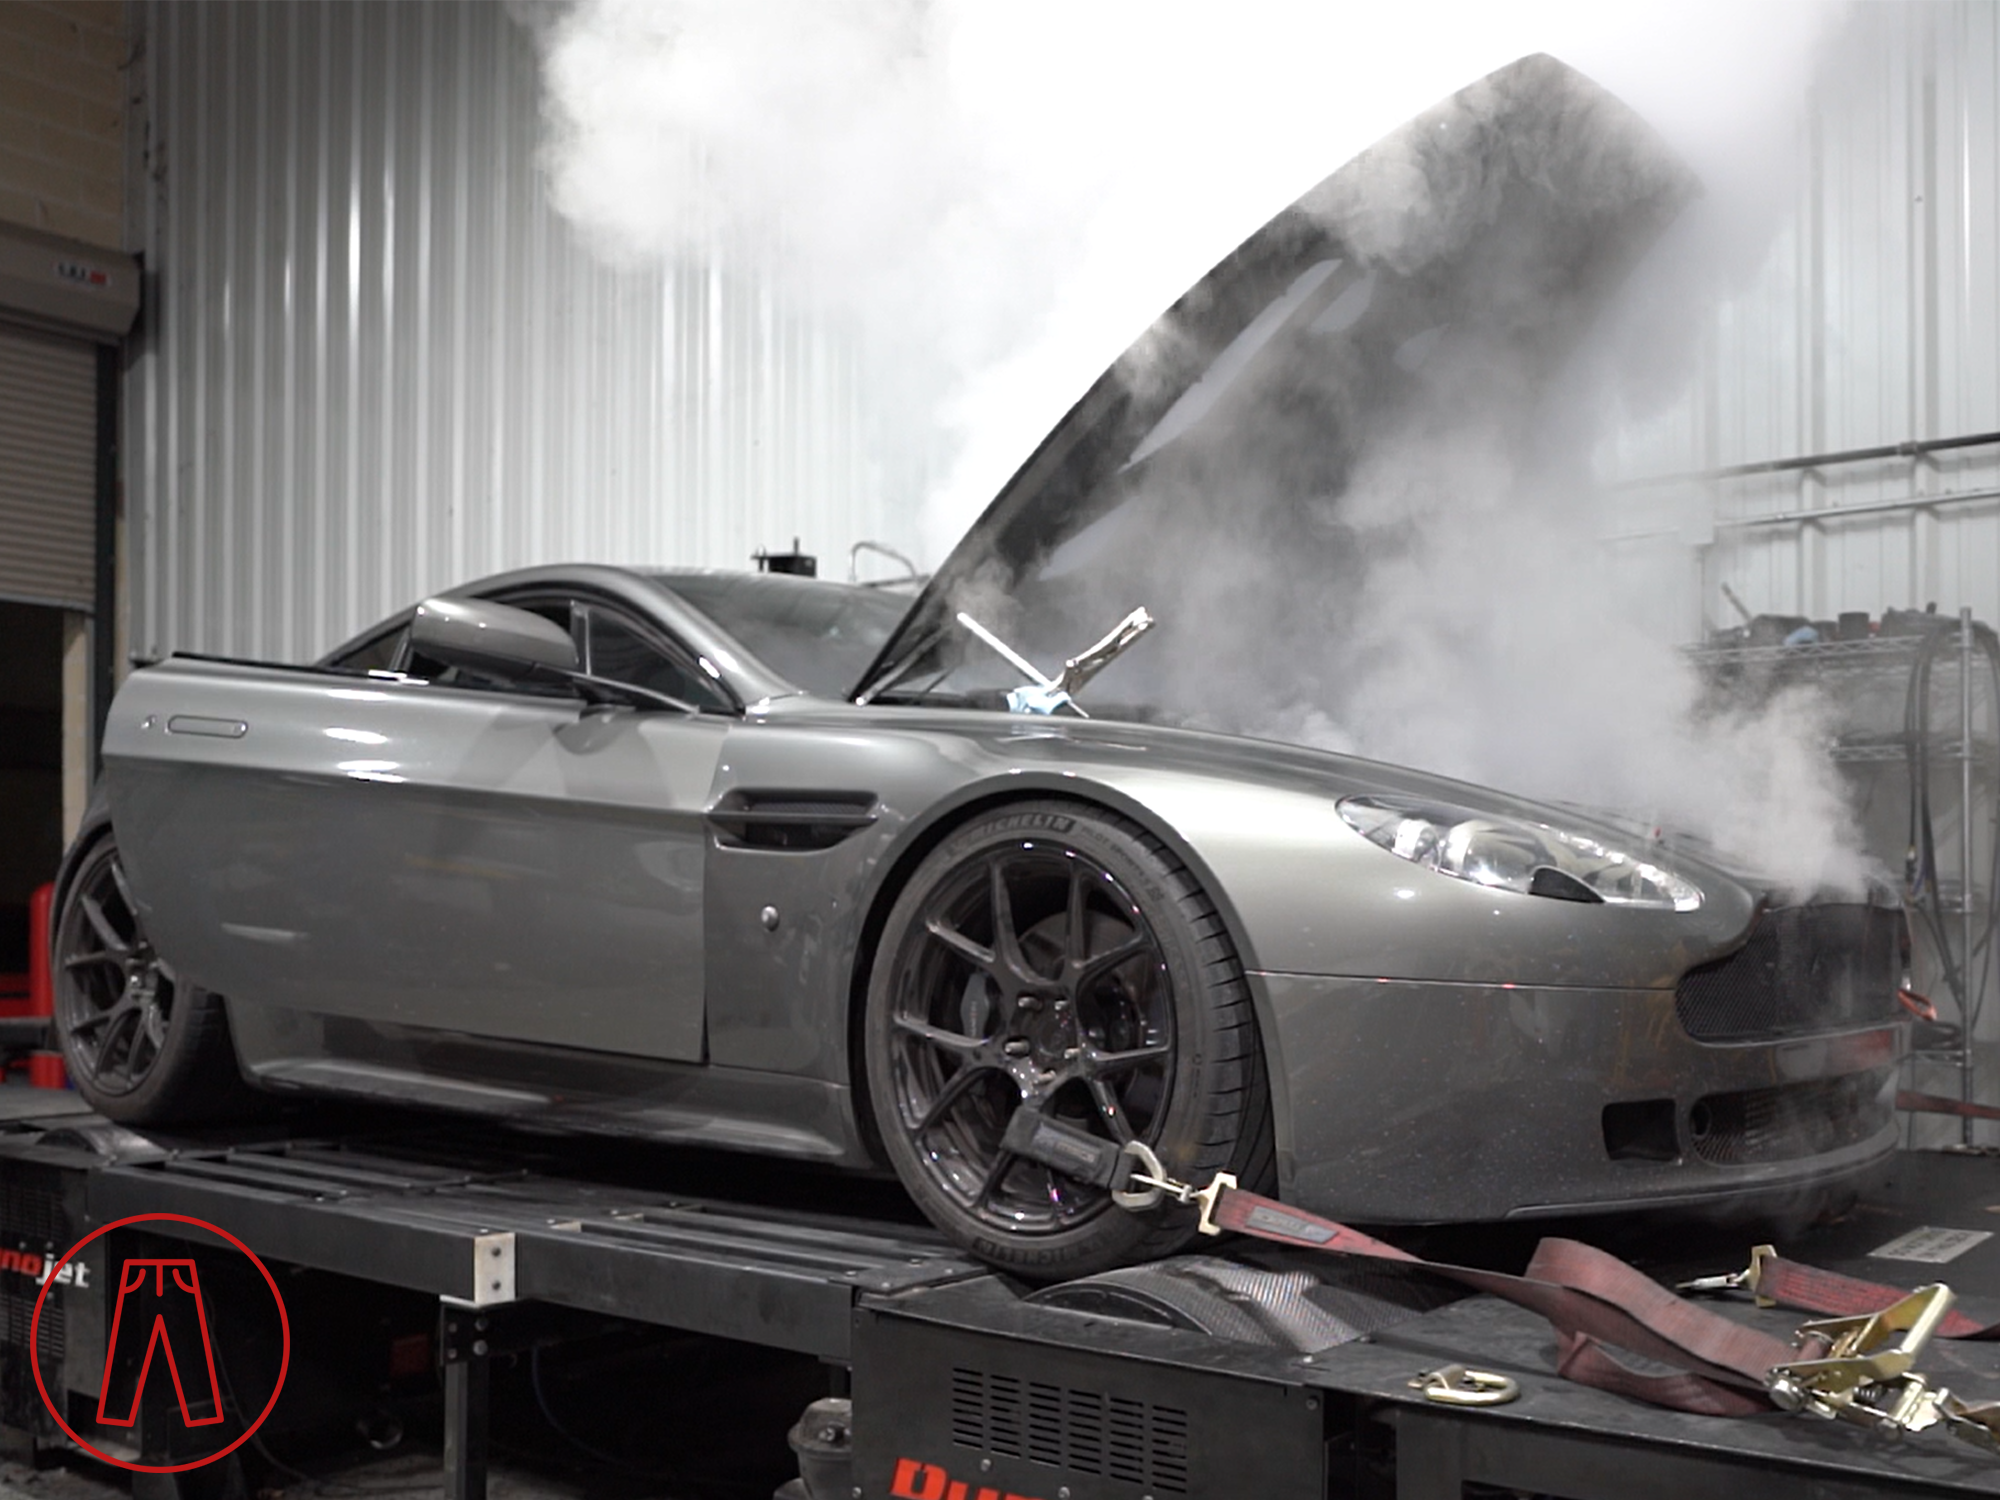
The supercharger kit is supposed to push out about 600 bhp but mine only showed 550 bhp when I did a dyno session in Texas during my road trip across the country. We noticed erratic fueling during the runs and started doing some diagnostics… but then my radiator popped so I couldn’t get a good pull in to see how much power the kit put out. Just to be clear, the radiator had finally failed after an awful lot of abuse that was unrelated to the supercharger.
Fixing my radiator was its own adventure but after a couple weeks and a broken tooth, I finished that road trip.
I later found out that a failed check valve in my gas tank was preventing my car from getting enough fuel pressure, which made it difficult for the engine to turn over at startup and for the system to maintain consistent fuel pressure under heavy loads. I fixed my busted fuel system with scrap parts from a salvaged Jaguar and a boxcutter so dull that I’d have been better off with a butter knife. The repair immediately helped and all was right again… for a few months.
I was out for a relaxing drive while visiting my parents in Idaho when my engine made a puff sound and felt as if it’d been deflated. Pressing the throttle made little difference other than sounding more like a burbling steam engine. I was able to limp it over to a shop that specializes in British cars and they took a look. The issues were easy to find.
They did a compression test and found cylinder #8 was shot. The dropped a scope into the cylinder and saw lots of scoring on the cylinder walls - a clear indication of blown piston rings. Hooking up a smoke machine, they found that the GMR throttle body inlet and lower intake manifold plenum were leaking badly. These two components were made using carbon fiber and aluminum that were bonded together. The epoxy that was used hadn’t done the job well enough and was splitting, creating massive vacuum [and boost] leaks between the carbon fiber and aluminum pieces.
The boost leaks would have contributed to the lower power output than expected during my dyno session in Texas, and the vacuum leaks were so bad that they were definitely the cause of my engine popping. The worst of the leaks was the one at cylinder 8, which is the one that failed first.
The pic below shows the smoke leaking out from between the carbon fiber and aluminum pieces of the throttle body inlet cone. The leak from the intake manifold runners was much worse - so much so that I couldn’t get a good picture of it because my cell phone’s camera couldn’t focus through the smoke down onto the bottom of the intake manifold runners.
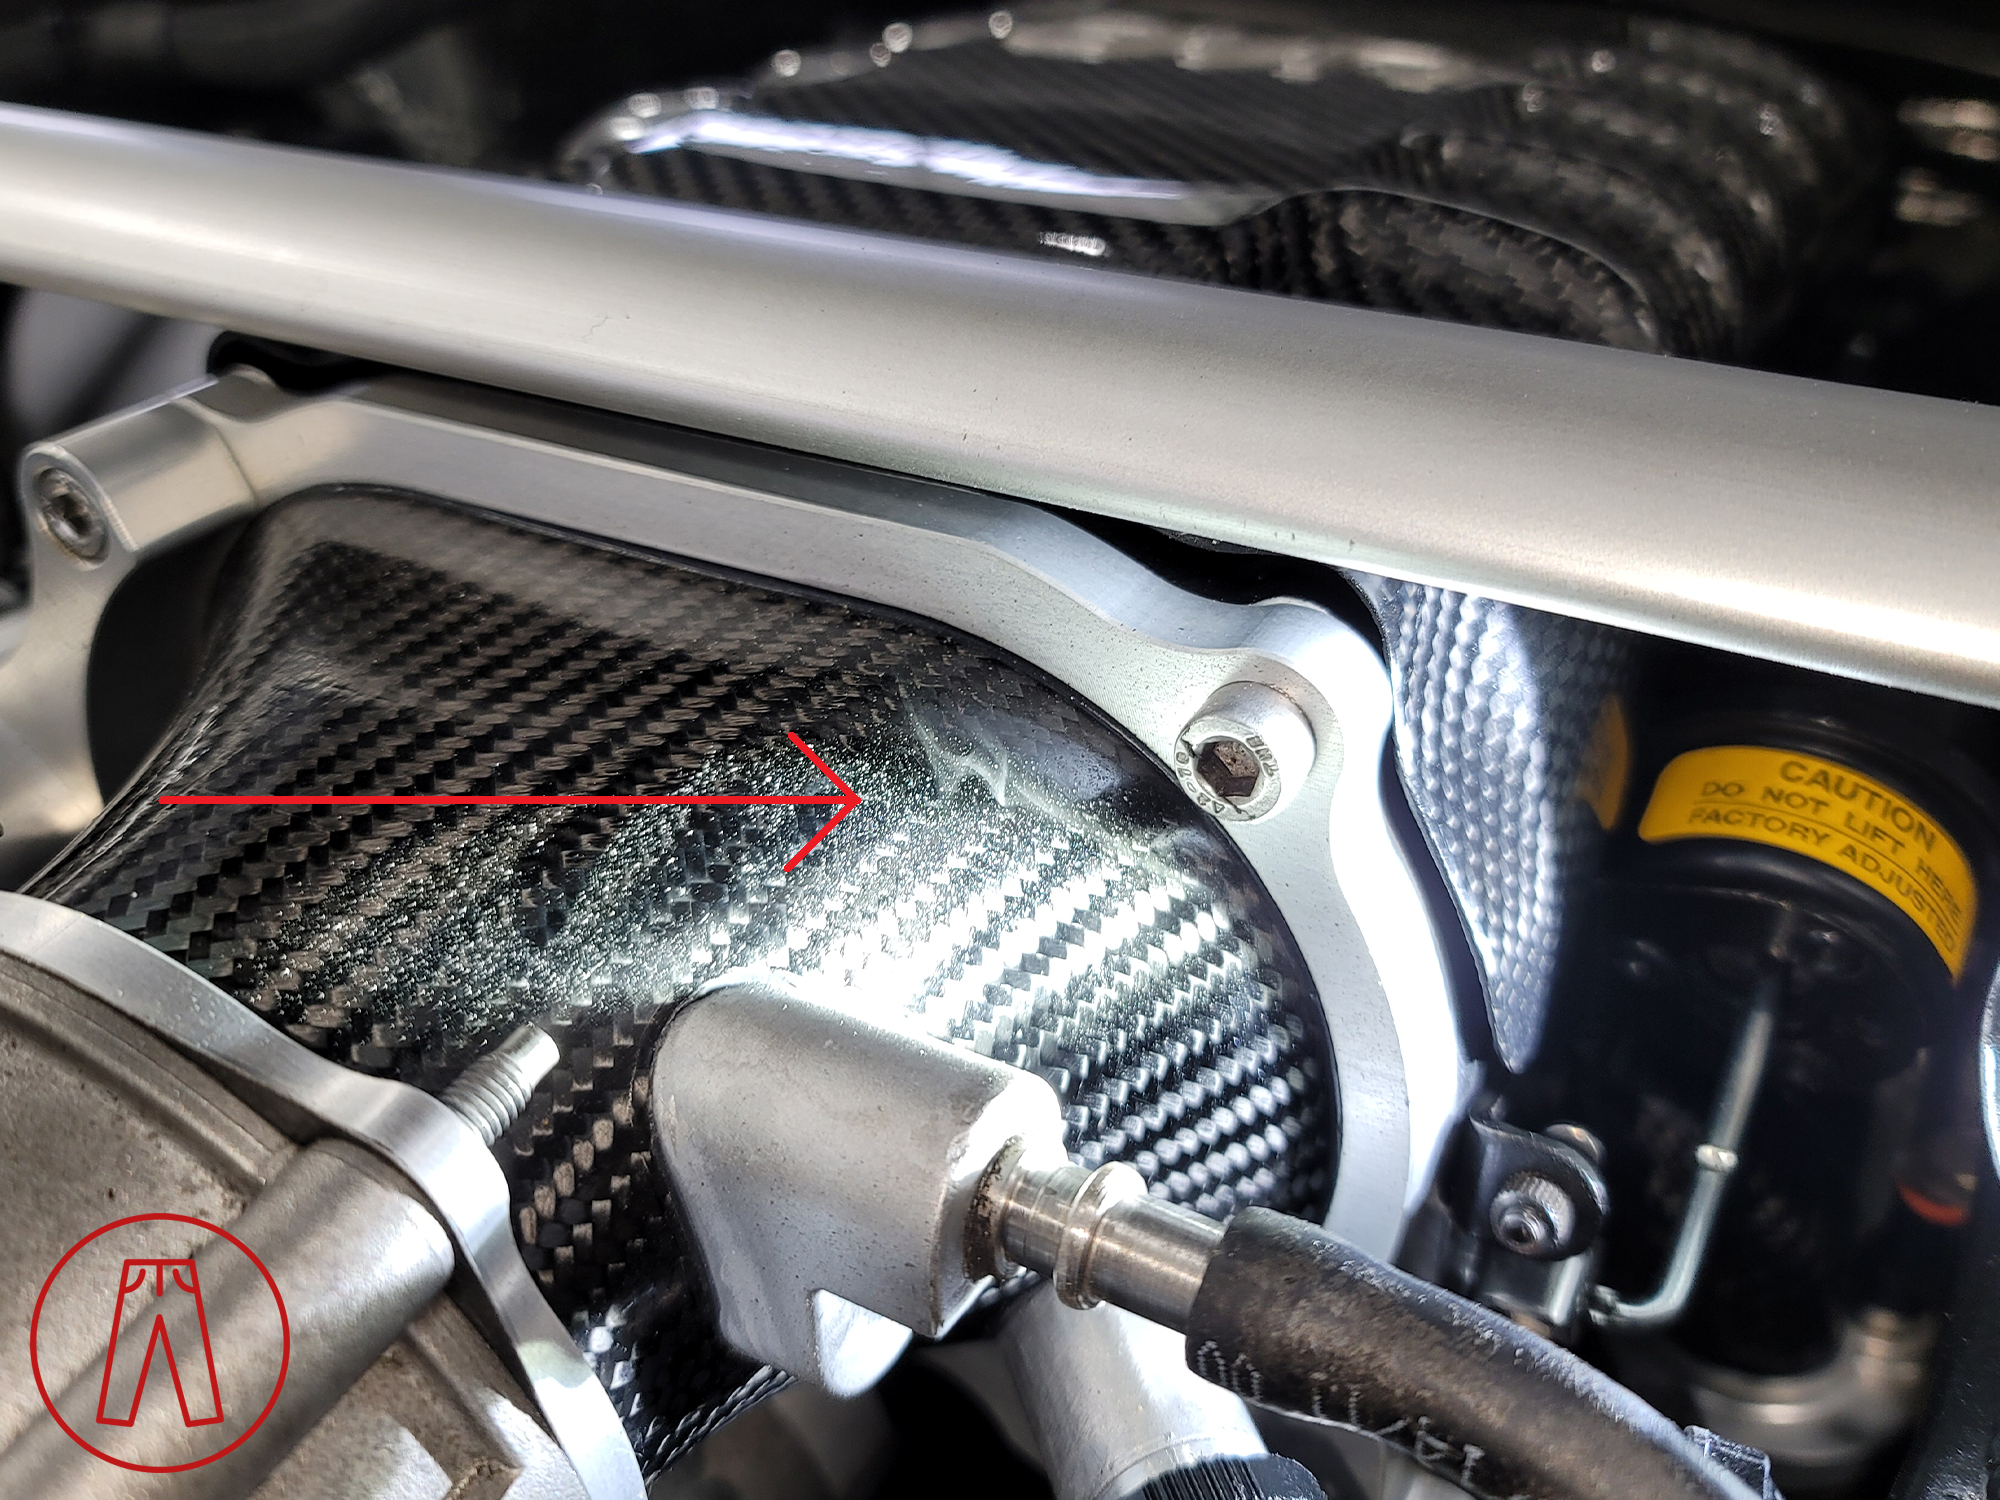
The arrow indicates smoke from a smoke test coming from between the aluminum and carbon fiber of the GMR inlet cone. That isn’t a smear or reflection!
Reporting back to GMR, I found out that my car wasn’t the first one with this issue. GMR already knew about it.
They had already begun redesigning their intake manifold to get rid of the aluminum and make it fully carbon fiber to eliminate the epoxy entirely and remove that point of failure. That was great and all, but I’d already lost my engine and a new one from Aston Martin was somewhere in the ballpark of $30,000 (not including shipping, import duties, installation, taxes, or anything else). Luckily for me, my buddy Alister over at Valiant-Ecosse in Germany happened to have an engine on the shelf that he wanted to unload.
It wasn’t just any engine, though. This was an engine from one of the 15 original Vantage N24 race cars! One of those cars had later been updated to GT4 regulations, which included the larger 4.7L engine, and somehow Alister had gotten his hands on the engine after it had been replaced. Not only did I get the engine, but it was also rebuilt to even higher specifications by the original engine builder himself, Bruce Bermingham.
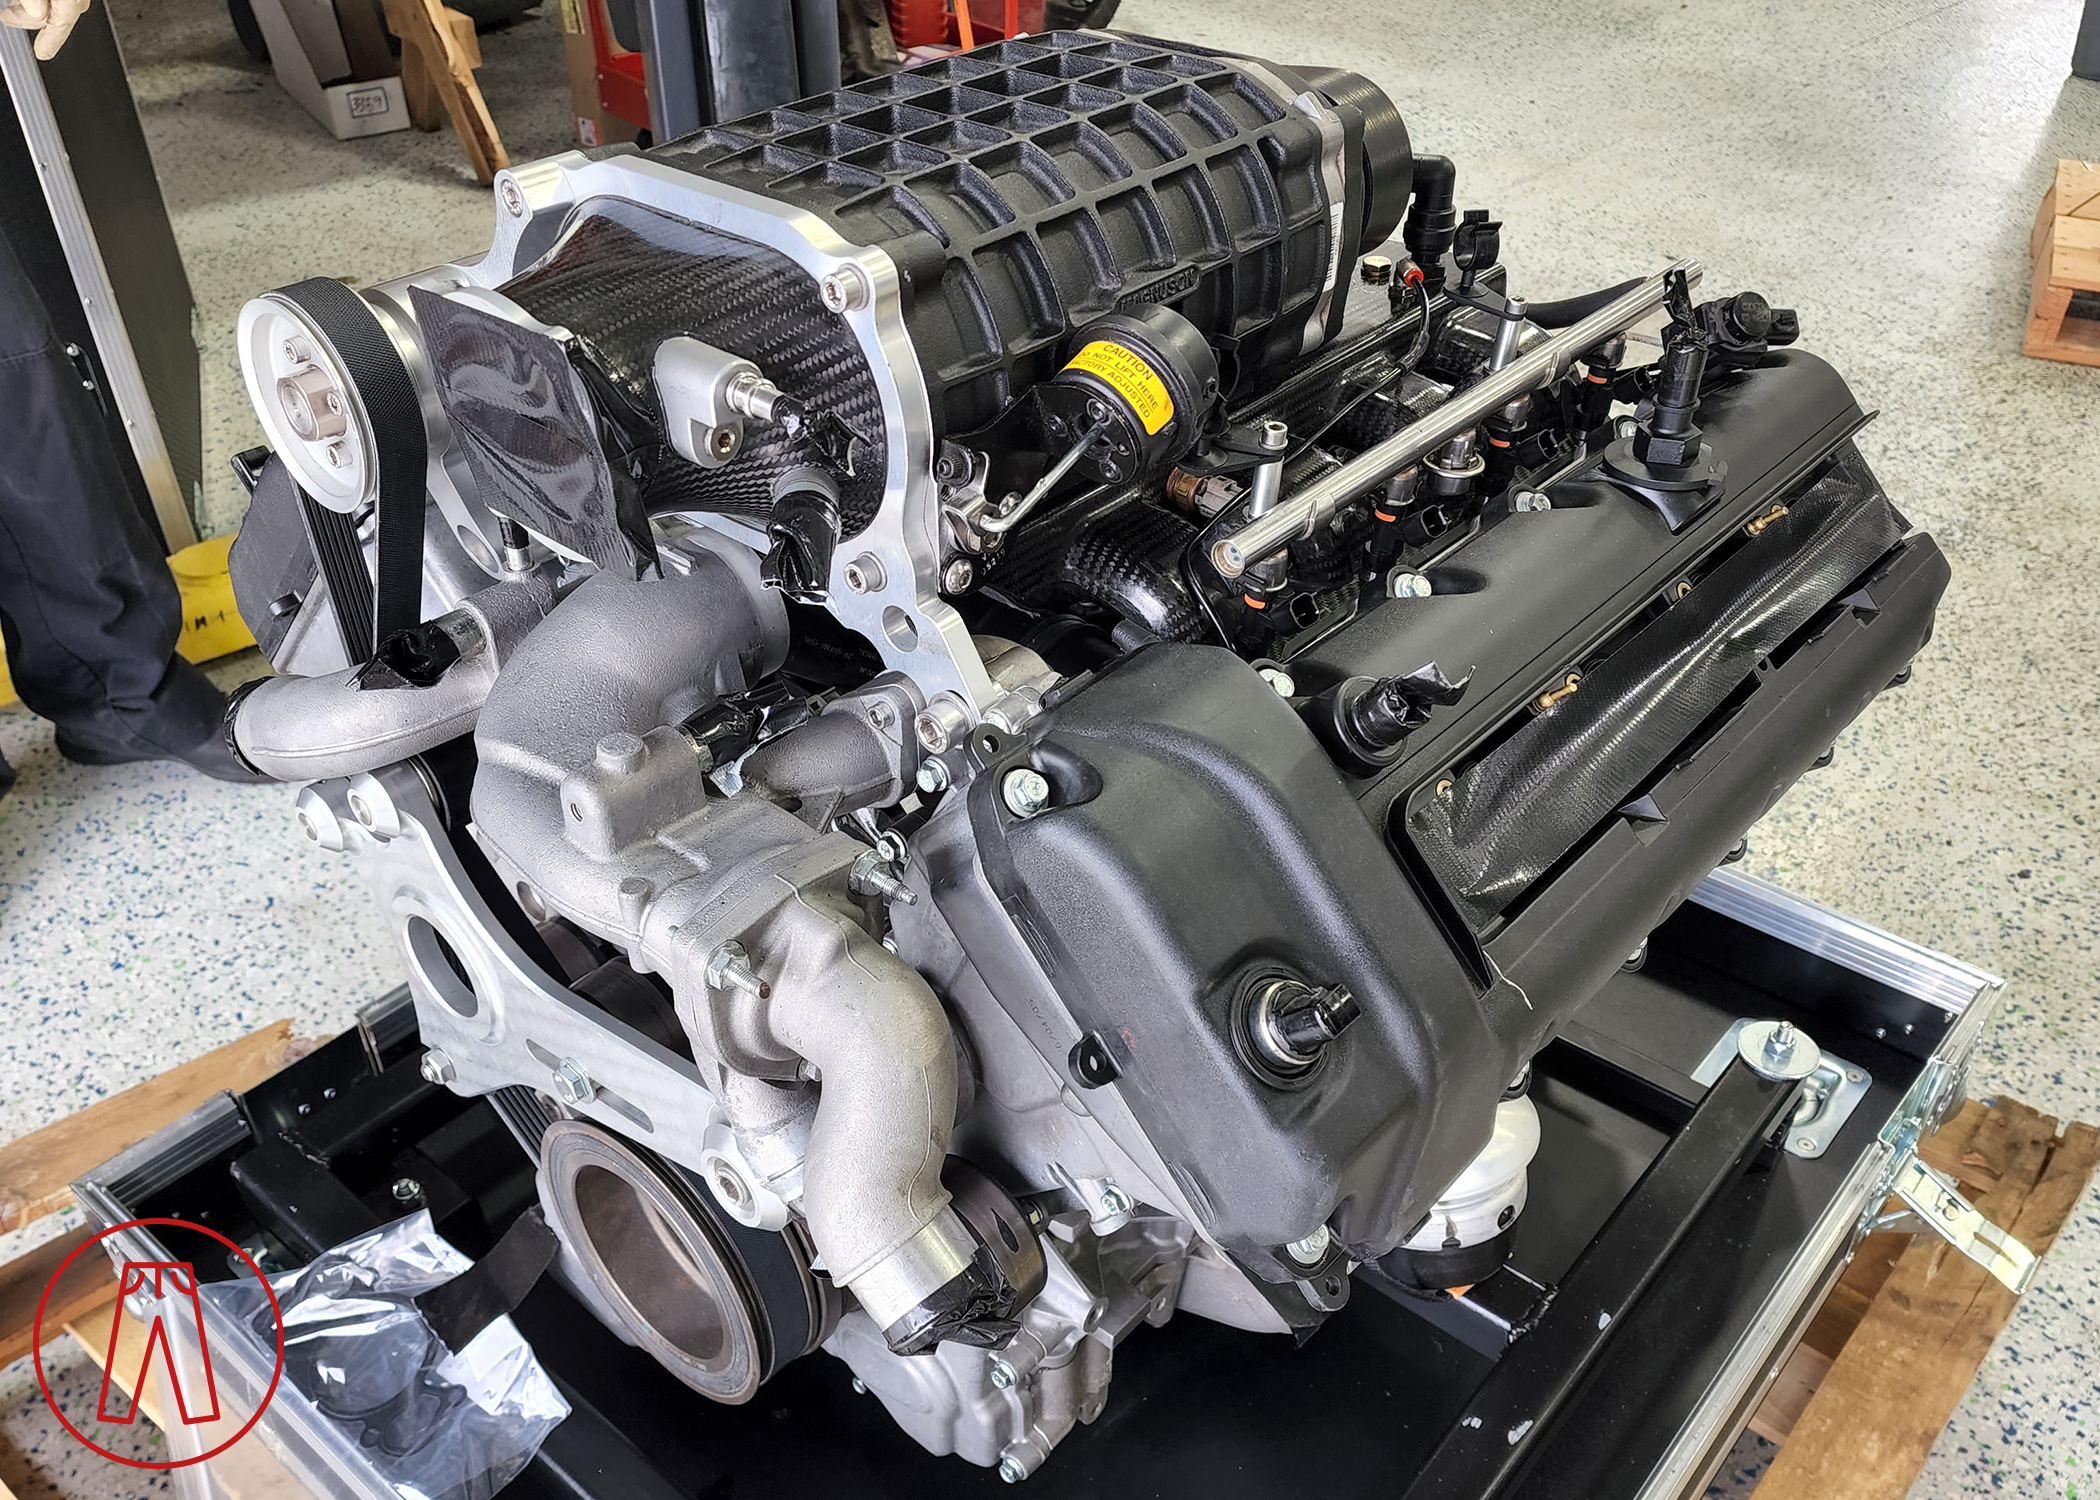
GMR insisted they install their freshly redesigned supercharger kit themselves, “to make sure it’s done right” (more on that later) and then the whole assembly was shipped over to drop into my car.
While all this was happening, I went about a few other projects that I wanted to do in tandem with the new engine being installed.
But don’t worry, the GMR story isn’t over yet and I’ll come back to it later.
Squeezing the Most Out of the V8
The power delivery of the GMR supercharger was impressive (prior to it killing my engine), but that wasn’t the case when I first installed it. Before supercharging my car, I had a VelocityAP engine tune that improved throttle response, making the engine much more reactive to my right-foot inputs. Although the GMR supercharger offered up a lot more horsepower, it was noticeably more sluggish to rev up. When I asked GMR about this, they said they kept the factory tune’s slower throttle response as a measure of safety. Their concern was that drivers would lay into the throttle and get too much power too quickly and lose control, possibly even wrecking the car.
Understandable, maybe, but no no no. I needed my throttle response back. They updated my engine tune and I loaded it into my car and, happily, I was able to enjoy a decent throttle response again. I didn’t find the car any more difficult to control and commented on how much better it felt overall, and they said they’d keep that in mind in case anyone else had the same concerns.
Even so, I wanted more. There’s always room for improvement in anything, and I knew I could do more with this setup.
Back when I was in Texas dealing with that whole radiator fiasco, my buddy Bruce and I replaced my starter. I’d been having startup issues and we suspected the starter was the problem. Up until then, I’d been running VelocityAP equal-length headers without any heat shielding whatsoever. I’d assumed that this had led to my starter burning out, which was causing the starting issues. While my starter was indeed fried, my assumption was incorrect - it was due to that faulty check valve in the fuel system I already talked about, which made my starter work much longer and harder than it should every time I started the car. The headers weren’t the problem.
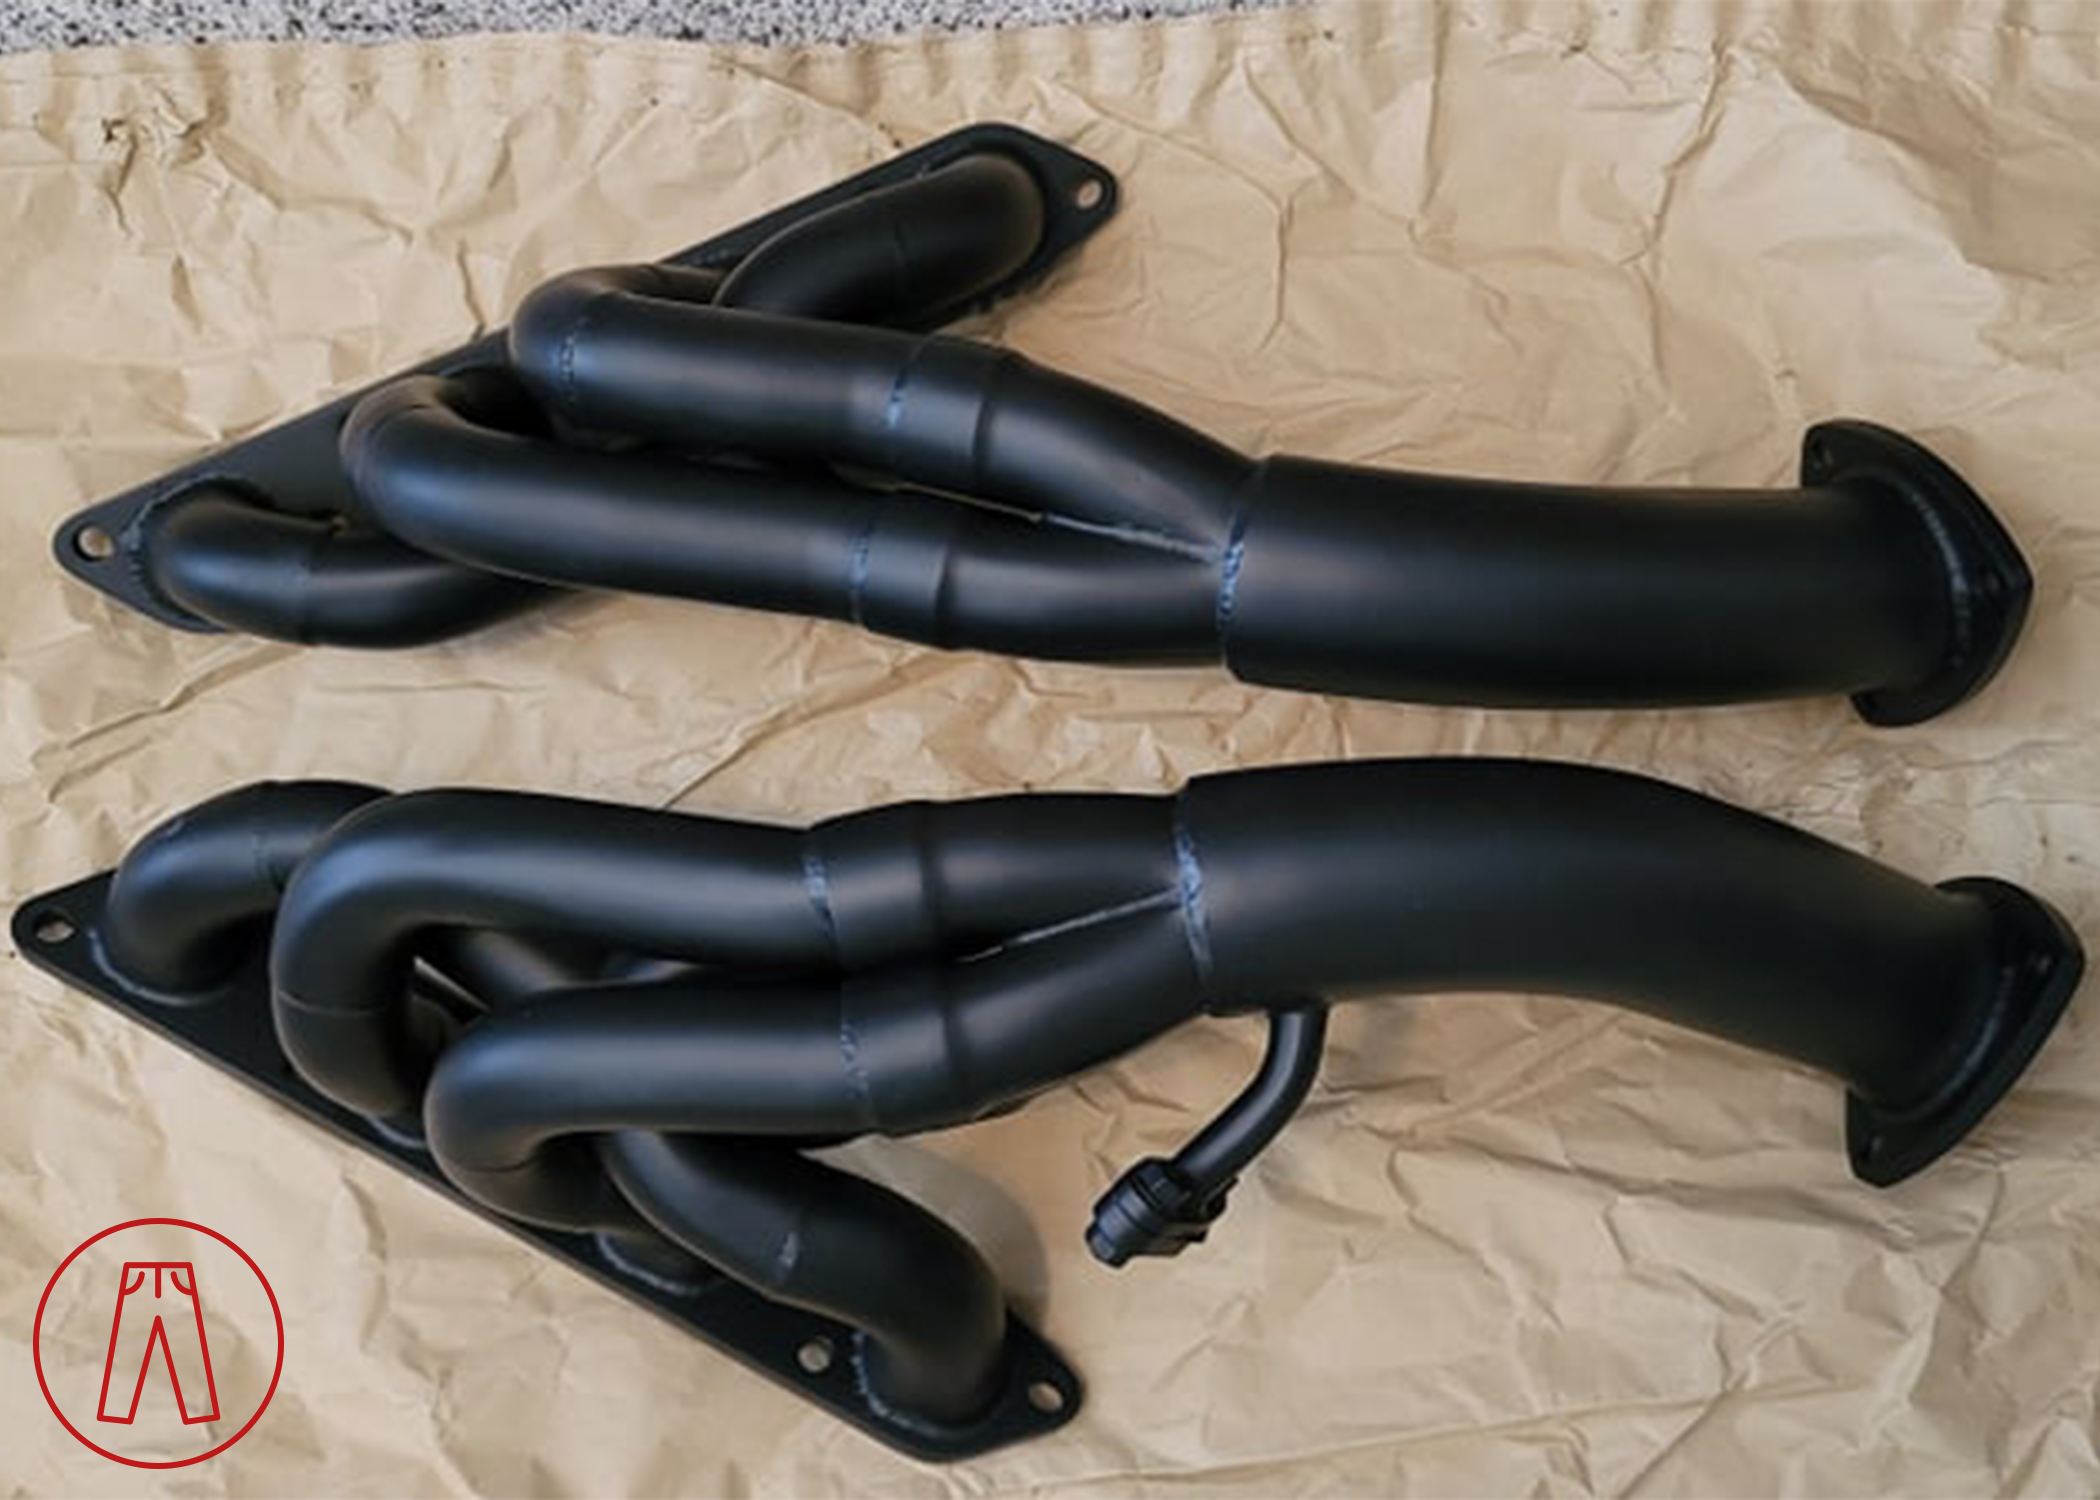
Regardless, I’d wanted to get them ceramic coated for a long time and I finally went ahead and had them Cerakote’d. The outside being black is the obvious coating. But the real heat shielding is performed by the coating on the inside of the piping - this is actually the coating used for protecting pistons, which does far more for blocking heat.
I also had my throttle body coated at the same time in the same way, inside and out. You cynics will surely say that such a small section of the intake system being ceramic coated will have no effect at all on the intake air and, yes, you’d be right. But I don’t care. I disassembled my throttle body, had it ported and ceramic coated, and then slapped it back in. The throttle body modifications are incredibly incremental and won’t be felt whatsoever on their own, but it’s another piece of a much larger puzzle.
The finishing touch for the throttle body was my mechanic’s idea - he cut out a piece of a Red Bull can and used that to reseal the throttle body’s butterfly valve.
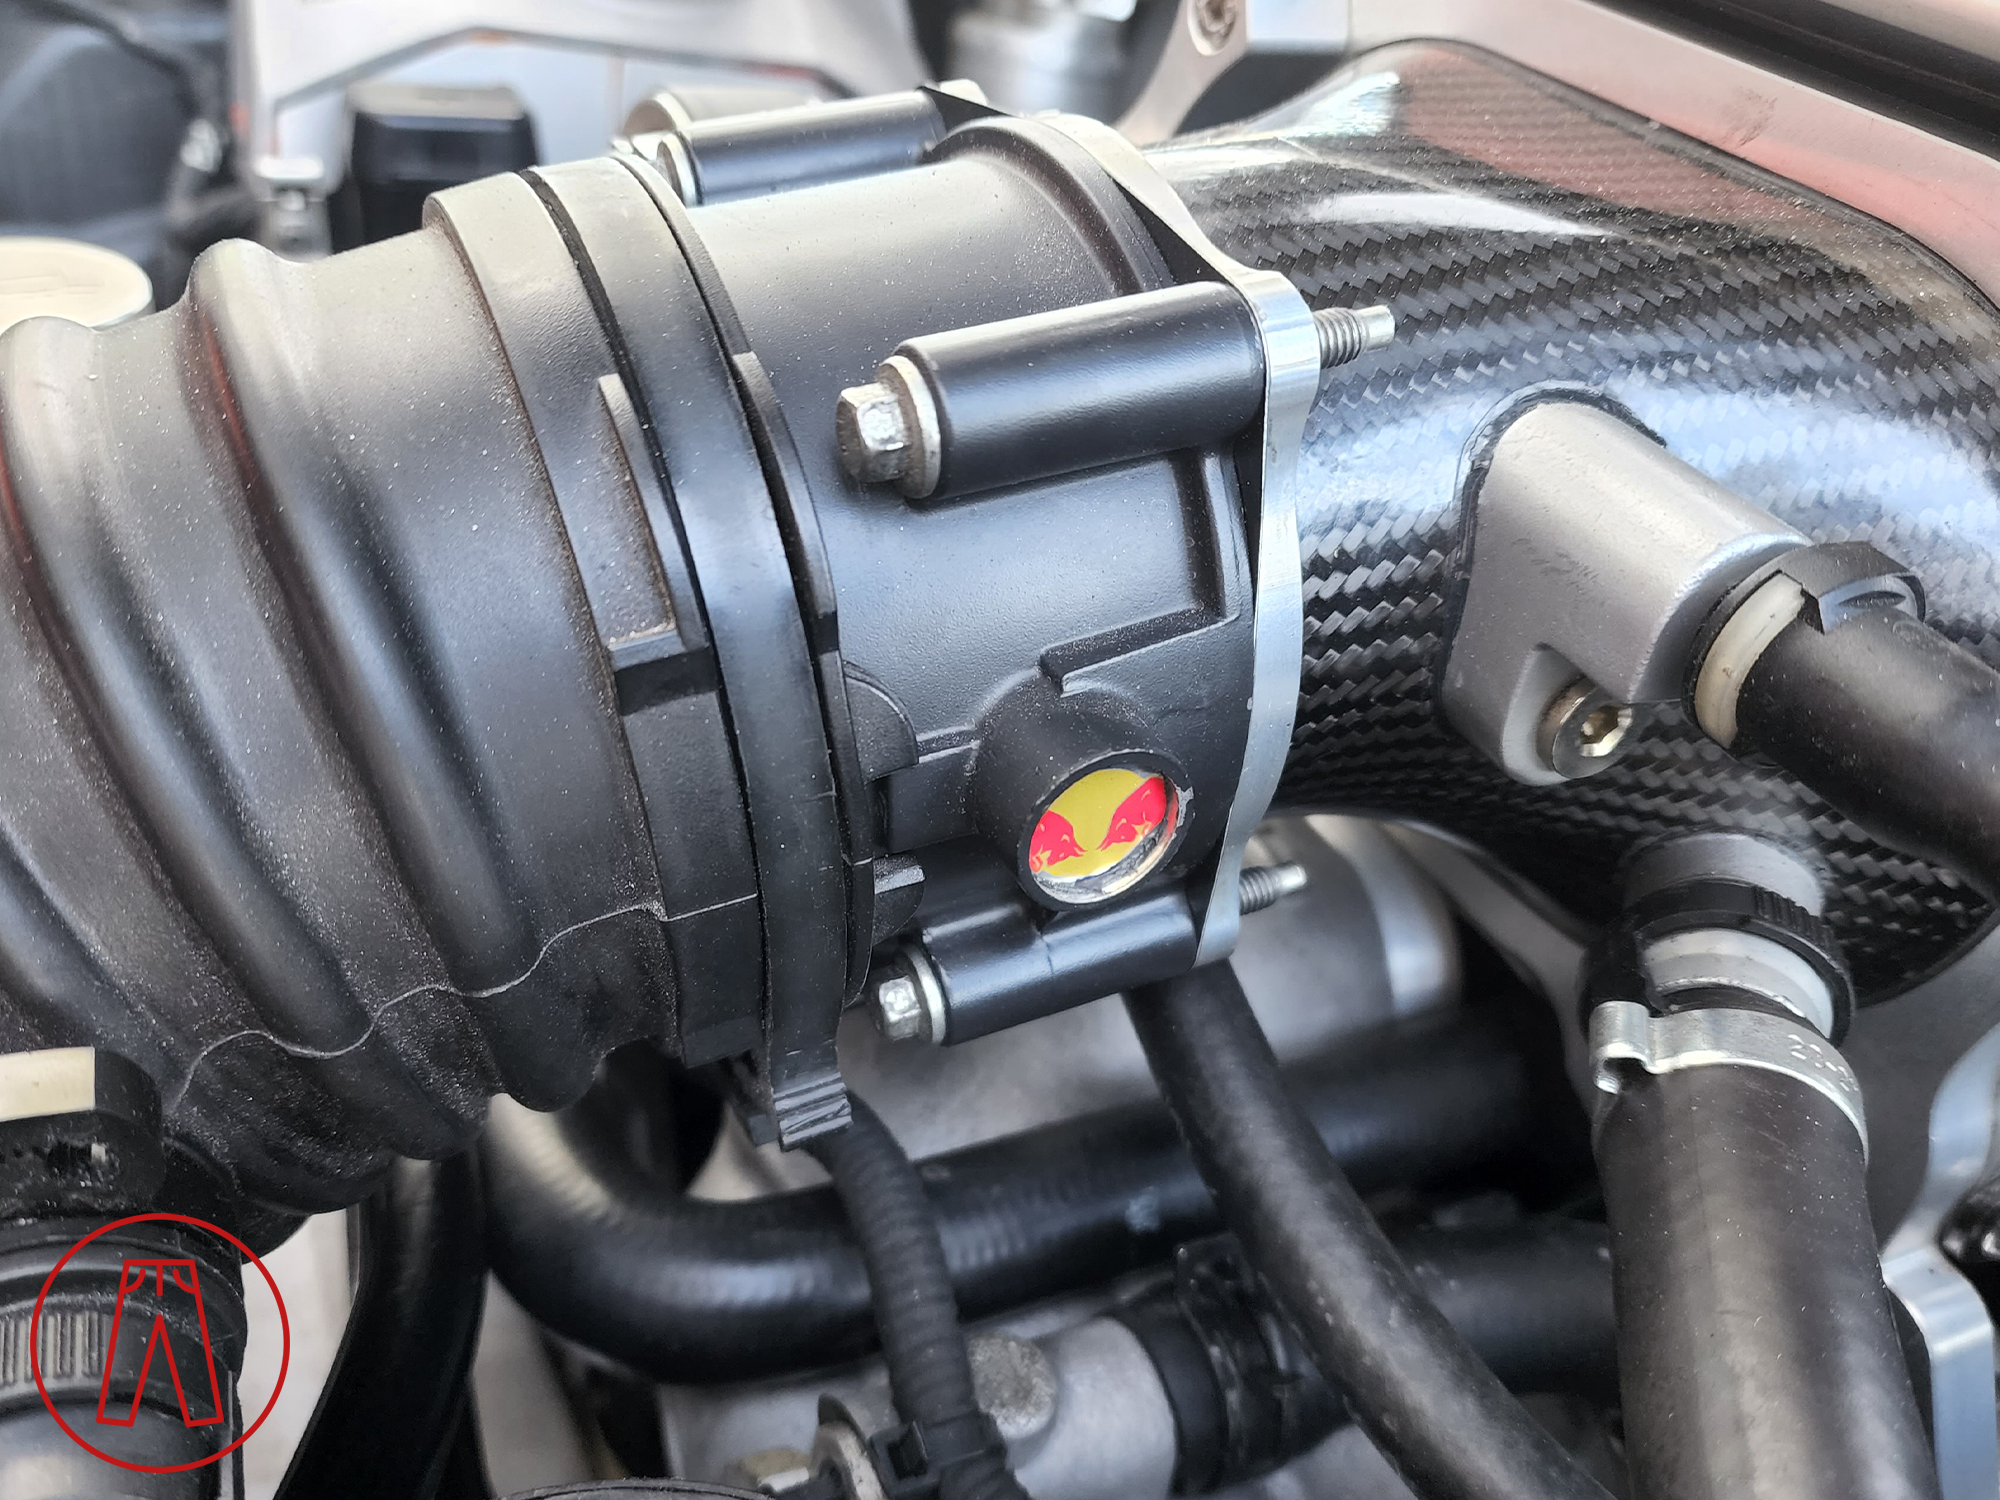
It was his idea so he gets full credit for it, but it was perfect for me as well. It reminded me of my late father’s 1969 Pontiac Firebird and the beer can he had in the engine bay acting as an overflow tank. That car was my introduction to the automotive world so being able to carry an homage like this, even if not nearly as cool, was still cool in its own way.
Running Gear
In addition to getting some more of that V8 goodness squeezed out, I also addressed the suspension. A load of extra power isn’t the best idea without making sure the car can actually handle it, of course.
I did this by getting a proper set of coilovers. Yes, after a decade of ownership and never being fully happy with my H&R springs, I finally replaced them with a set of BC Racing coilovers with upgraded Swift springs. I’d had a set of these coilovers on my other V8 Vantage since working with BC Racing to develop them, but those had the standard springs. Since I want to get as much performance as possible out of this car, upgrading the springs was an easy choice.
Coilovers aren’t the only suspension components that need attention - there are also a variety of rubber bushings in the control arms and for the sway bars, and I upgraded all of those to Powerflex polyurethane bushings while doing the coilovers. These are stiffer than the factory rubber bushings while maintaining a comfortable enough ride, even though I got the Race versions of any bushings that had the option. Personally, I’m fine with the slightly-harsher-but-not-unpleasant ride of the bushings even with the coilovers’ valving adjusted to provide sure-footed track performance. My wife does not share this sentiment.
But that doesn’t really matter, does it? I’m a grown-ass man and it’s my car and I’ll do with it whatever I damn well please.
Setting the coilovers’ valving to a softer setting gives a much more cushy ride despite the stiff bushings. My wife had far fewer complaints after I softened things up completely and utterly of my own volition. I kept them as they were even on a track day at Lime Rock and the car felt wonderful - it was easy to control and not jarring to drive.
That, by the way, was another long-distance road trip. Not nearly as long as my previous one, but at over 2600 miles (4200+ km) it was nothing to scoff at. As a kicker, I started out on the drive the day after we dropped the engine into my car - I literally let it sit in my parents driveway idling for hours just to get the engine broken in a bit, then did an oil change and alignment the next day, and then headed out on my trip from Idaho to the east coast.
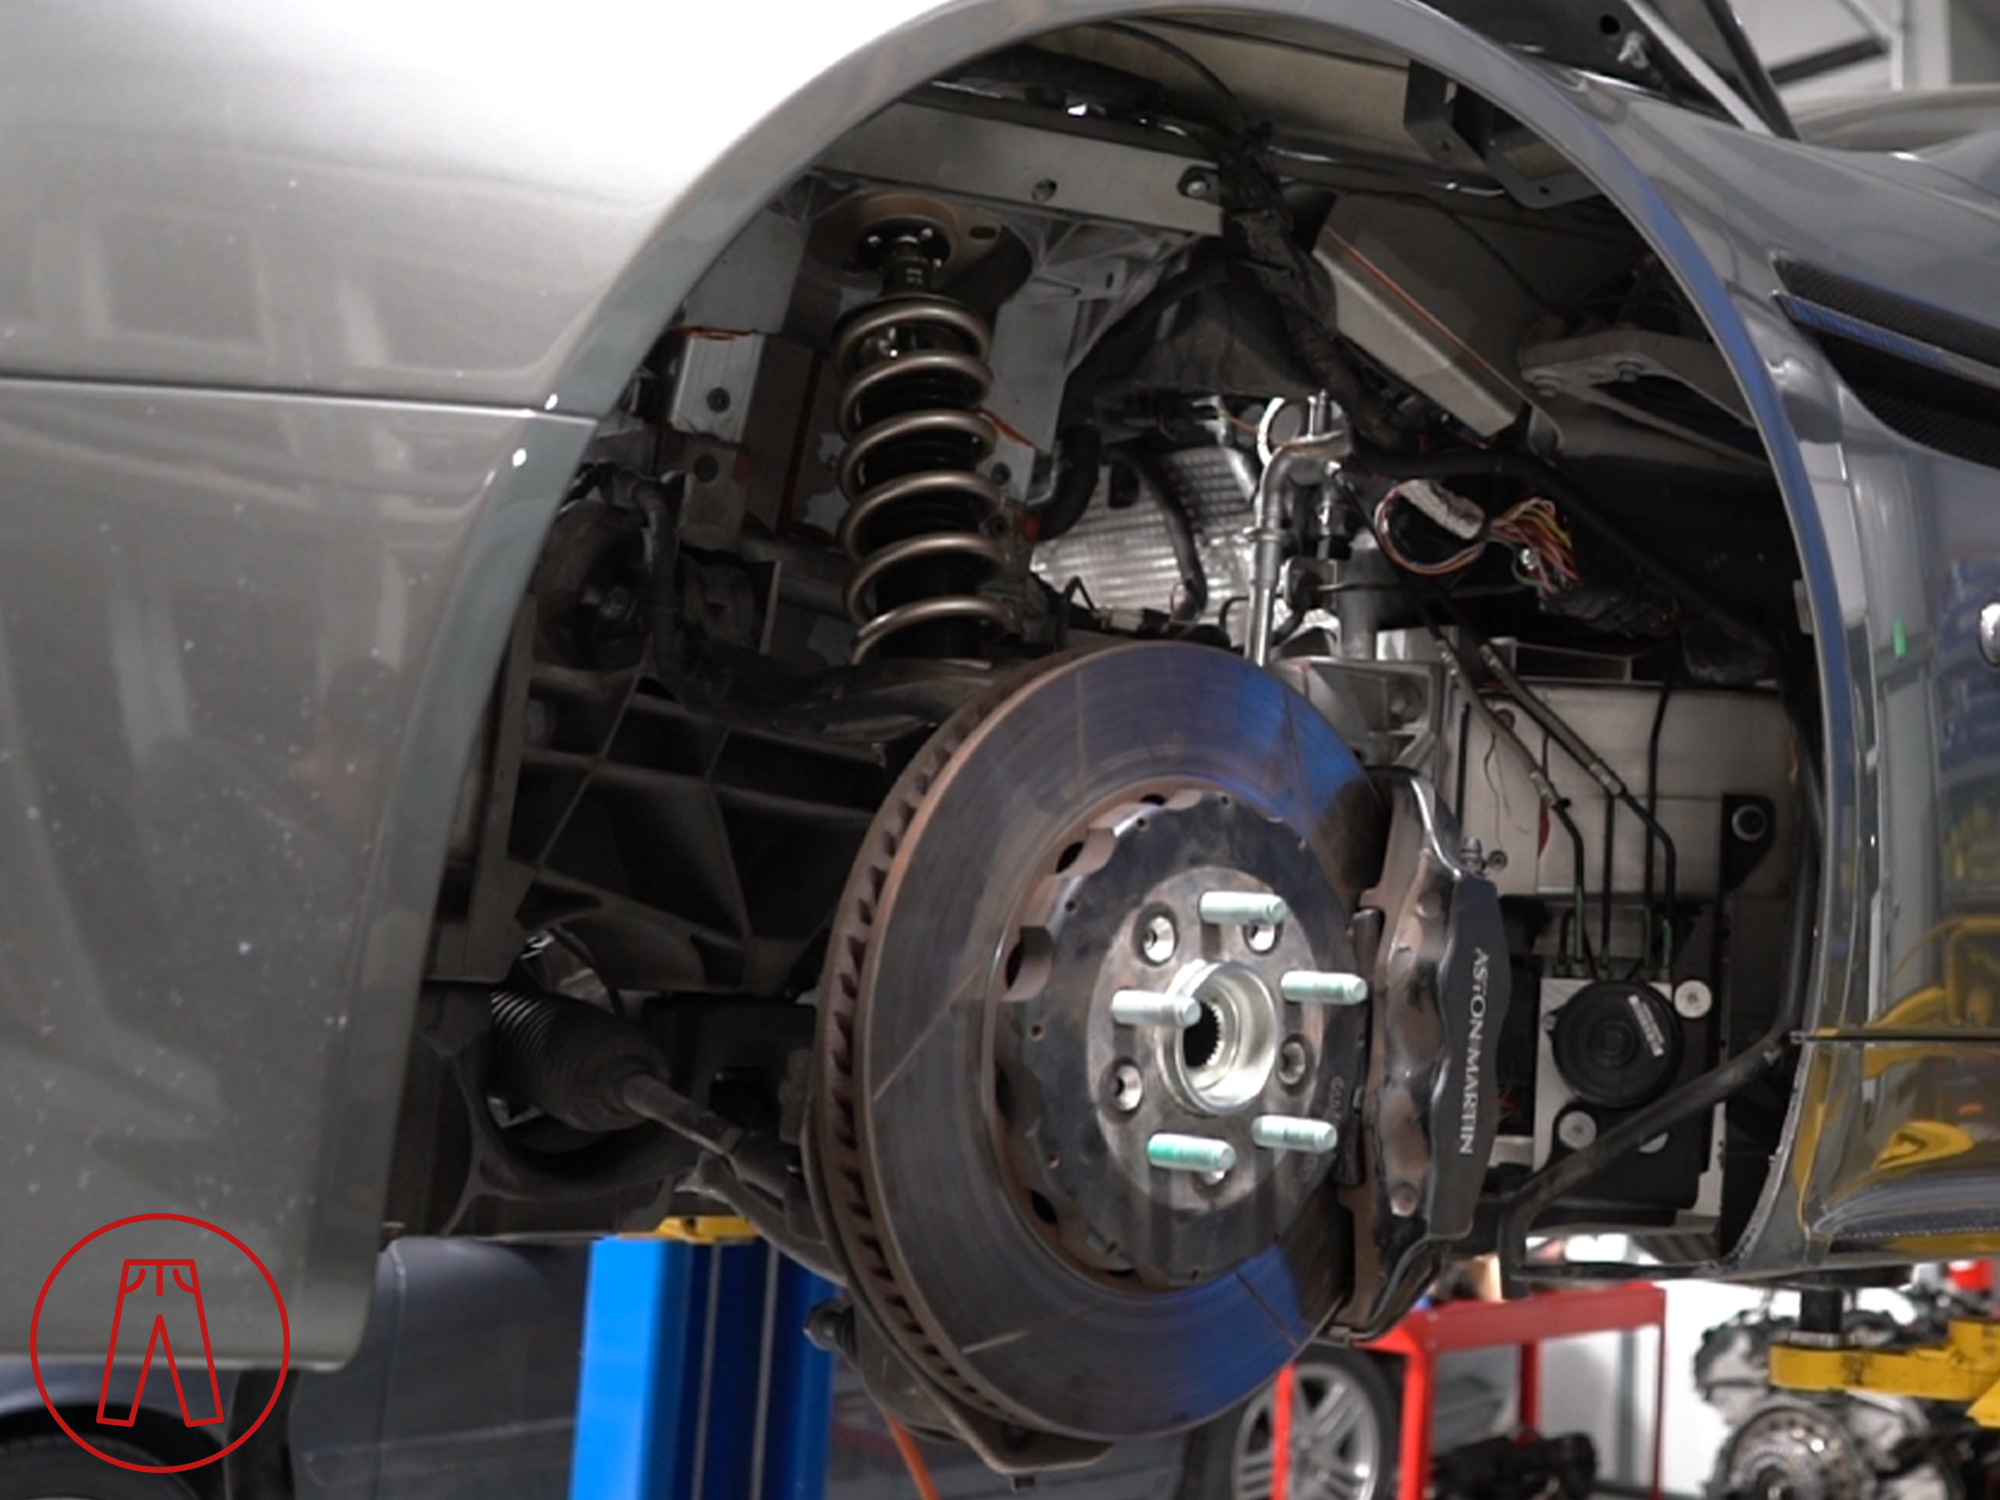
The funny thing is, the coilovers and bushings weren’t the only suspension work that was done. One of my front ball joints broke during the engine swap and needed to be replaced. I was already living in Japan at this point and was only in Idaho to oversee the engine replacement and then drive across the United States to attend the Aston Martin Owners Club annual meeting and track day at Lime Rock in Connecticut, which was a huge deal for me, so I couldn’t exactly wait for parts to arrive from England.
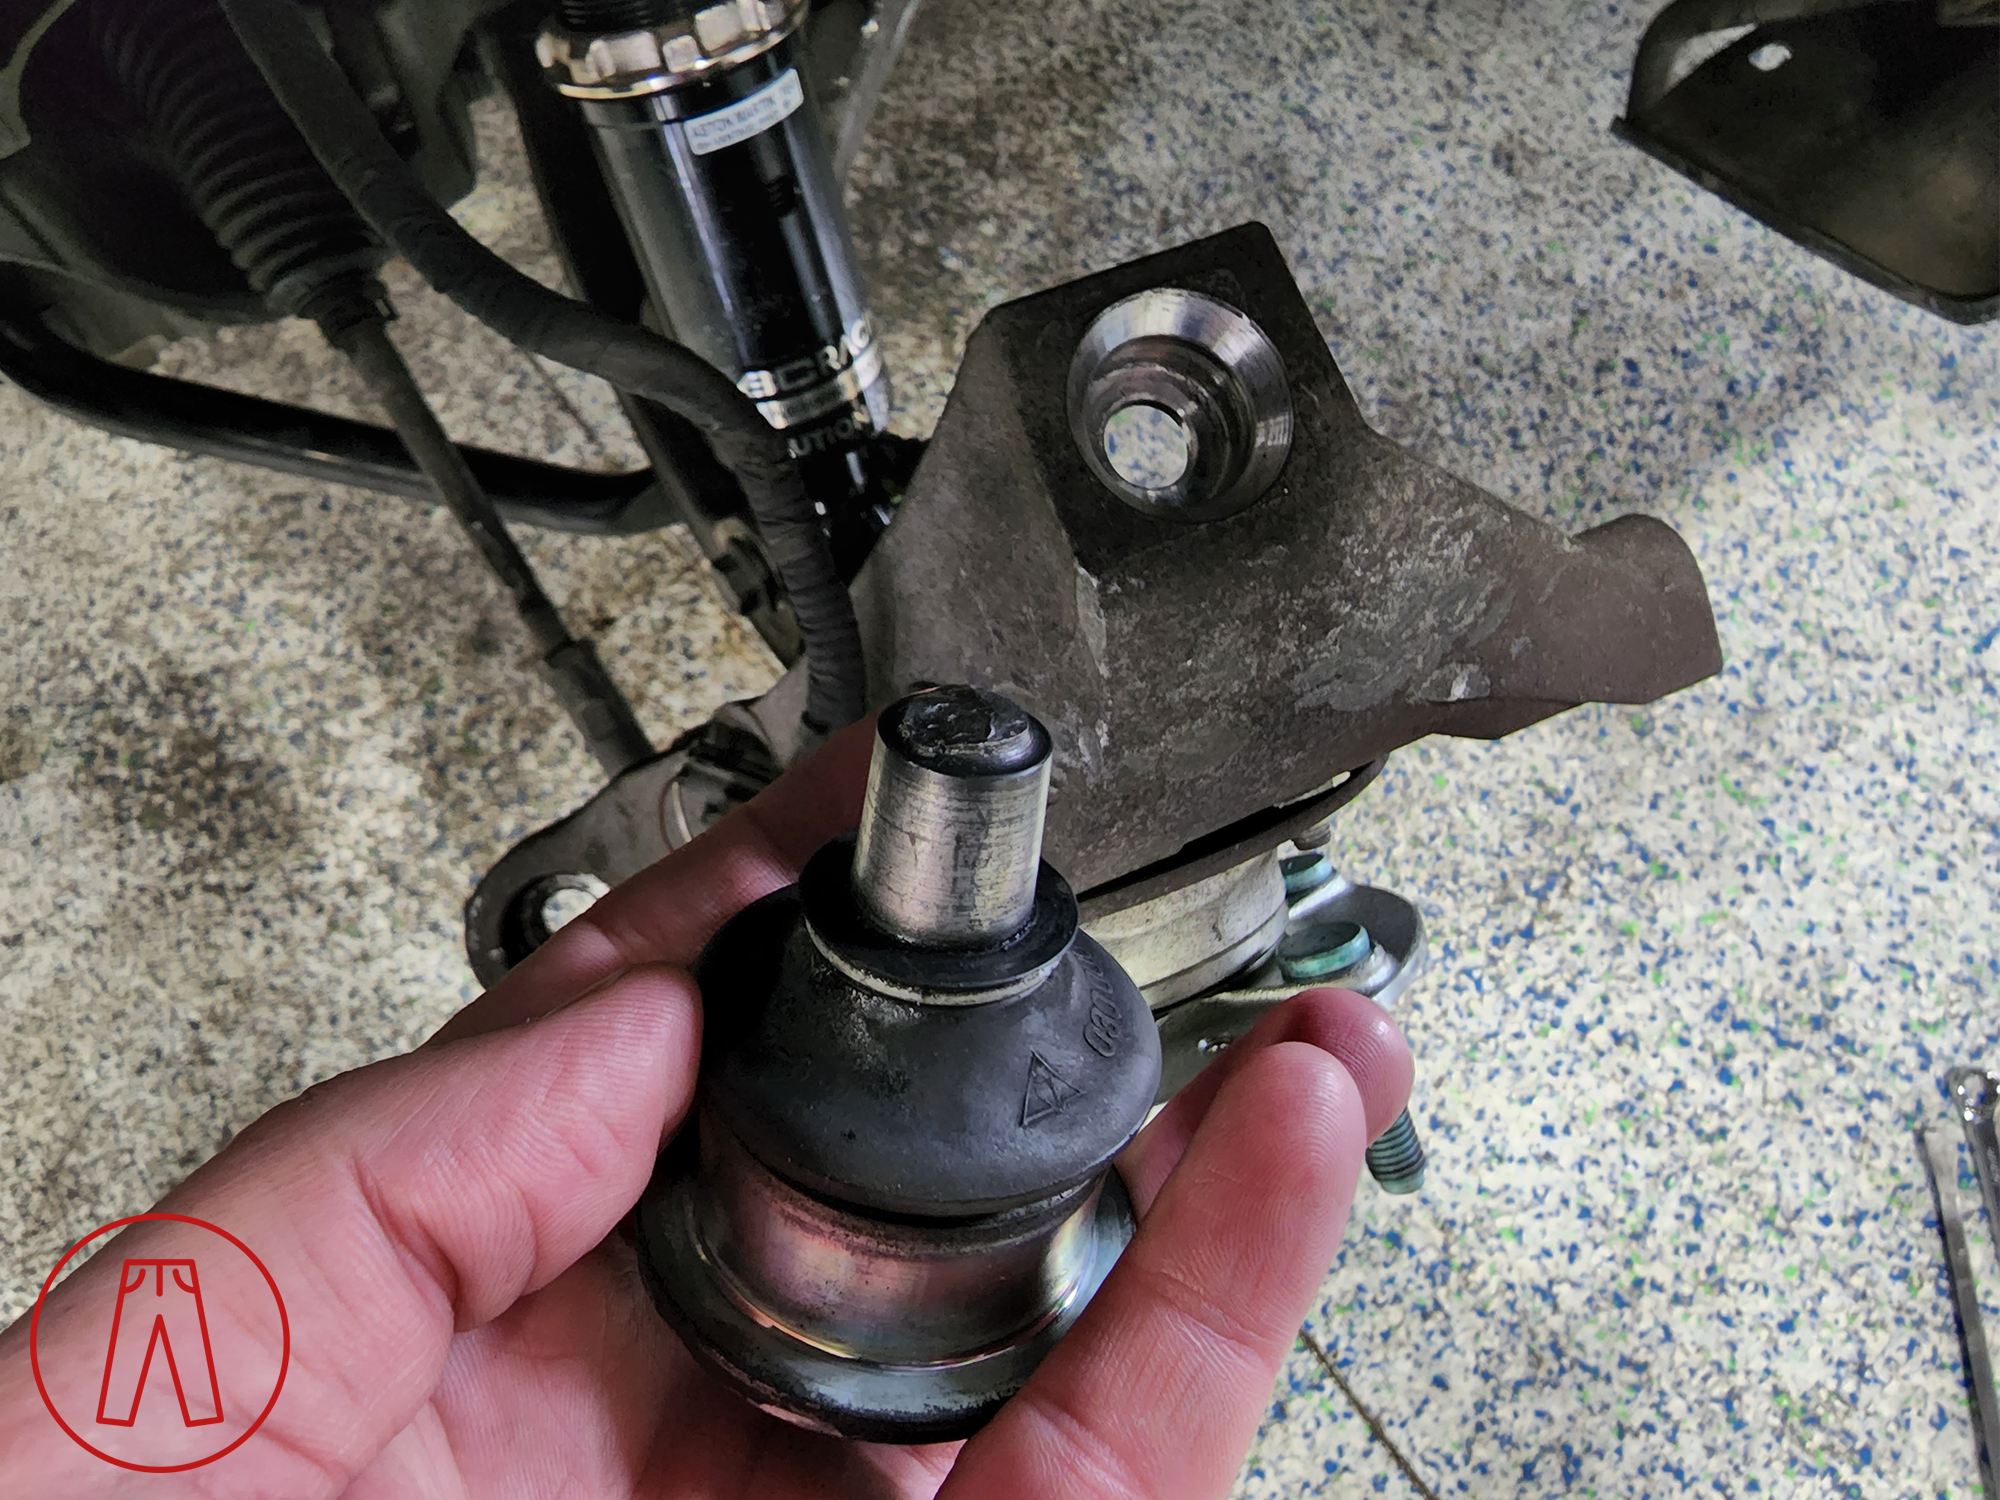
I called around everywhere I could think of looking for anything remotely similar that might be in stock to see if I could find a cross-over part from another car that Aston Martin might have used on the V8 Vantage. As it turns out - and this is the funny bit - there was one sitting right outside in the parking lot the whole time. Specifically, there was a Jaguar XK8 that wasn’t going anywhere anytime soon. My mechanic pulled off a ball joint, took off the boot, and confirmed it - the ball joint itself was the same. I bought a new one for the donor Jag that would arrive a week later to replace the borrowed component, we put the Aston Martin boot on the Jaguar ball joint, and buttoned everything up.
People often make fun of Astons for being parts bin cars. Those people don’t own an Aston Martin. The parts bin is why these cars are affordable at all and can be reasonable to own.
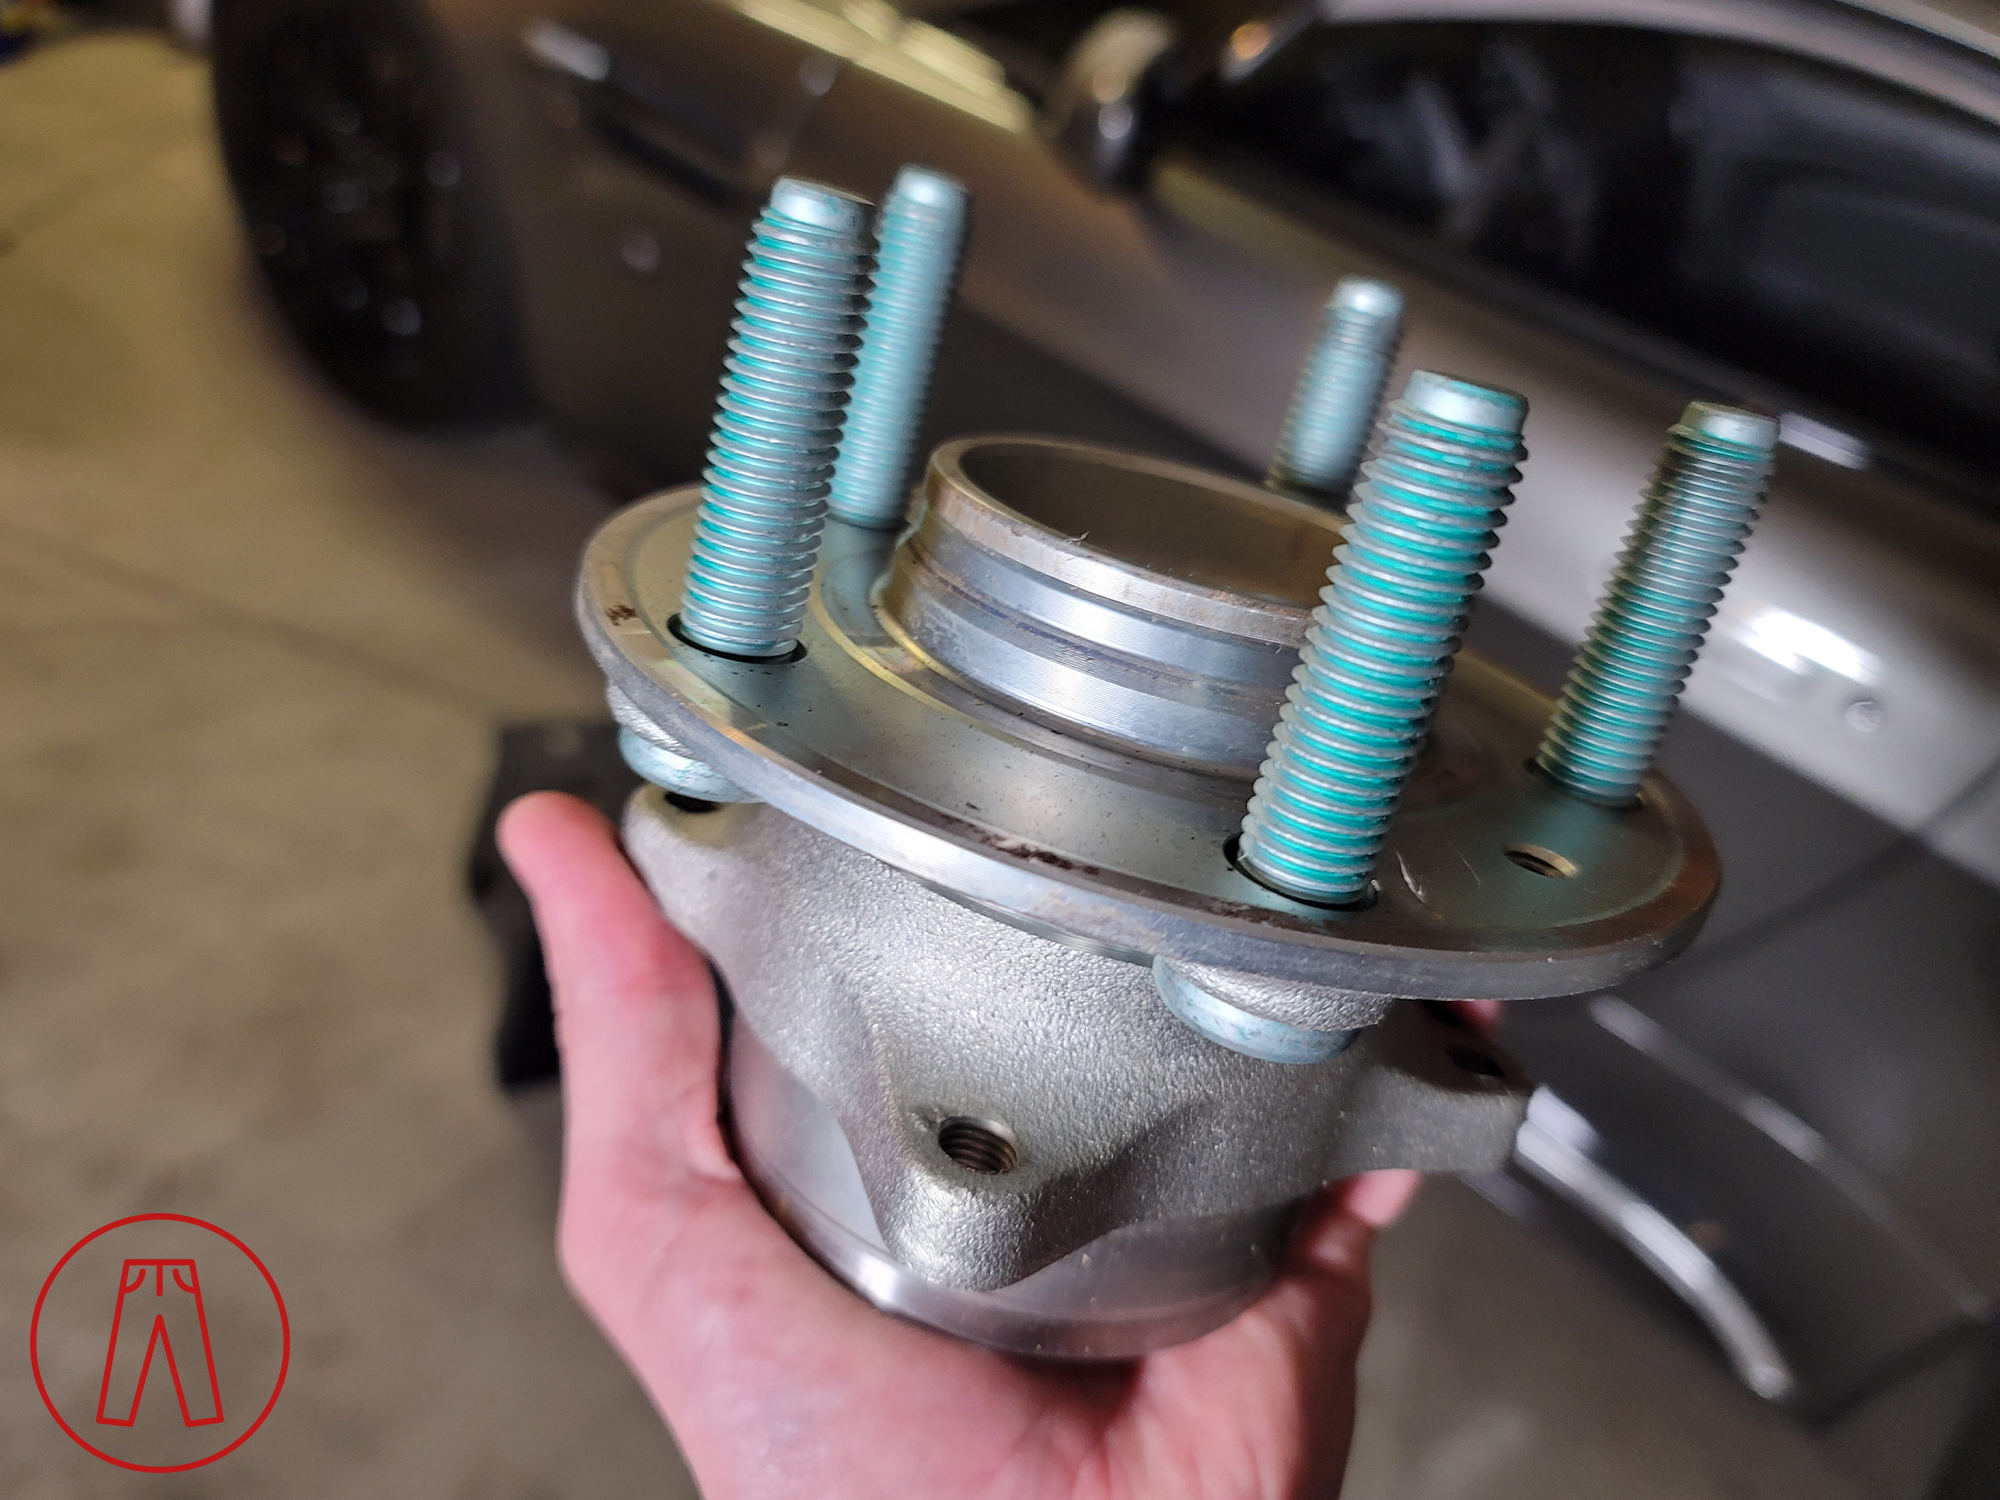
I wouldn’t be surprised if the hub assemblies are also from the parts bin. The studs share the thread size and pitch of a Ford van and I wouldn’t be surprised if the whole thing came from one. I had a full set of them from Aston Martin, though, so I had those swapped in. I mainly just wanted to get back to having normal lugs again, rather than the extended ones that were needed by the wheel spacers that had been on my car when I bought it, but having new wheel bearings was a huge bonus, especially given my car has well over 90,000 rough miles (145,000+ km) on it.
The last thing of note during this time was getting another new set of wheels, this time the BC Forged KL11. I got these in the exact same specs as the outgoing RZ05 wheels, just changing the model and color. The KL11 is a similar style as the RZ05 - a “split 5-spoke” design - but with sharper edges and more sculpting between the spokes. The color is Brushed Dark Black, and it’s not at all black compared to the Gloss Painted Black on my RZ05 wheels. I was going for a color that would still be dark, but would allow the contour of the wheels to be seen better. Even if they didn’t come out as dark as I had expected, I think I still nailed what I was going for with this color.
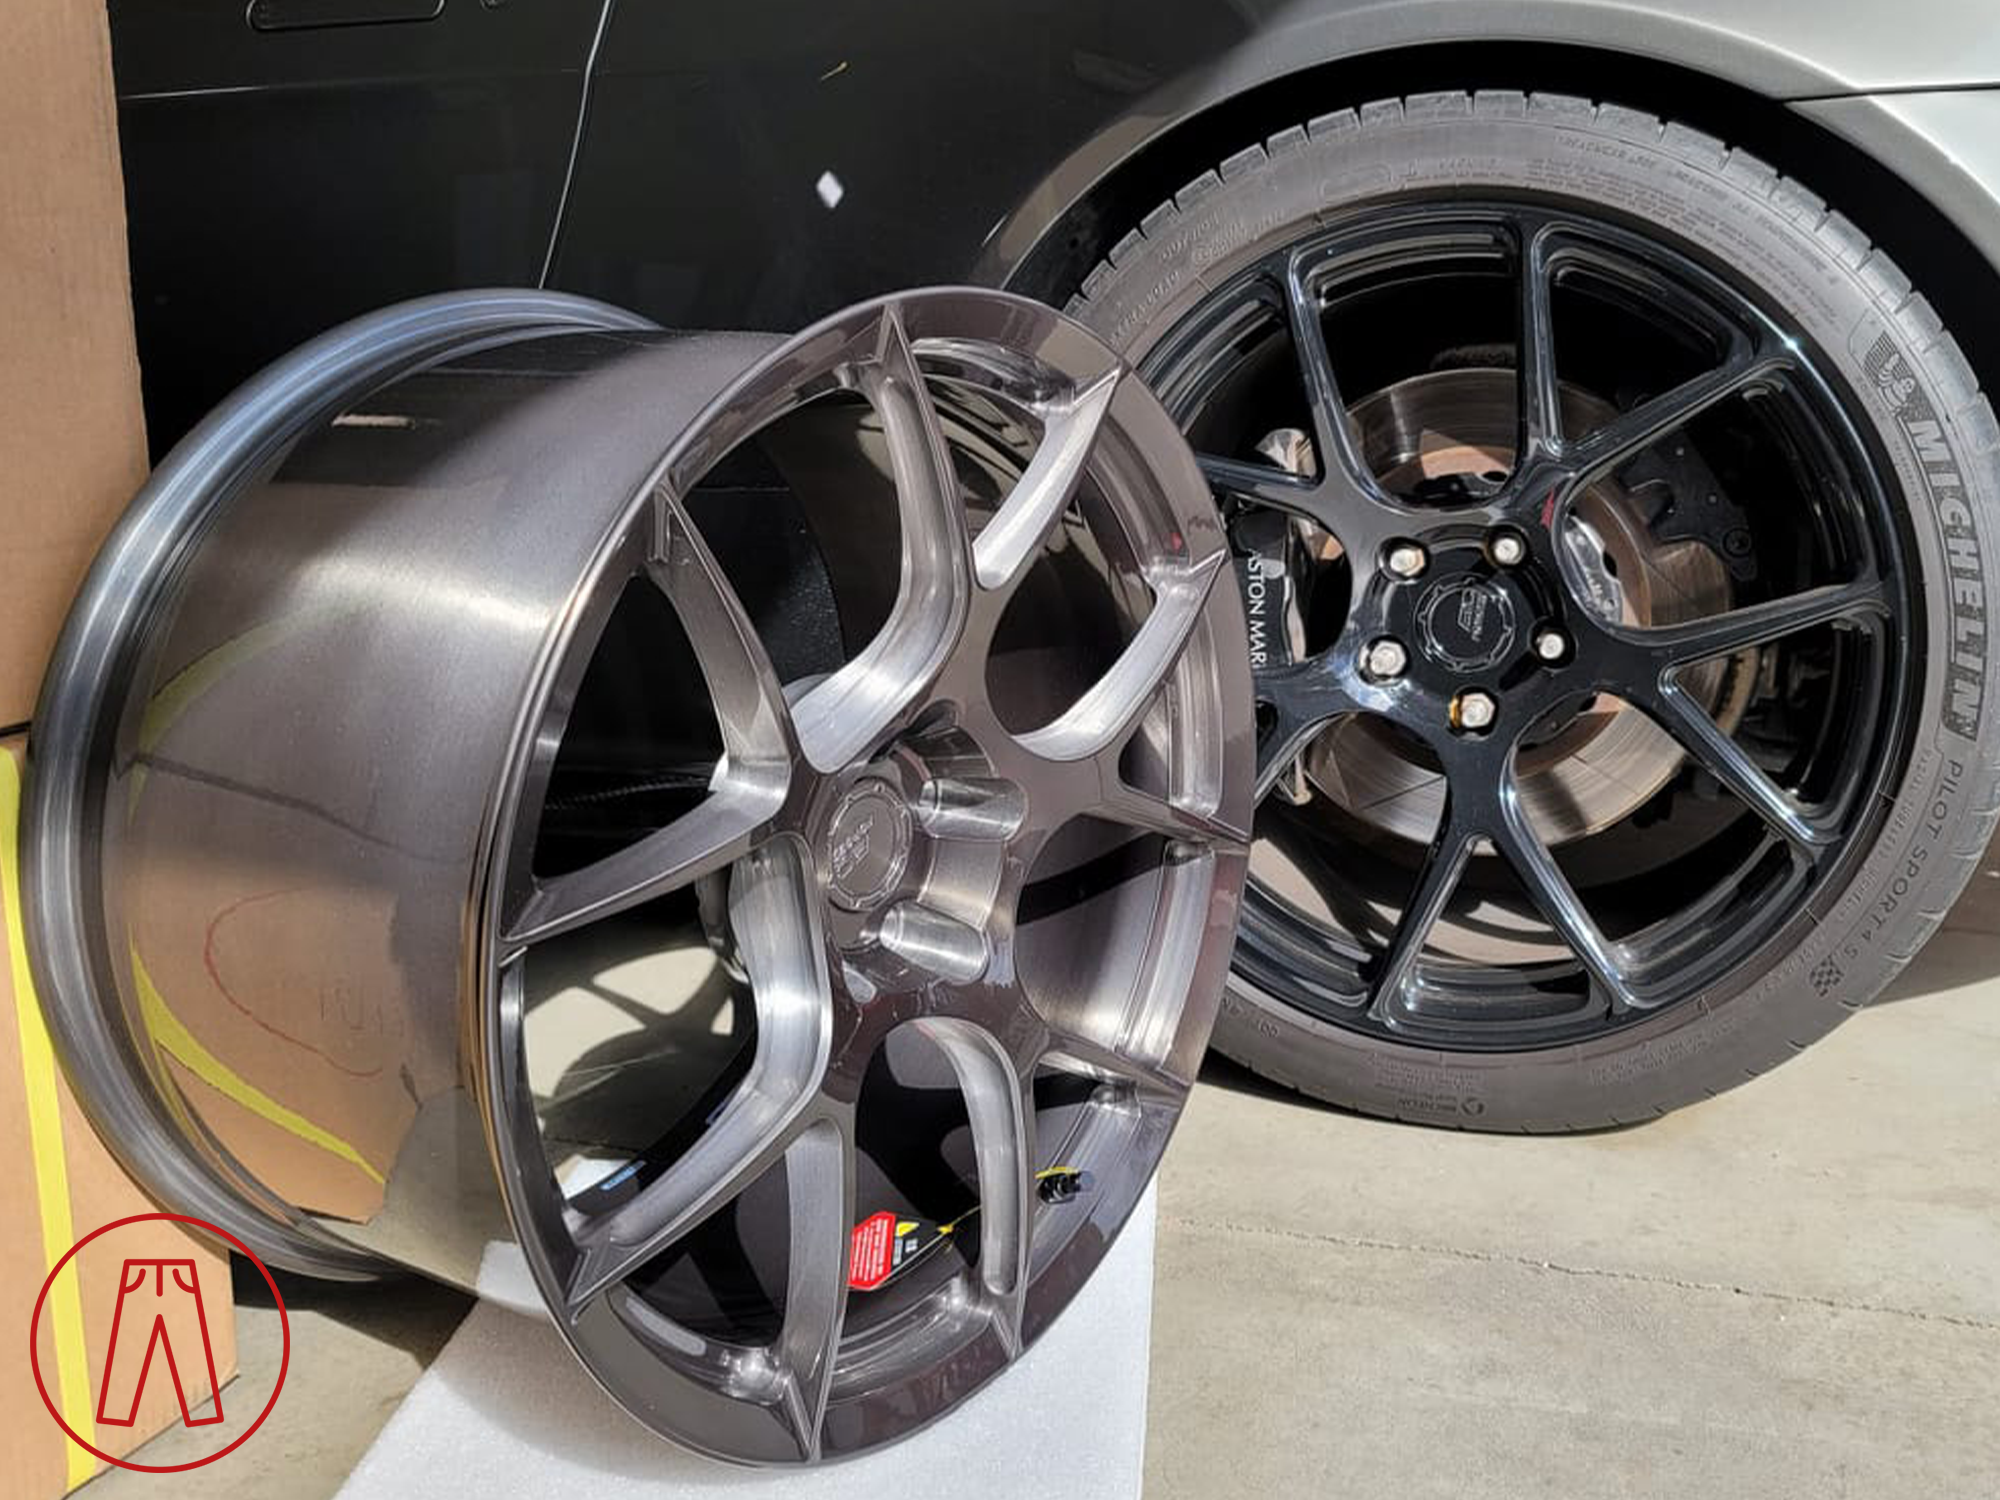
But, the color… The only thing I hate more than black wheels (yes, like I’d been using on my car for quite a while) is when the color of the wheels matches the color of the car’s paint.
“Wow, that’s a beautiful wheel,” I said as I opened the first box and beheld my new spinny boi.
“OH GODDAMNIT,” I exclaimed when I test fit the wheel on my car.
I had, you see, committed the second of my own-decreed cardinal sins of wheel customization. (The third and final sin is bad fitment, so at least I won’t be striking out entirely.)
Although they aren’t exactly the same, the Brushed Dark Black finish on my new wheels was similar enough to the Mercury Silver paint on my car that it really, really upset me. I loved the new wheels on their own, but it felt like a step down compared to my previous wheels because the overall look of the car felt so mundane without the contrast provided by the black wheels. The grey-on-grey looked so… boring.
At least I was finally able to use my Redpants Lightweight Lug Nuts. These were made of a combination of aluminum and steel, had a swiveling base to help prevent wheel marring, and were hard-anodized black to add to the car’s style and keep the OEM chrome lug nuts from clashing with the dark wheels.
I’m sure the washed-out color concerns qualify as a first-world problem, but it really put me off. Eventually I’d make some other changes that would allow me to fully love my new wheels again. But first, I had to ship my car to Japan.
Go Fourth and Prosper
That previous section could best be described as “two steps forward, one step back,” as every time I did something that should have been awesome, there was always some caveat that held it back from being the showstopper modification that I had expected. Now I was living in Japan and determined to put my best foot forward without the stumbling I’d done so much the last few years. I had a positive attitude, an exciting environment, and a plan laid out. Which of course means things didn’t go well.
I’d already been living in Japan for a couple of years before I was able to get my car shipped over. (Long story.)
When I was finally ready to ship it over, I had to first head back to the US to make some changes to help prepare it for its journey as well as for the testing it’d be undergoing upon arrival. I had to make the car as safe as it could be for loading onto trucks, getting stuck into a shipping container, and being moved around who-knows-how-many times, and then going through even more once it arrived in Japan and went into testing. And despite what you see in movies and on social media, Japan has really strict vehicle regulations. My car is heavily modified and I wanted to keep as much of it as I could in place, so I had a lot of work to do. The first round of changes were done before my car was shipped out.
The regulation I new my car would fail from the outset was noise limits. I’ve got headers, high-flow cats, and a much smaller muffler on my car and I knew it was loud - way, way too loud for Japan. The headers on a 4.3L V8 Vantage don’t have catalytic converters in them like the later cars got starting mid-MY2010, so I didn’t think those would be worth messing with. My RSC Tuning prototype high-flow cats had already been replaced by GMR’s, and those were quite a bit larger and a bit quieter so I hoped they would do at least a bit to help keep the noise down. But my RSC Tuning muffler wasn’t exactly helping things - it was smaller and had considerably less sound dampening than the OEM muffler, and I knew it was the main reason my car was so loud.
VelocityAP has three sound levels available for their mufflers and I got the Touring muffler as it’s the quietest one they make. They also make a Valvetronic muffler but I was worried that would be too loud. The muffler arrived from VAP, I pulled it out of the box, and I sat back and wondered if this would actually make enough of a difference… if any at all.
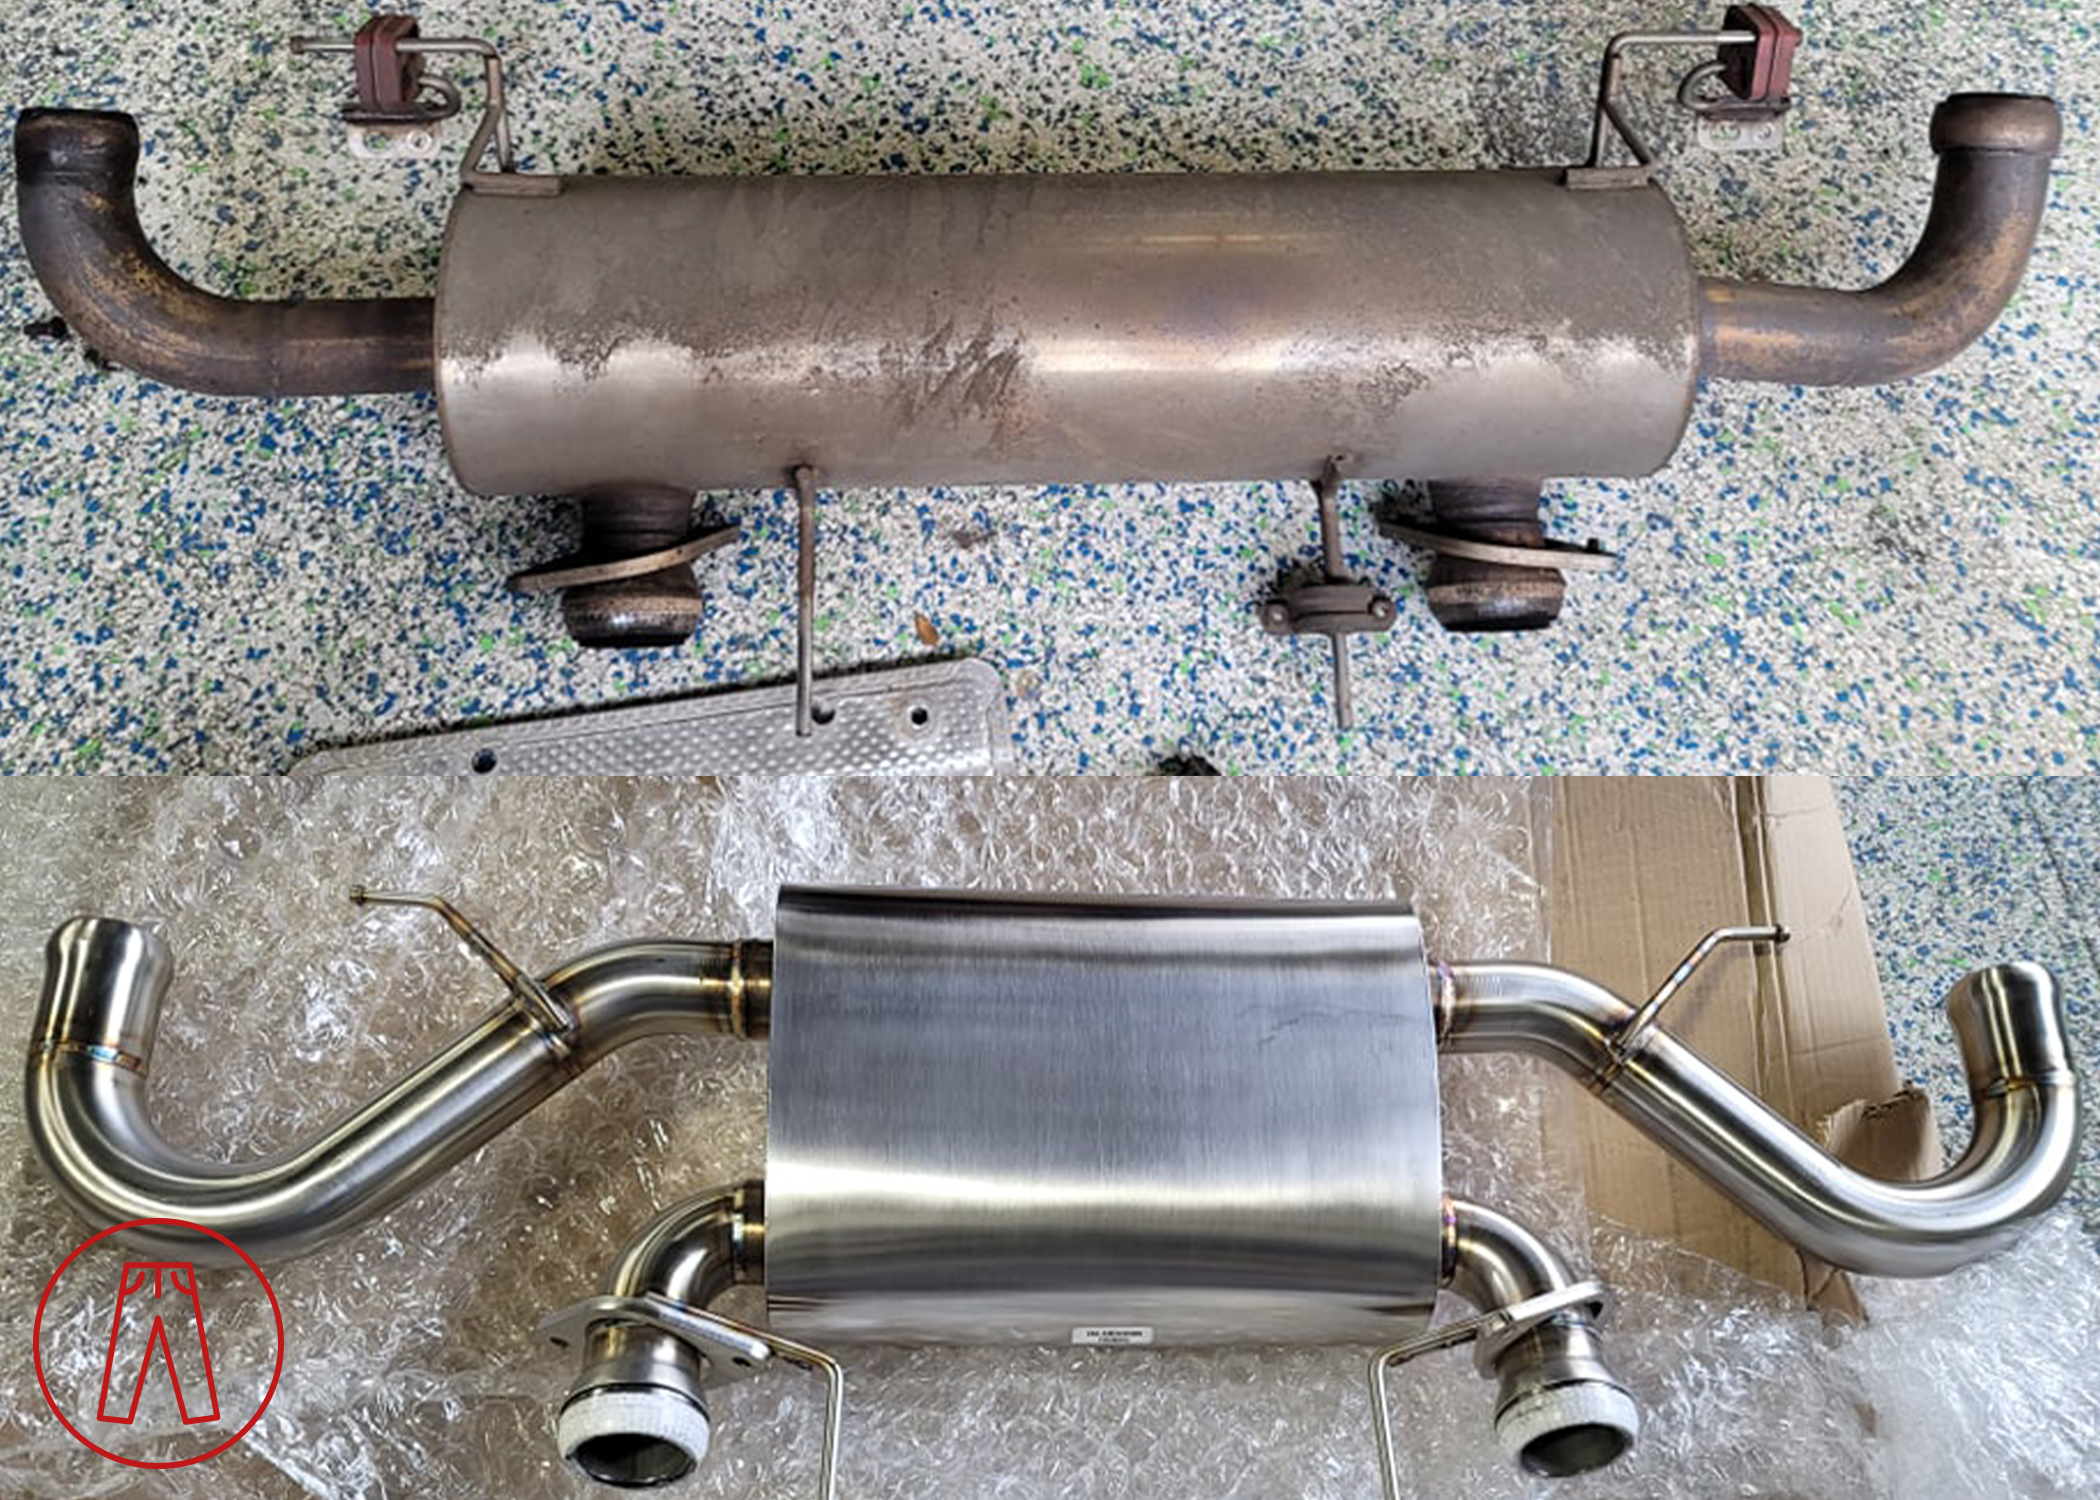
RSC Tuning prototype muffler (top) vs VelocityAP Touring muffler (bottom).
Although it’s quieter than my previous muffler, it’s still really small and that limits how much noise reduction it can provide. It sounded great and it did help, though.
Inside the cabin were those Cobra Nogaro seats that I put so much time, money, and effort into making happen. Inside my storage unit were my OEM seats that I’d been keeping on standby until I figured out what to do with them. I wanted to keep my OEM seats so I can turn them into chairs, and that meant getting them to Japan. But they are seriously heavy and shipping them would cost a fortune. The Cobras are featherweights and it made sense to swap the seats and ship those instead. This also allowed me to clear the warning lights, making it one less thing to worry about when my car went through testing in Japan.
With all that done, I still had to make sure my car was physically capable of being transported, so that meant raising the ride height of the BC Racing coilovers to their maximum levels. Even then, the car still sits about half an inch lower than the factory ride height, so it really didn’t look bad being raised up. The extra clearance was just enough and I was able to successfully load my car onto the transport truck that would take it to its private trans-Pacific shipping container.
The truck driver didn’t feel comfortable loading my car himself, so I did it. I really wish I had recorded it because I basically ended up doing a burnout in reverse to get up the ramp. In hindsight, I can’t believe I actually did that.
A few weeks later my car arrived in Japan and was moved to a storage facility where it’d be kept while more work was done on it. The very first task to tackle was to get it turned on. The pint-sized Braille battery that was perfectly fine for daily driving was not fine at all for months-long storage and it was dead as a parrot when my car landed. Replacing it was the first order of business but I went a completely different direction with the new battery - I got a big ol’ hefty chonker.
The thing about living where I do in Yokohama is that I don’t actually have to drive. A vehicular requirement is easy to avoid and I can go about my normal life without ever feeling like a car is required for survival. What that means in reality is that I can easily go without driving my car and have on a few occasions gone for a drive simply to make sure my battery hadn’t died and my car was still okay. Because of that, I got a full-sized battery (and despite it, I have still had to jump my car a couple of times due to letting it sit for so long).
The one I chose was a Bosch Black-AGM battery. It’s the same size as the OEM Varta battery but with the improved AGM construction instead of the Varta’s lead-acid.
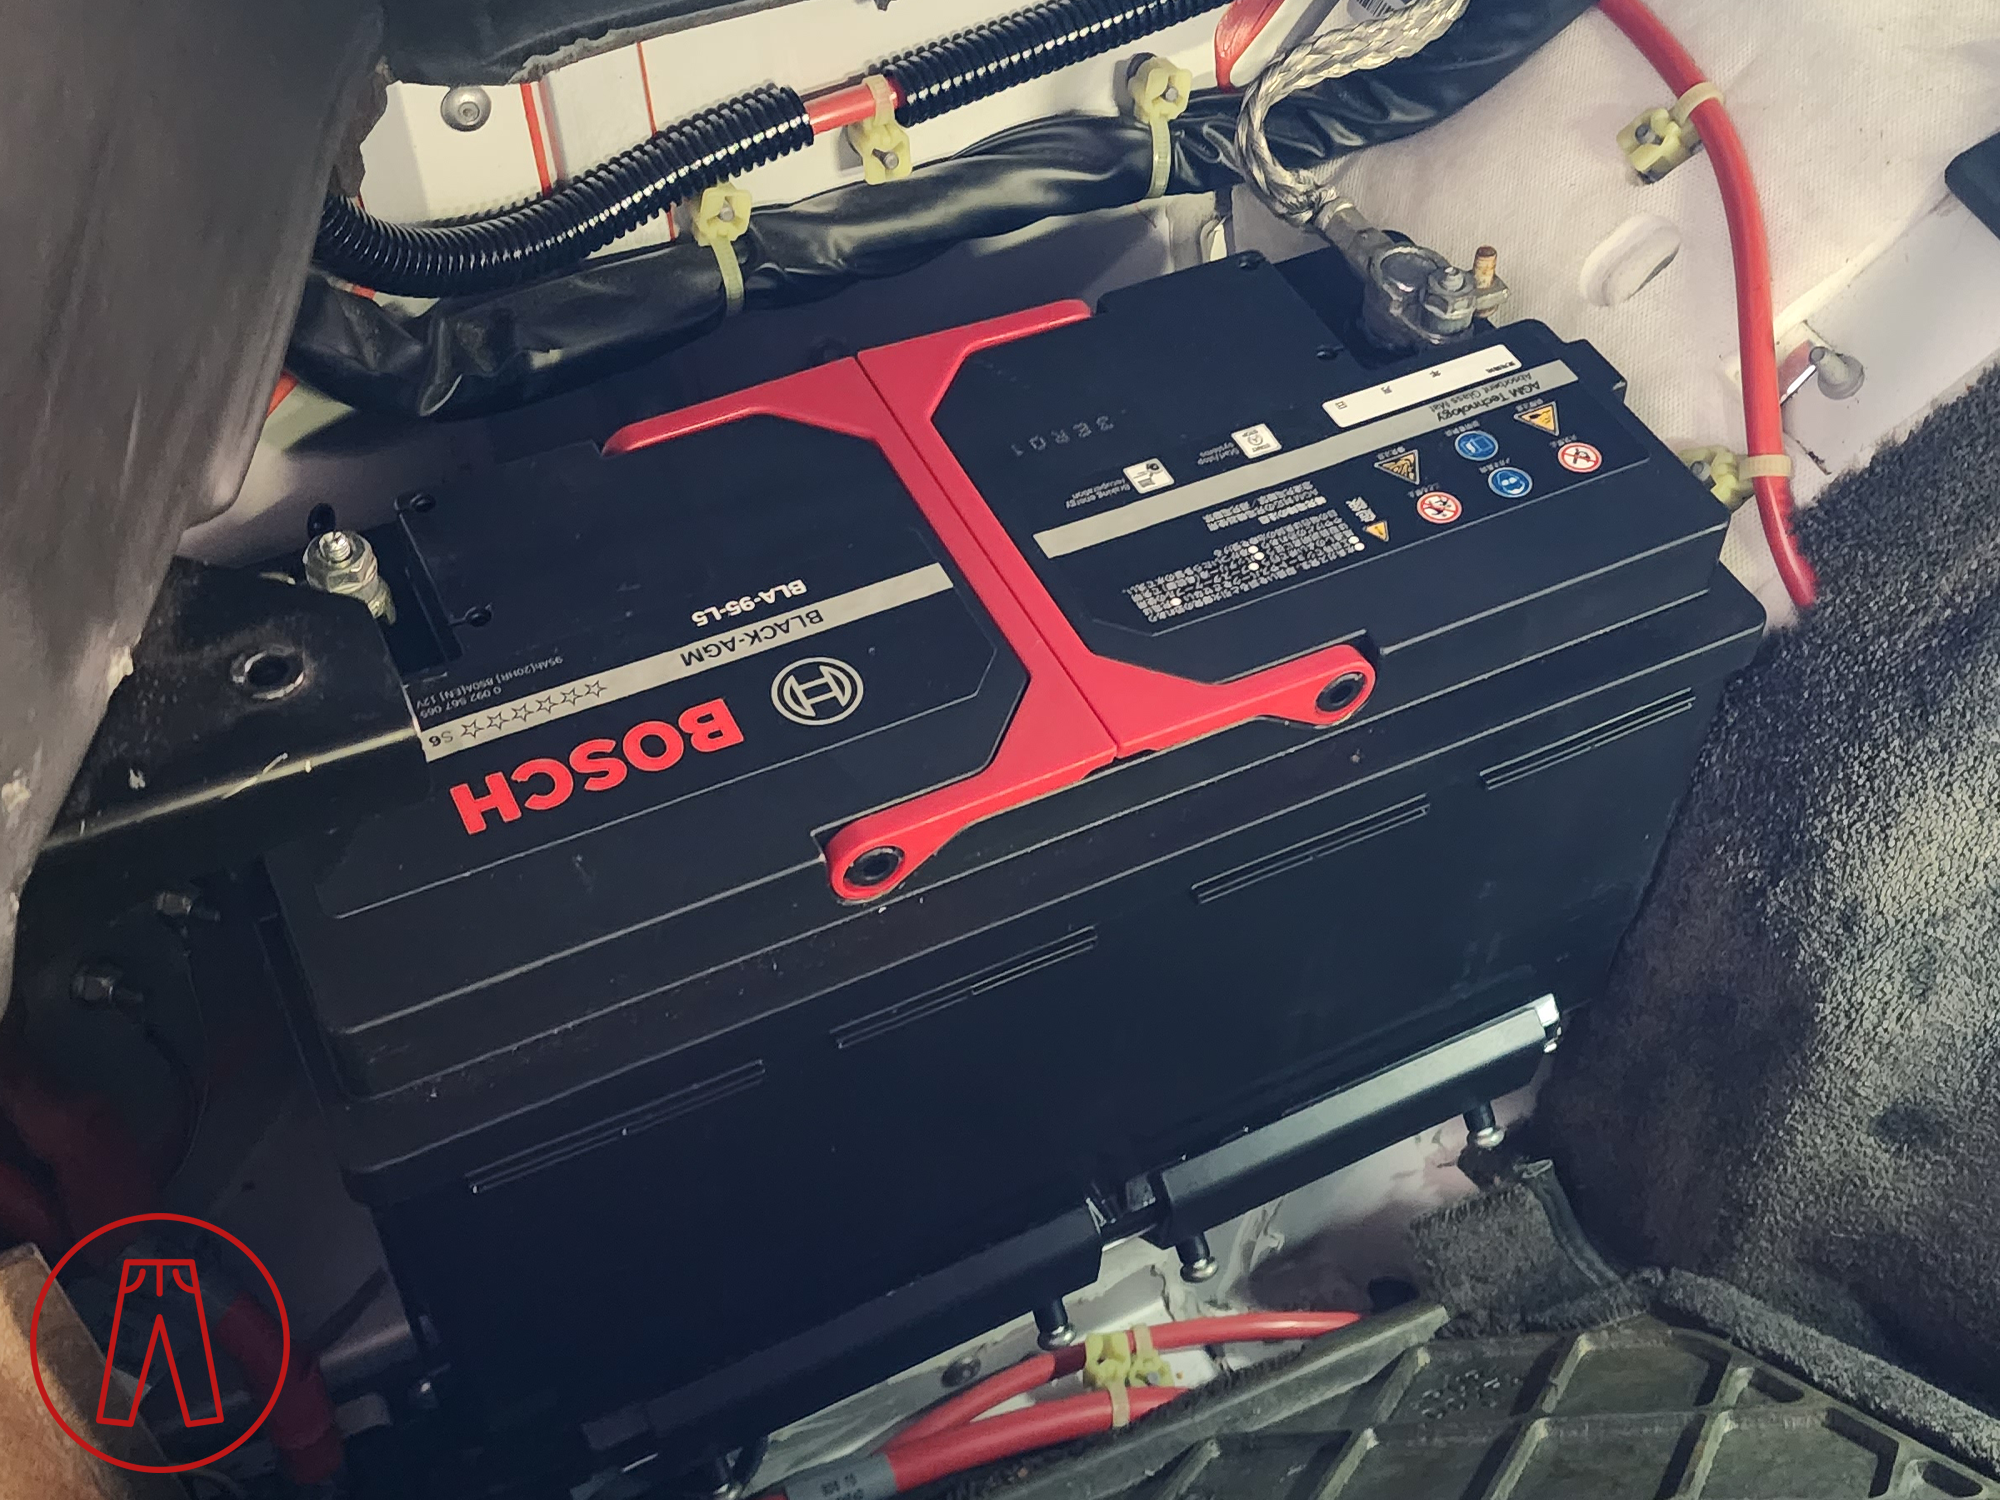
The picture isn’t upside-down, that’s just how the battery is oriented when in the car.
Car able to start again, we headed ‘round back and did a sound meter test to confirm that my car was indeed still too loud even with VelocityAP’s quieter Touring muffler. Installing a set of OEM catalytic converters would be the best way to get the sound level in check, along with the added benefit of reducing emissions to help out with that test as well. Unfortunately, I didn’t have a set of OEM cats lying around. Fortunately, my buddy Brett down in Oz did and he graciously sent them up to me.
While installing them in place of the GMR high-flow cats, I also found that my mid-pipe hanger bushings were badly worn out and replaced those at the same time. This is one of those overlooked things that I don’t think many owners are aware of, and I’m sure it’s not a terribly pressing issue for people that haven’t done any work on their exhaust system. But these support the middle section of your exhaust and worn out bushings will sag, which can lead to misalignment of the various exhaust components and possibly result in exhaust leaks.
Another thing we did was peel off the window tint. The tint that I had was mild by US standards - only rated at 35% or something like that on the side and rear windows. Japan’s laws only allow 70% on door windows, which does virtually nothing for privacy and the only real value of which is UV and heat reduction in the cabin. But that’s neither here nor there and doesn’t matter. My tint had to come off.
The tint had to be removed because it was darker than legally permitted. My wheels were legally permitted but they had to be removed because they didn’t have the correct markings on them. Wheels in Japan are required to meet JWL standards and those that do get the JWL logo embossed on them. My wheels exceed the JWL requirements but, since I bought them while in the US, they don’t have the JWL markings because they’re irrelevant there and the wheels look better without them. Having a certificate isn’t enough to prove the wheels are okay, so I had to replace them with a set of OEM wheels - same as it had back when I first bought my car.
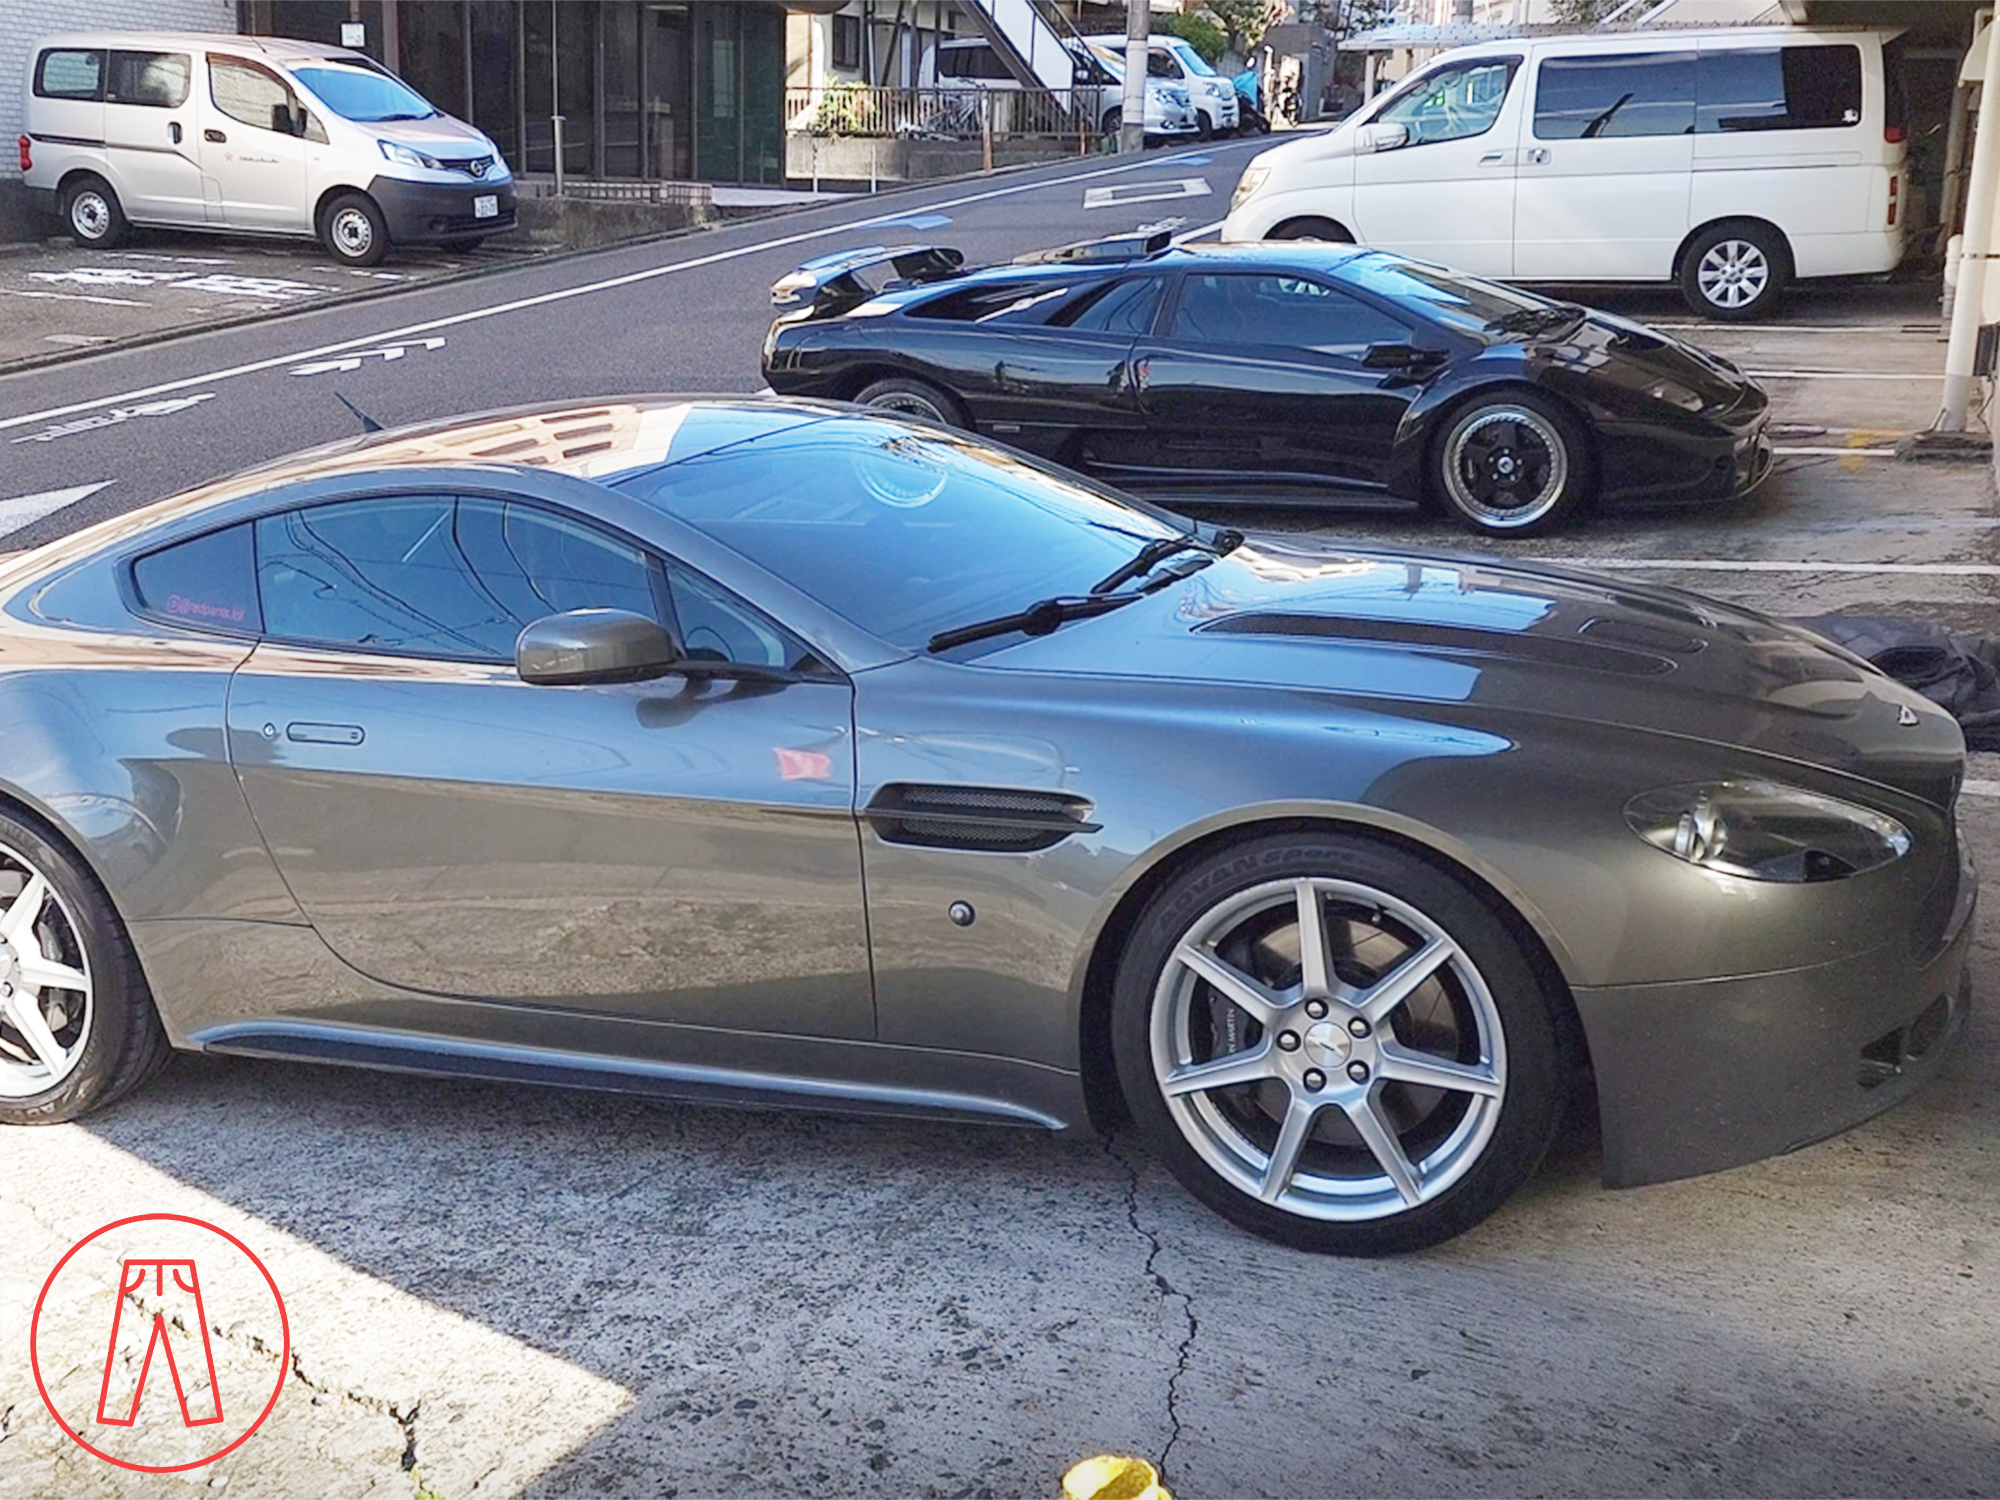
I didn’t have spacers this time to fill in the wheel wells, but at least I didn’t have extended lugs and open lug nuts anymore - that would have really looked absurd, if not completely ridiculous.
There were a variety of other things small things that needed to done, like adjusting the aim of the headlights and changing the speedometer from MPH to KMH, and I documented much of it in a video, but the main things were done. My car was quieter, didn’t have window tint where it wasn’t allowed, and the seats and wheels were returned to the original factory equipment. So we sent it off to get tested.
It failed. BADLY. All the GMR stuff I’d mentioned before, the things I said we would come back to later, the foreshadowing I’d done… here’s what came of it.
Long story short, GMR had botched the installation of my replacement supercharger kit so badly that it had massive vacuum leaks and failed emissions “with zero chance of a retest” as it was. One of the main bolts holding the supercharger support brace had backed almost completely out, one of the O-rings between the lower intake manifold and the engine had been pinched really badly when it was installed, and here I was thinking to myself, “I’m so done with this.”
I’d already given GMR way too many chances, including threats of legal action for not shipping orders to customers that had paid 20 grand up front for supercharger kits, and this was the last straw. I was sure I’d miss the extra power but it wasn’t worth it knowing that a part of them was still in my car, and seeing the shoddy work they did installing their own kit on my new engine that I had to get to replace my original engine that their earlier product had destroyed, I wasn’t going to go through it again. And it’s a good thing my car failed emissions so badly because otherwise I wouldn’t have found this, and I’d end up losing yet another engine.
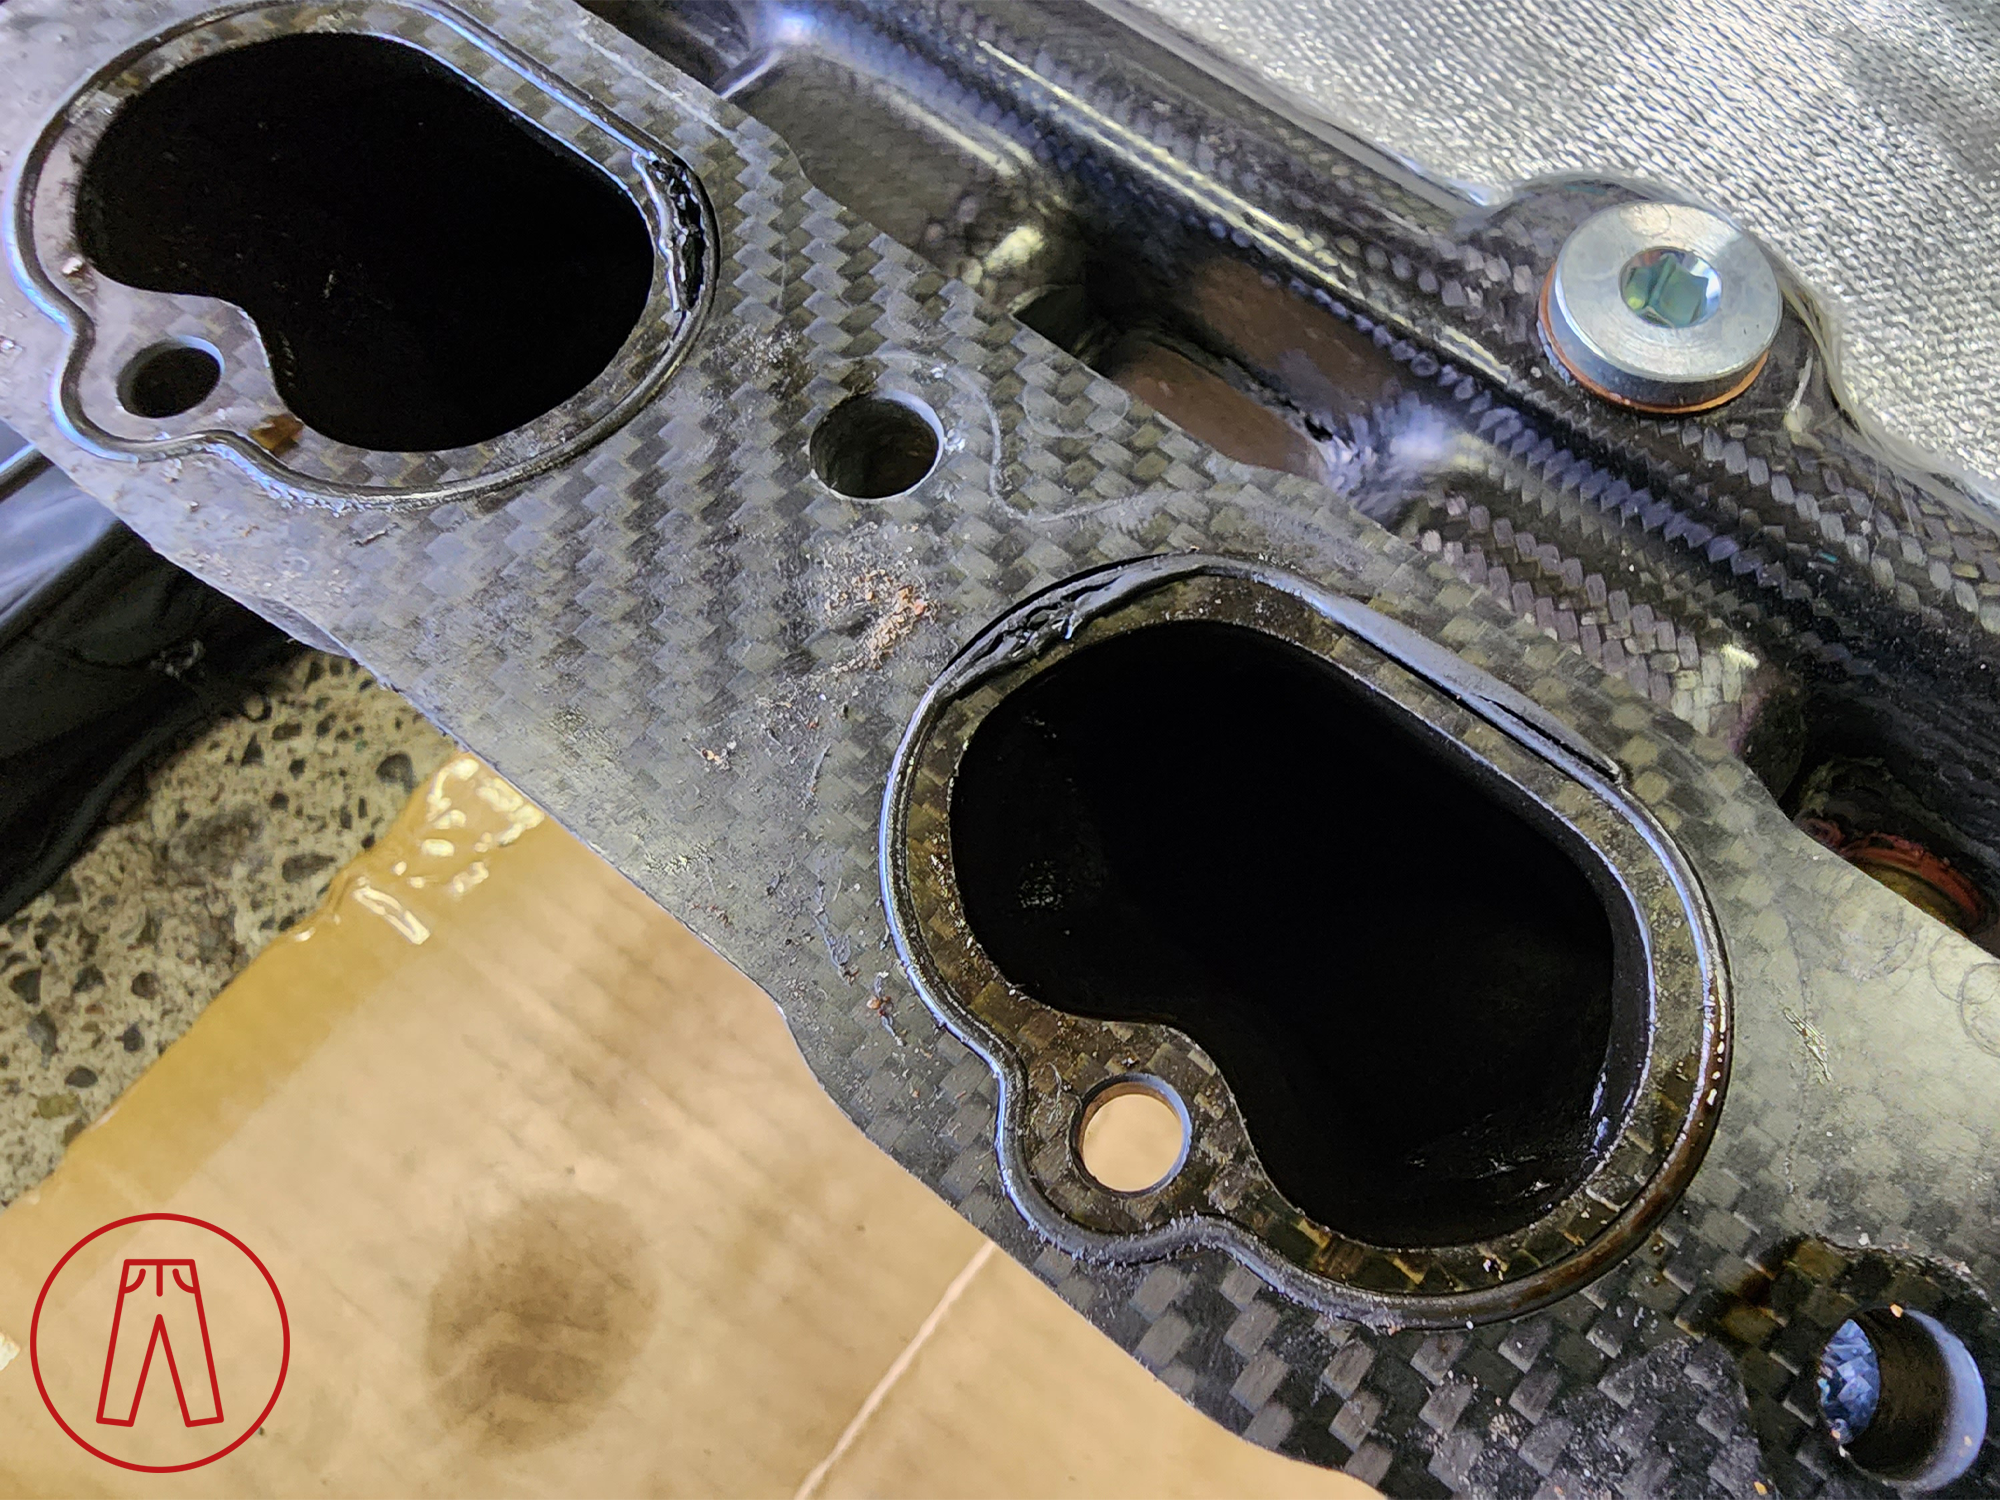
GMR’s handywork.
It was incredibly lucky that Alister over at Valiant-Ecosse in Germany was able to rearrange things on his end and fly out to Japan, bringing some spare parts with him when he did, so that we could return my car to being naturally aspirated. He’s a magician with these cars and he had it sorted in no time. His shop was busy back in Germany so he couldn’t stay long, but I did what I could to introduce him to the local culture with some yakiniku and a trip to the maid-lined streets of Akihabara.
I actually do have one GMR part still on my car, the carbon fiber slam panel. I already modified it to work with my hood pins and, even though the carbon fiber weave is terrible, it just isn’t worth it to me to replace it because it isn’t seen most of the time. At some point I’ll probably replace it with a slam panel from ECPS, but it’s not a high enough priority right now and what little money I have is demanded elsewhere.
Engine returned to natural aspiration, my car went back to be tested again. It passed emissions this time but the headlights failed - the aiming we had done before wasn’t enough to get them within the required specs. Specifically, it was only the right-side headlight (US passenger side) that was not aligned correctly, so all I needed to do was replace that one.
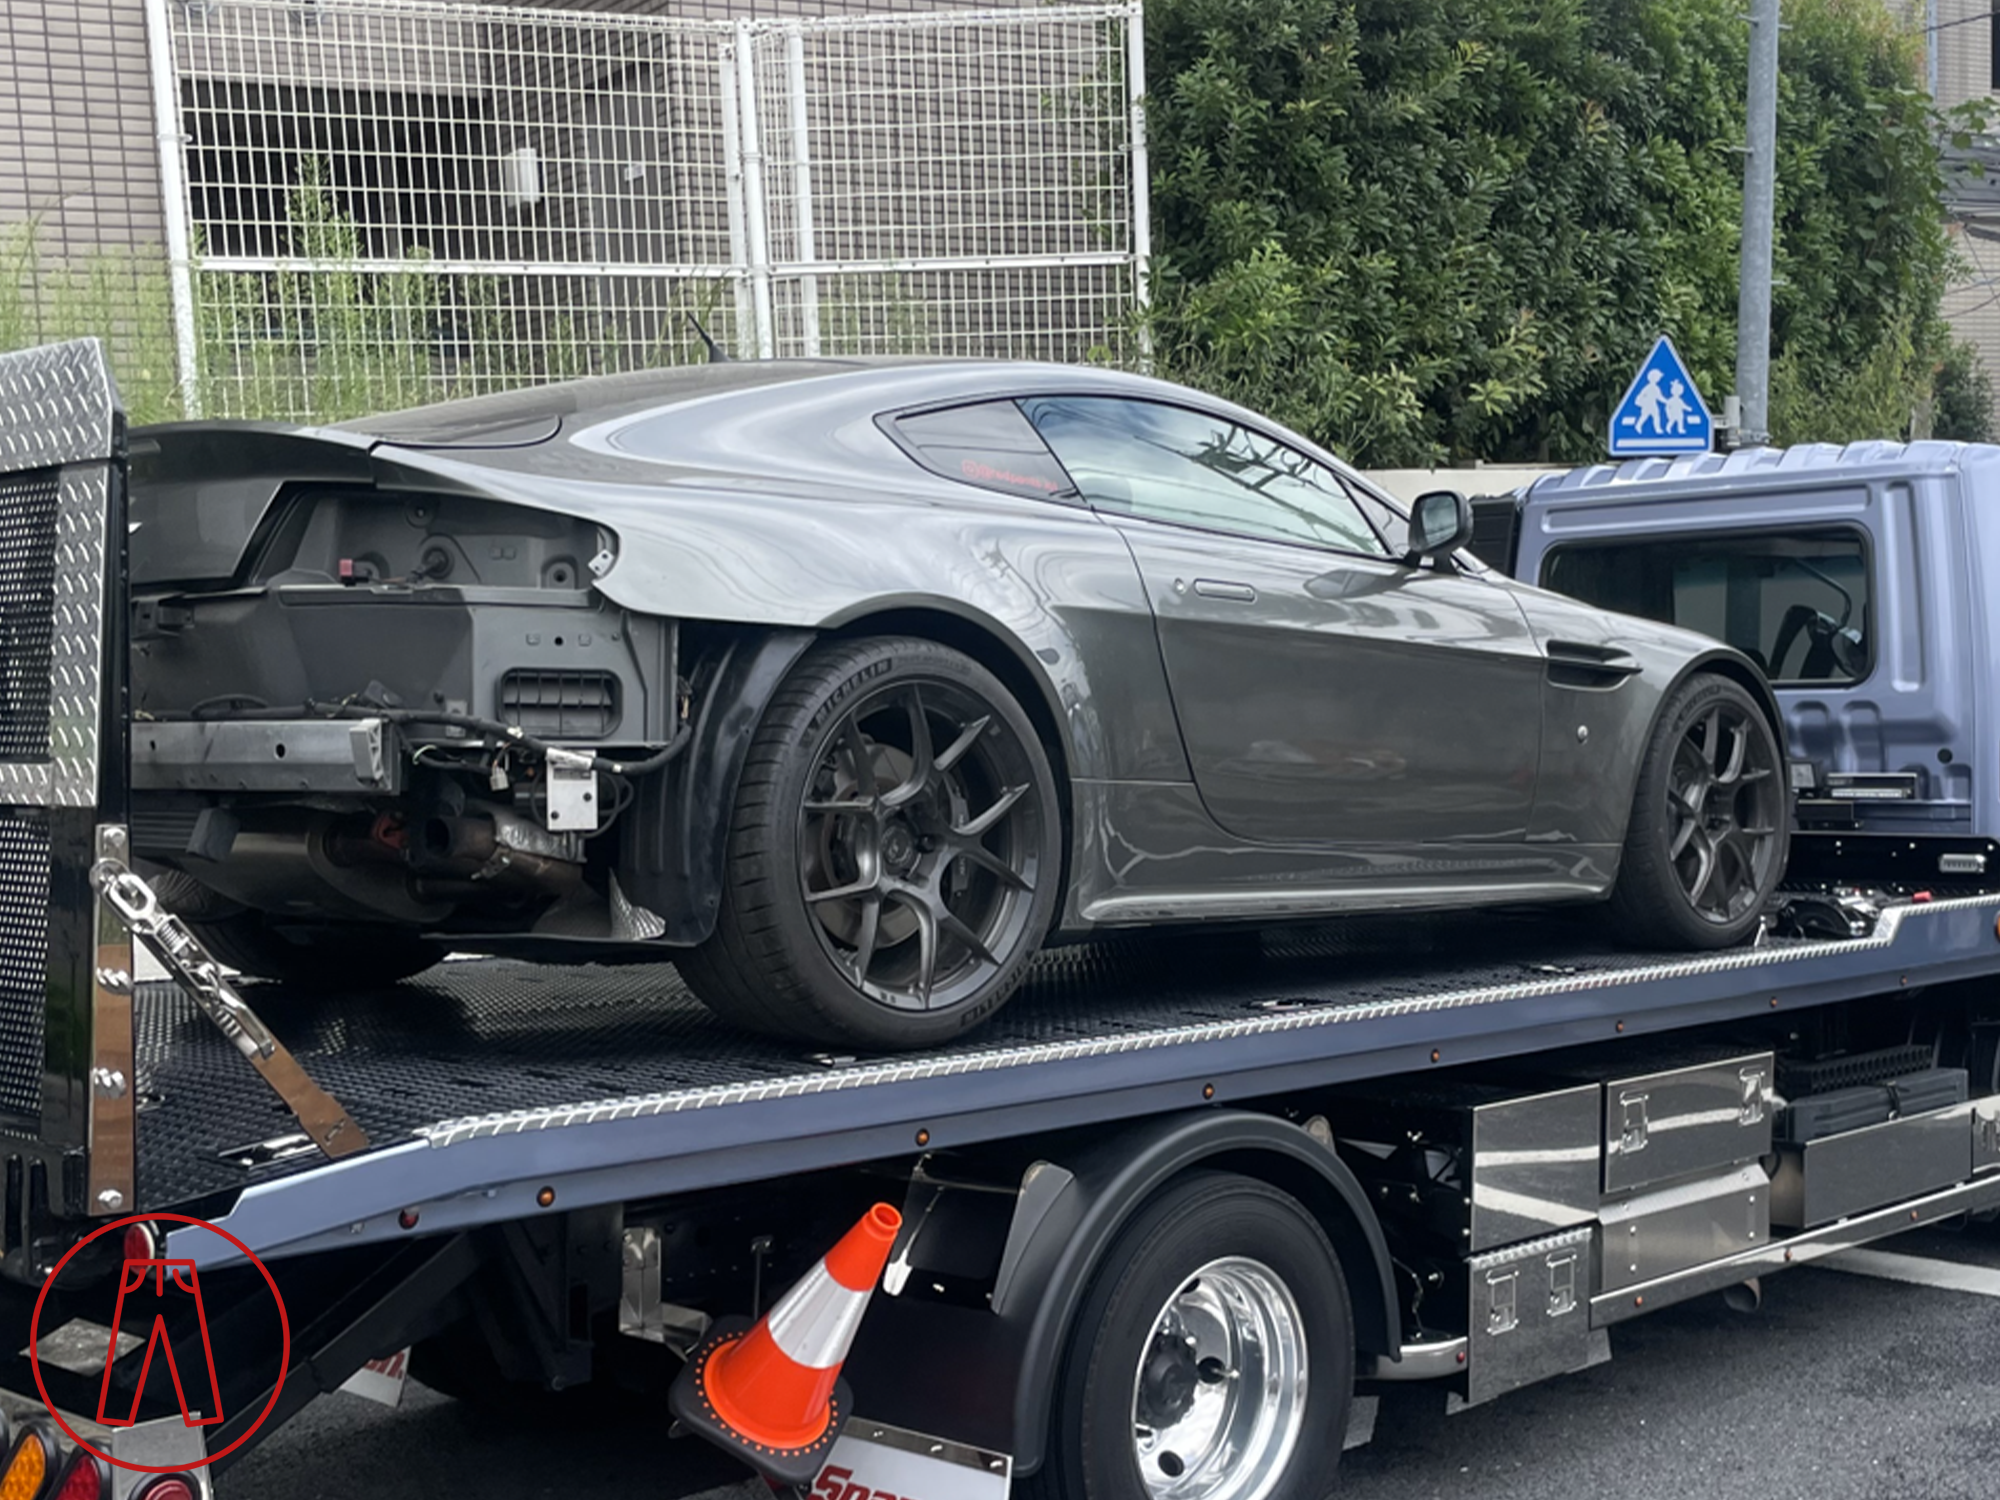
It took a couple months and a lot of changes, back and forth, and more hassle than I could have ever expected, but my car did eventually pass all the testing and was registered for street use here in Japan.
De-Neutering My Car
I finally had my beloved V8 Vantage and was free to drive around the Land of the Rising Sun as much as I pleased. I should have been excited, but… it just wasn’t the same. The OEM cats and quiet muffler made my car sound so tame that it made me sad to mash the throttle when I should have been giggling. The monochrome grey-on-grey of the paint and wheels looked how the exhaust sounded: muted. And the OEM seats made the interior look old and weary. I needed to make some changes. I needed to de-neuter my car.
Getting my car to sound right again was easy enough - that just required a set of VelocityAP high-flow cats. Catalytic converters have an out-sized impact on the exhaust sound of these cars and the OEM ones really muffled it. Going to the VAP cats opened it back up again. It’s still quiet enough to get by, but it’s much louder now that it was with the OEM cats.
The Cobra Nogaro seats also needed to make a comeback. In addition to looking infinitely better than the worn-out OEM seats, these also hold me in place far better. I used to do track days in the US and I planned to get back into it in Japan, so I needed well-bolstered seats back in my car.
Those were relatively big improvements that brought some joy back, but they were nothing compared to the next one.
I had been outright embarrassed of my car’s paint for years. Shortly after it was rebuilt after my track day shunt, it started accumulating rock chips on the front end. Yes, it should have been wrapped (It was wrapped in clear vinyl before I wrecked it) but the paint was already starting to get chipped before I had a chance, so I left it alone. Over time, all the chips built up to the point that the paint was painful to look at. I could have gotten it repainted, but I had other things in mind.

Those white specs on the front are all paint chips! (pic taken at Daikokufuto PA)
The main issue I had was that the washed-out monochrome look was all the worse in the Tokyo metro cityscape. Even at the world-famous Daikokufuto Parking Area, my car gets lost in the crowd because it’s the same color as the pavement. It didn’t pop at all and I needed to change that.
Go Big or Go Home
My car has a lot of great modifications but it didn’t really look like it. Upon closer inspection you could see how aggressively it was built. At a distance, it was lost in the crowd and unable to demand attention.
Wrapping it red changed that.
I went with Luscious Lips from Oracal - the vinyl wrap with the closest color I could find to my signature Redpants red. It has the slightest hint of orange in certain light but most of the time looks just right. It did everything I needed to do: it [mostly] hid the terrible condition of the Mercury Silver paint, it solved my personal qualms of the car paint and wheel finish matching, and it completely overhauled the look of my car. It was no longer incognito. It was now super cognito.
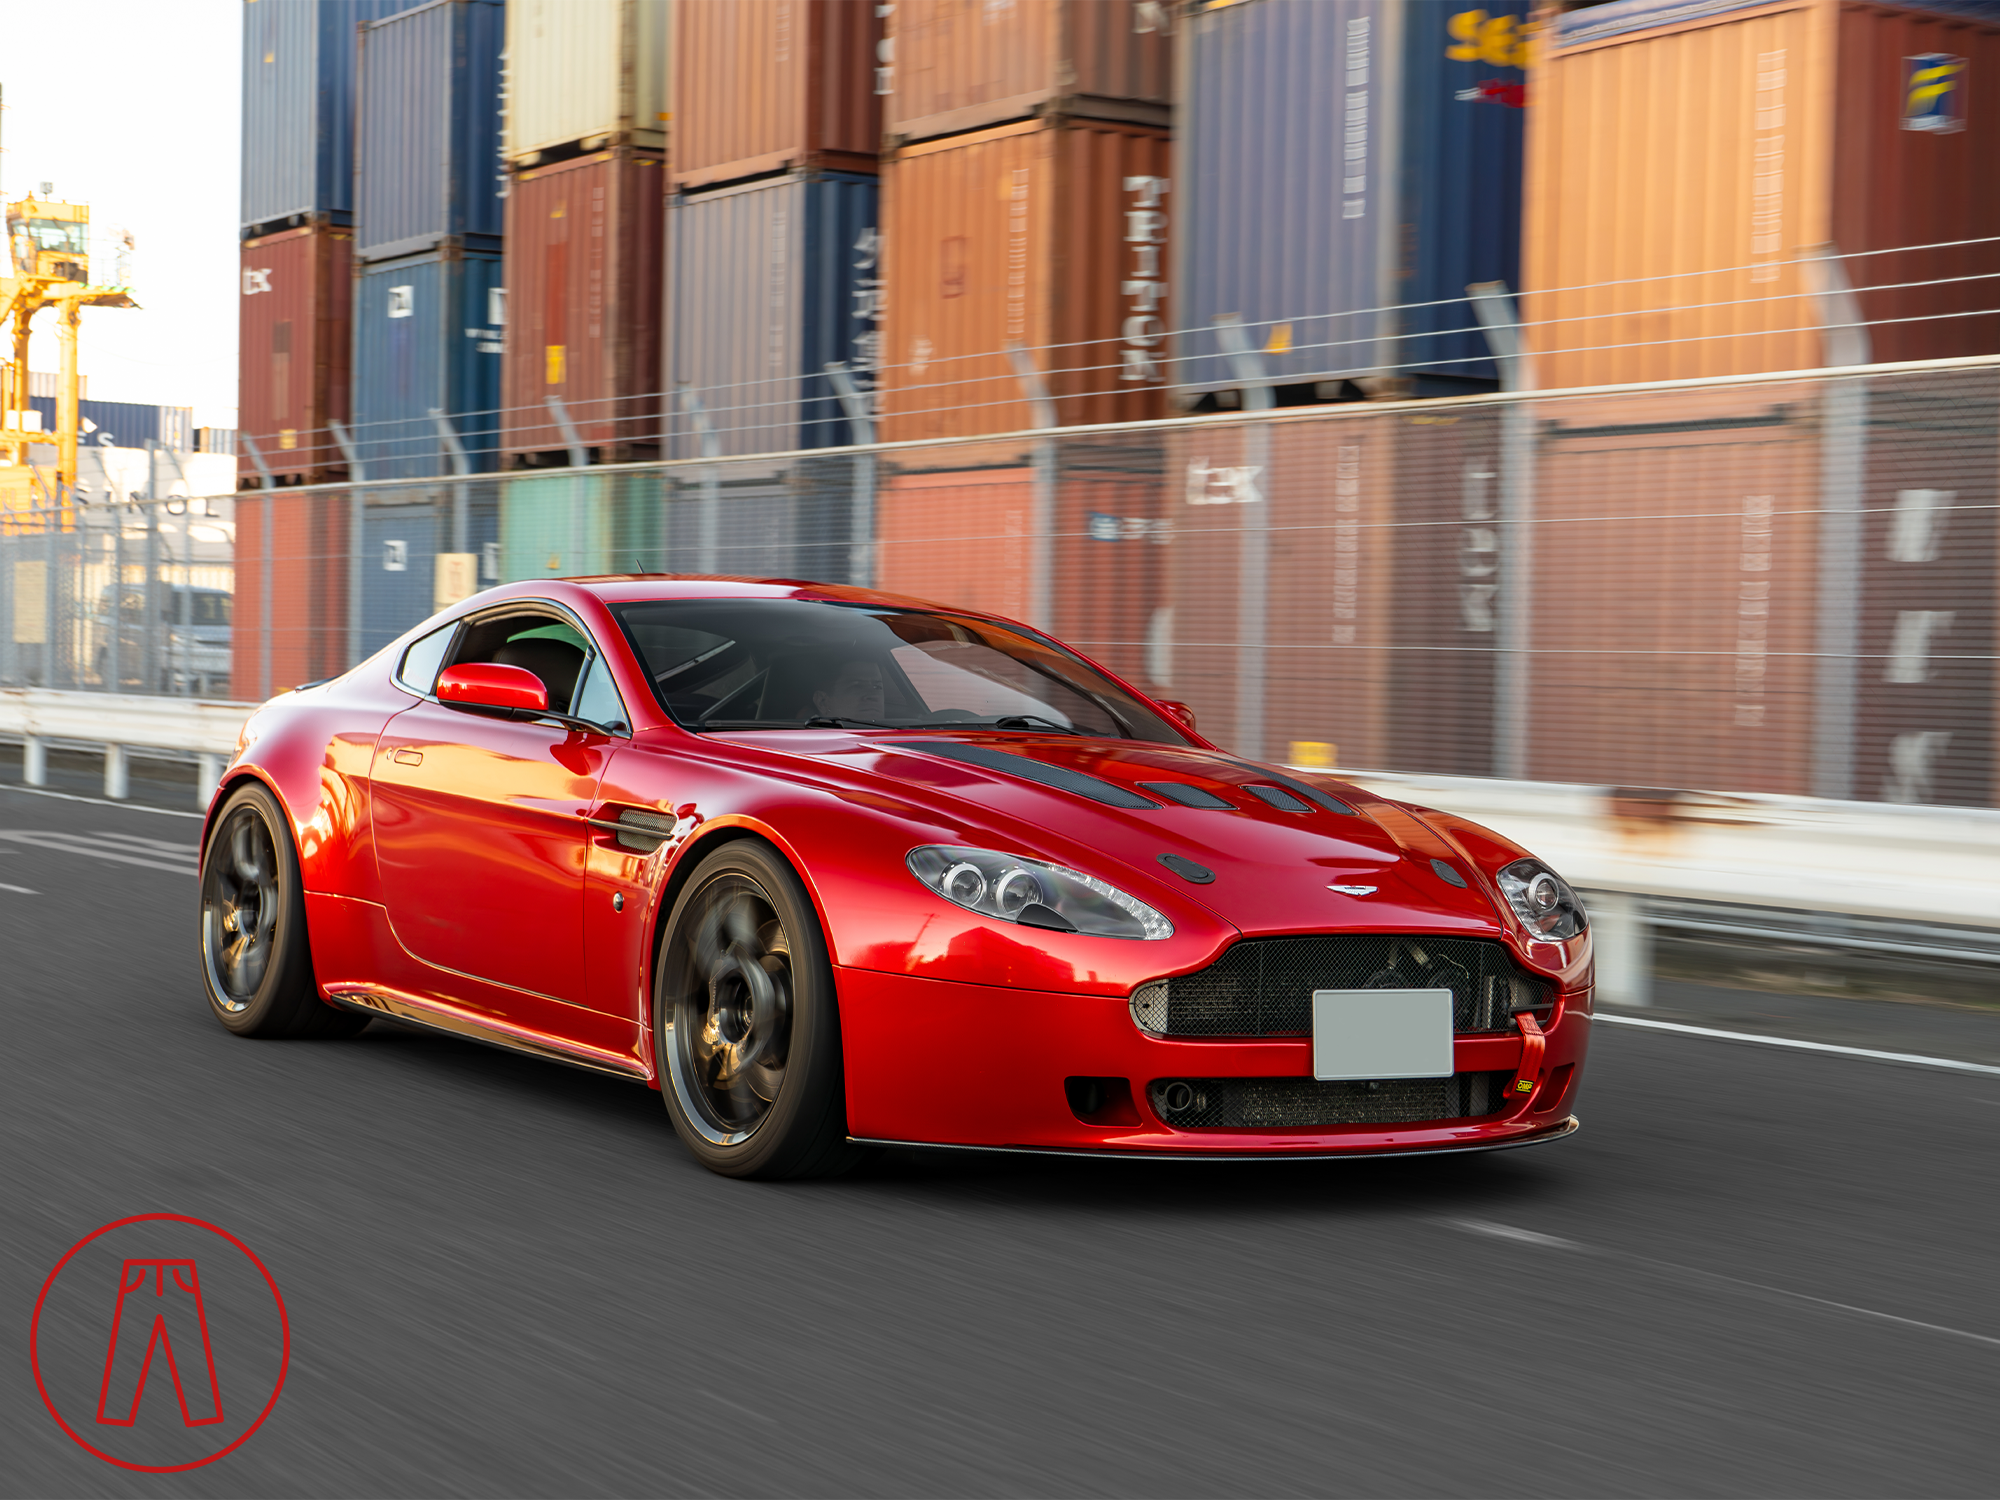
The red vinyl wrap was exactly what my car needed, but it still needed a finishing touch. That came by way of a front splitter and rear trunk lid spoiler from ECPS.
One of the options ECPS has for some of their parts is to make them with a mirrored V-weave in the carbon fiber. This is a lot more difficult to do so they take longer and cost a lot more than the standard unidirectional weave, but I think it makes a big difference on parts like the front splitter and trunk lid spoiler. Having carbon fiber weave sweep across the front or rear of a car all in the same direction is a pet peeve of mine, so I had to do the V-weave, and I’m so so glad that I did.
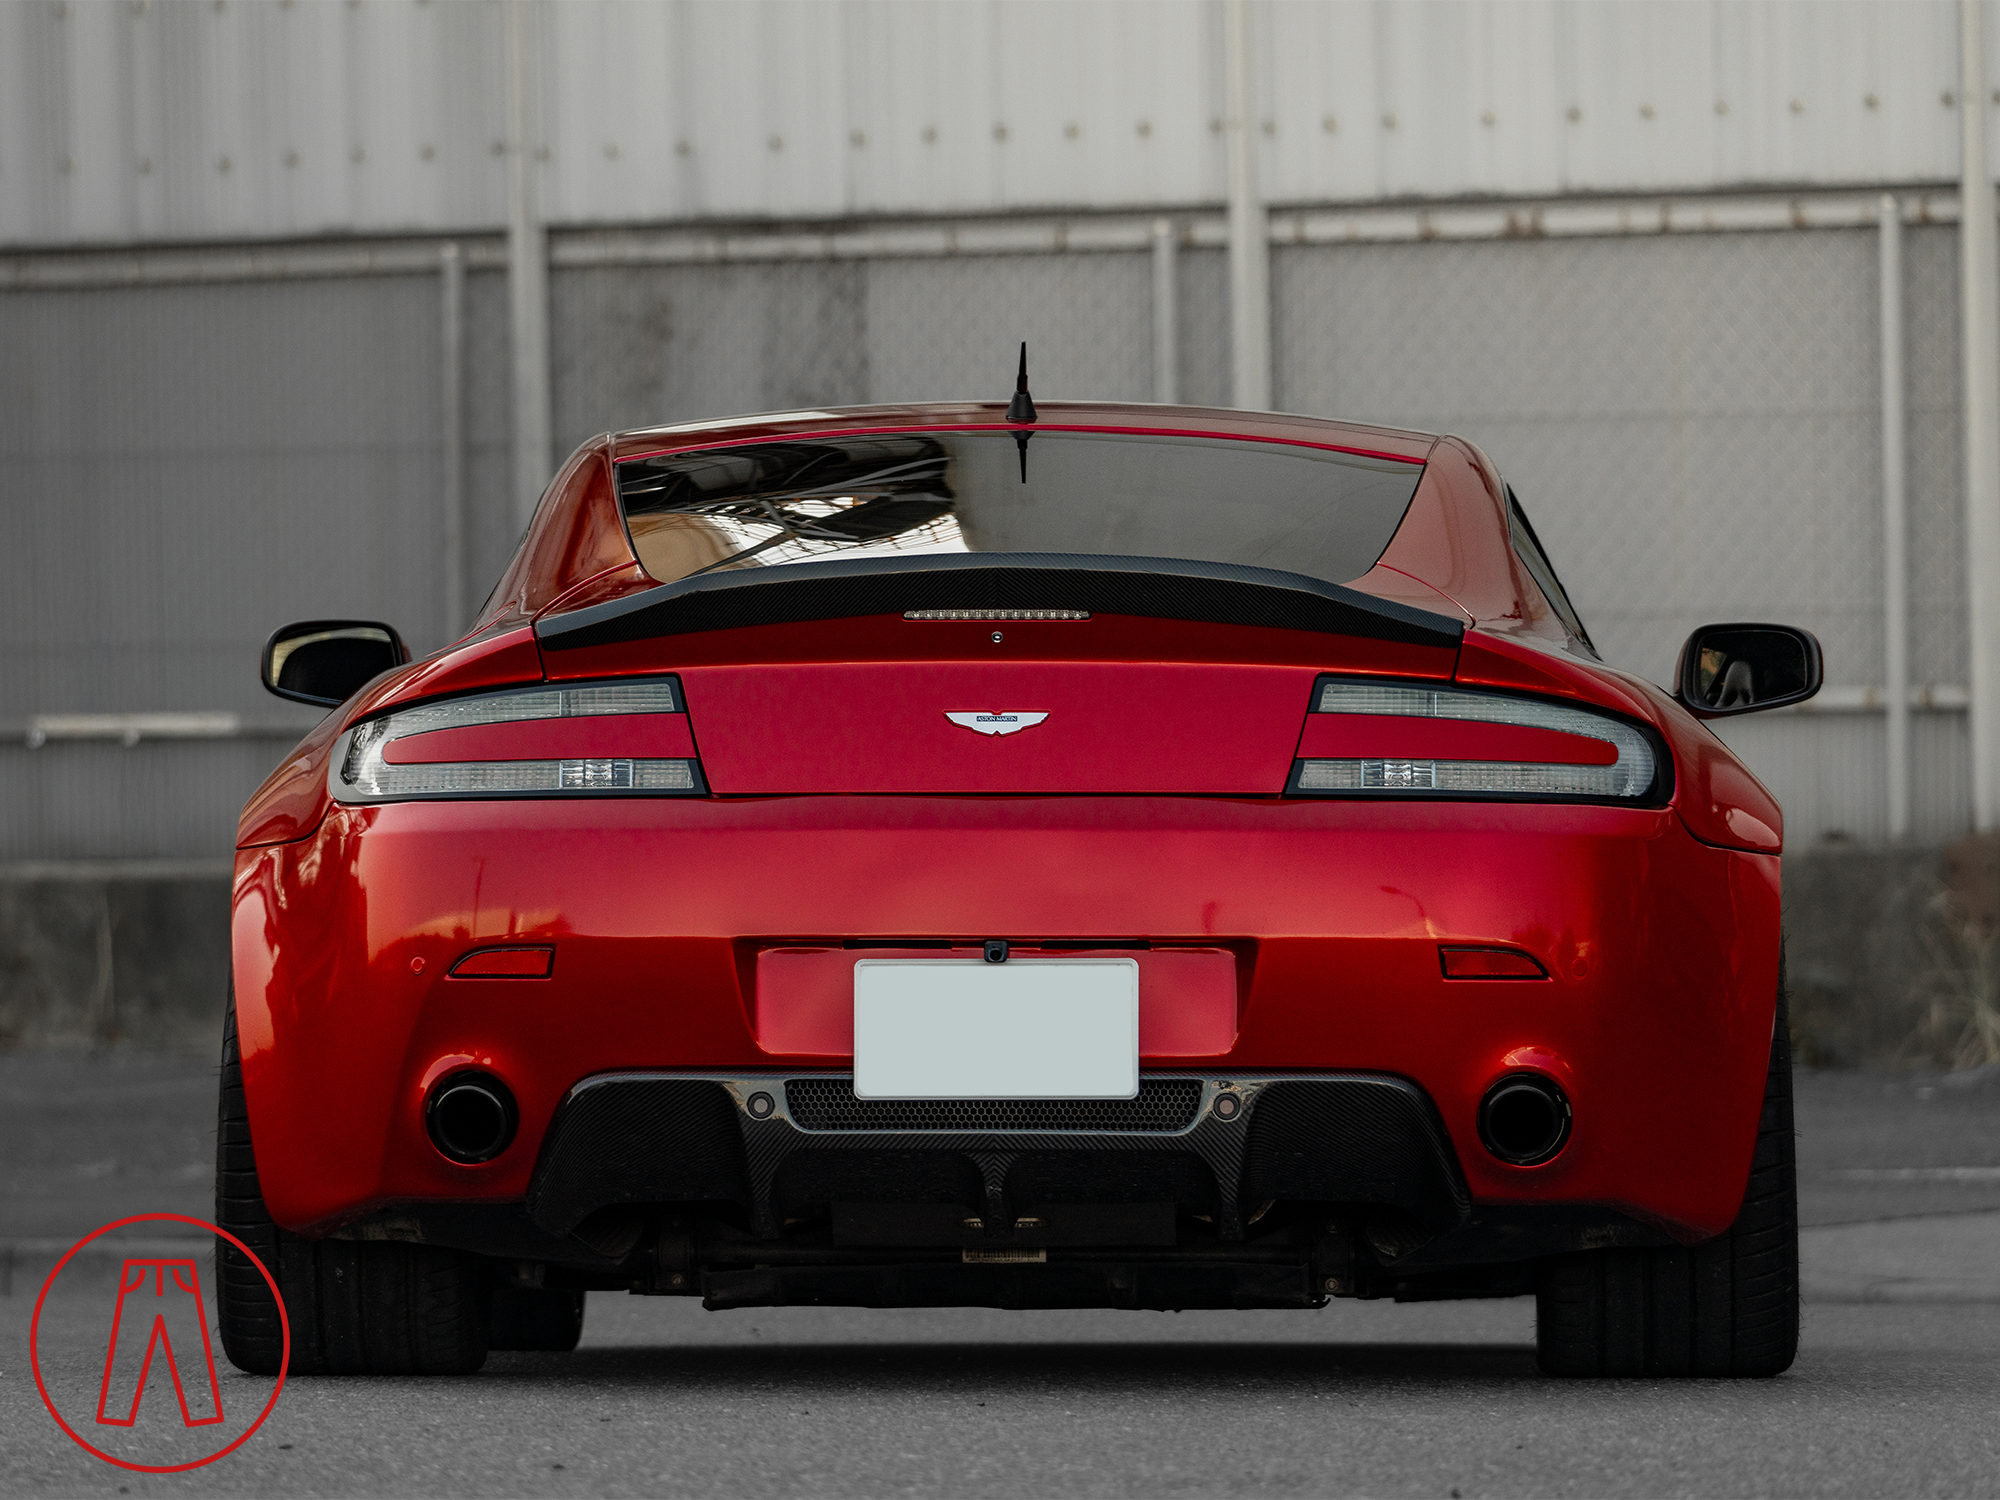
The ECPS trunk lid spoiler and Aston Martin N420 rear diffuser both have mirrored V-weave carbon fiber.
I’m not entirely satisfied with the results, though. That’s not ECPS’s fault - it’s entirely my own.
My thought process was that I wanted to make the car stand out a lot more (thus the red wrap) but I still wanted it to be a little restrained. James Bond in a proper tux with a Vesper in one hand and a white knuckle-clenched hammer in the other. Menacingly classy, if you will. To accomplish that, I went with the more restrained options when I could.
The trunk lid spoiler, for example, is ECPS’s low-rise version. Some years ago I had a similar product from ACR that was taller and I loved how it looked. I wanted to do something a little more understated this time but, for what I ultimately want this car to be, I think I went a little too understated. This trunk lid spoiler makes a nice impression when you’re looking at it, but it’s easily missed.
Likewise, the front splitter is vastly more bold than the flimsy plastic OEM front valance.
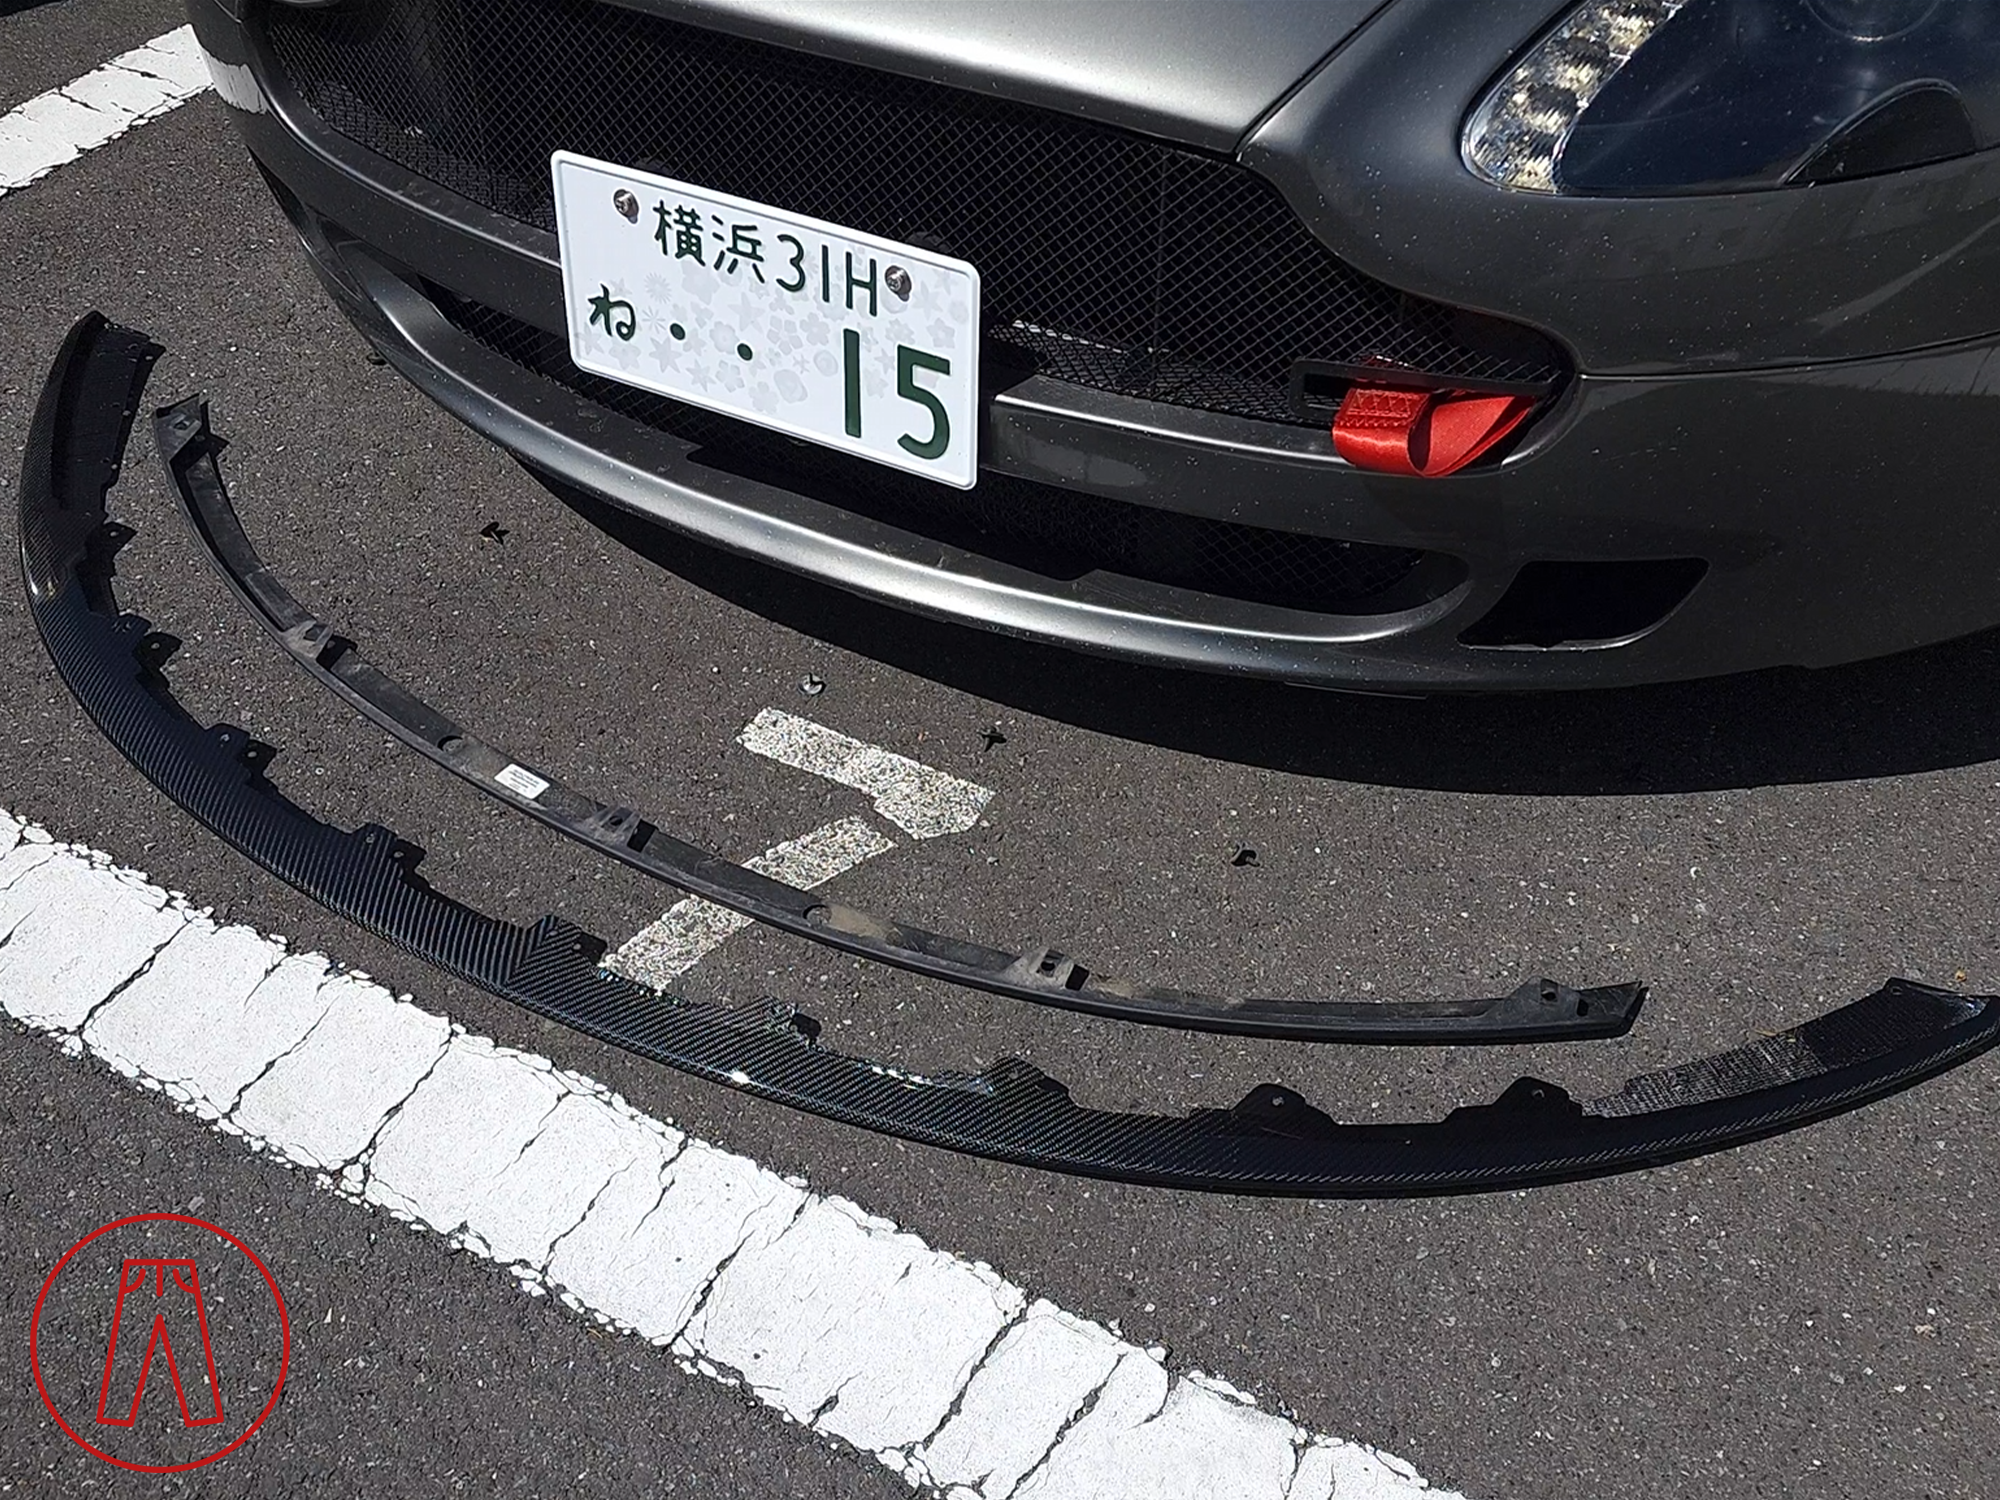
OEM (top) vs ECPS (bottom) front valance / splitter.
Sat next to the OEM front valance, the ECPS splitter looked like it would be just a protrusive (thank you, Google, for telling me that protrusive is a word while my assumptive protrusionary is not). Once installed, it essentially was the halfway point between the barely-there N420 front splitter and the HERE I AM VCollection front splitter.
Honestly, it came out exactly as I wanted and I absolutely love how it looks. But now I want more…
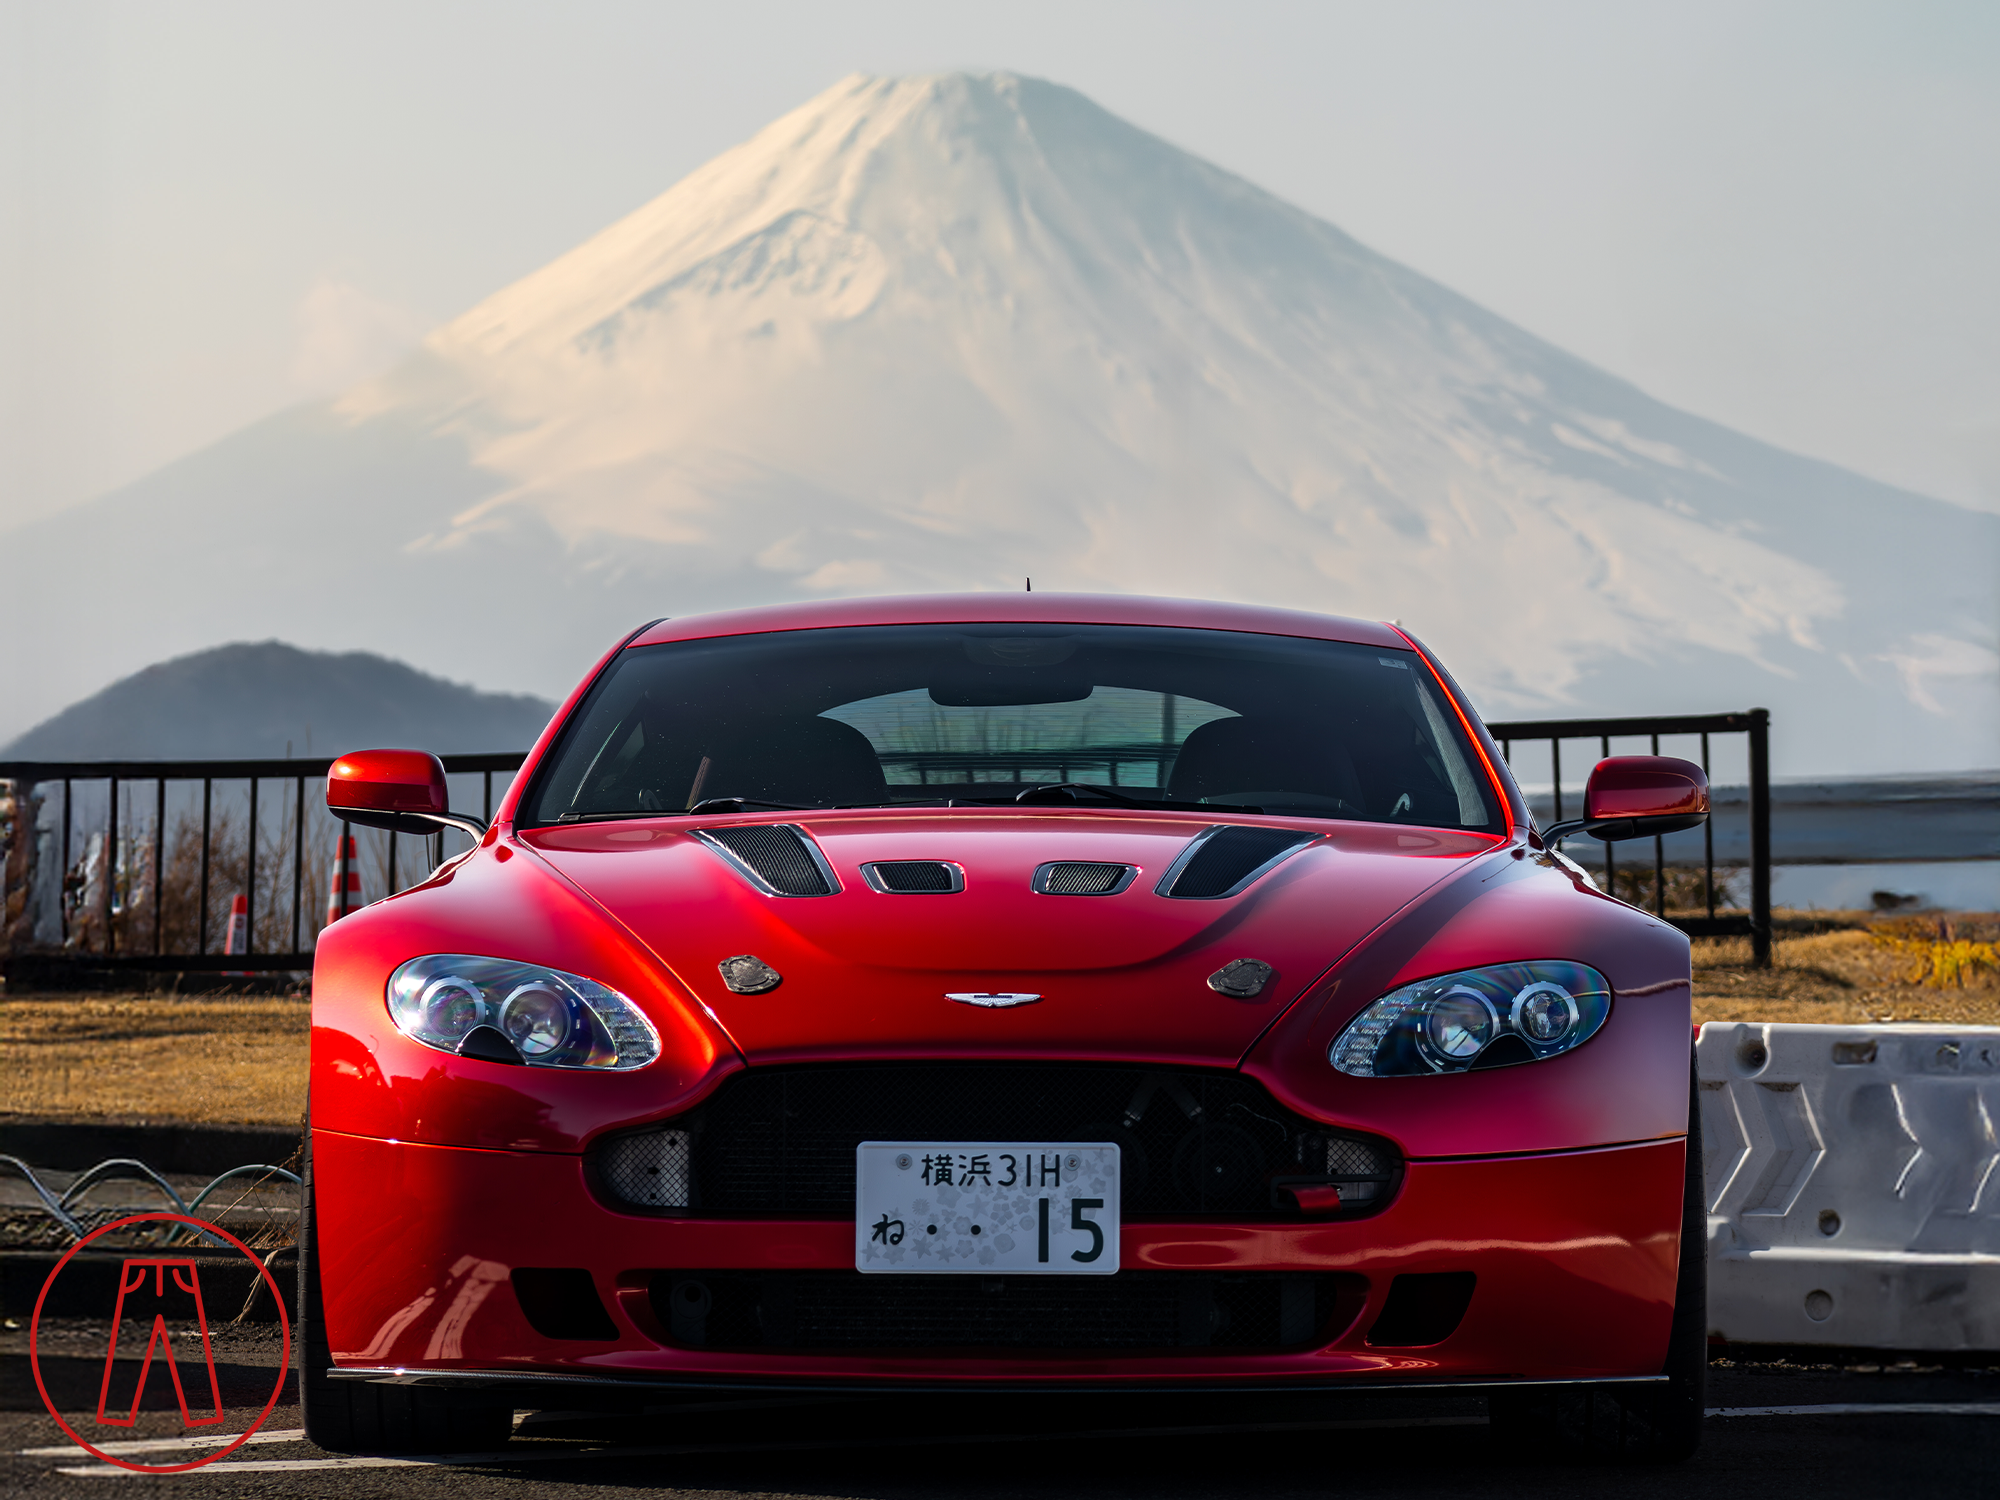
At some point I’ll be adding to the exterior styling to push the race-aesthetic a bit further. There are other things to do before that, though.
What’s Coming Next
After getting my car back in Japan, I found a ton of problems that had ‘occurred’ while it was in storage, being transported, and was getting sorted in order to pass testing. These include issues like a broken chassis stud, a broken headlight connector, improperly installed tail lights that led to serious condensation, a broken shifter trim that had been glued back together, and a non-functional infotainment system, among other things.
I’ve got to fix all those things plus more, just to get my car back to what I’d consider a “normal” state. Then I can more forward with my next plans for further developing it to be what I want as my perfect Aston Martin V8 Vantage.
About the Owner
What’s there to say that most of you don’t already know? Well… a lot, honestly, but that’s a story for another day (or a book, as I’ve been encouraged to consider writing). The quick version is I’ve lived in several States around the US, was in the Marines for five years, and had a great career as a defense contractor before leaving that to run Redpants as my sole job. Eventually I moved to Japan and that’s where I’ve lived for the last several years.
My life revolves around Redpants so it’s basically my job, my hobby, and my passion all in one. I’ve added Redpants Unzipped to share my travel adventures in more depth than you’ll see on Redpants. Cars are a huge passion of mine as is travel (and the cultures, food, people, and experiences that go with it), so Redpants Unzipped is my attempt at bringing all of that together.
Aside from that, you can find a little more about me on the About page, through all my public-facing content, emails and phone calls, or by meeting me in person - I attend AMOC events whenever possible and travel quite a bit so it’s not too hard to run into me at some point! I’m pretty much what you see in videos, but usually way less awkward because I’m super uncomfortable on camera.